In the digital realm, the distinction between vector and raster graphics is fundamental. Vector graphics, built upon mathematical equations, offer scalability without loss of quality, making them ideal for logos, illustrations, and designs that need to adapt to various sizes. Raster graphics, on the other hand, are composed of a grid of pixels, and while they excel in representing complex imagery like photographs, they can become pixelated when enlarged. Often, we encounter images that were originally vector but are now only available in raster formats like PNG or JPG. Recreating such images by hand can be a time-consuming endeavor. Fortunately, tools like Photopea offer efficient solutions for converting between these formats.
Understanding the Need for Rasterization
Graphics in Photopea, much like in other advanced image editors, can exist as either raster or vector. Raster graphics, also referred to as rasterized images or bitmap images, are made of countless tiny squares called pixels. When you zoom way in, you’ll see the solid edges break down into jagged squares. On the other hand, vector graphics are shapes mathematically programmed to remain sharp at any size.
There are several tools in Photopea that work only on raster layers - including brush tools, the Eraser tool, the Paint Bucket tool, and certain filters like Blur. When you create new shapes in Photopea or add text to a project, they automatically show up as a vector layer. Their edges will be crisp no matter how much you zoom out or in. To utilize these pixel-specific tools or filters, you need to transform a vector layer into a raster layer. This process is known as rasterization.
Why Rasterize?
Rasterize layers to transform them from vector images into pixel images. This is a crucial step when you intend to:
- Apply Pixel-Based Editing Tools: Tools such as brush tools, the Eraser tool, and the Paint Bucket tool primarily operate on pixels. If you want to directly paint, erase parts of a shape, or fill an area with a specific color on a vector layer, you must first rasterize it.
- Utilize Raster-Specific Filters: Many filters, like blur effects, are designed to manipulate pixel data. To apply these filters to vector shapes or text, they need to be converted to a raster format.
- Achieve Specific Visual Effects: Sometimes, the desired aesthetic involves the characteristics of raster images, such as the subtle imperfections or texture that pixels can introduce.
- Prepare for Certain Export Formats: While Photopea can export vector content in formats like SVG, some workflows or specific output requirements might necessitate a rasterized version of the graphic.
It's important to note that once you rasterize, you can’t go back to your original vector layer. That means you’ll also lose the ability to scale your shape to any size without some loss in image quality. While many graphic designers avoid rasterizing unless absolutely necessary, rasterizing a vector layer doesn’t have to compromise the quality of your project if done thoughtfully.
Photopea's Vectorization and Rasterization Capabilities
Photopea is a powerful, free, web-based image editor that provides robust tools for both creating and manipulating vector and raster graphics. It offers a seamless workflow for converting raster images back into editable vector formats, a process often referred to as vectorization or image tracing. Conversely, it also allows for the straightforward rasterization of vector layers.
Converting Raster to Vector: Image Tracing in Photopea
Often, we see images that were originally made as vector graphics, but are only available as a PNG or JPG file. Recreating such an image by hand can take a lot of time. Vectorization (or image tracing) can be done online for free within Photopea.
To begin this process:
- Open Your Raster Image: Navigate to Photopea.com. Press
File - Open, and select your raster image (PNG, JPG, etc.). - Access Vectorization Tools: Once the image is open, you'll need to find the image tracing functionality. While Photopea doesn't have a direct "Image Trace" button like some desktop software, you can achieve a similar result by utilizing its vector shape creation tools and then refining them. A common approach involves using the "Pen" tool or "Free Pen" tool to trace over the raster image.
- Refining the Vector Result: When the initial vector tracing does not look perfect, you can improve it by changing settings. For instance, when manually tracing or using automated tracing methods (if available through plugins or specific workflows), you can adjust parameters.
- Number of Colors: You can set the "Number of colors" to tell Photopea how many colors the resulting vector graphic should have. This is particularly useful for simplifying complex raster images into a more stylized vector form.
- Confirm and Export: When the vector result looks well, press the
OKbutton to confirm the vectorization. Now, you can export your newly created vector graphic. Just pressFile - Export As - PDF, SVG or EMF. And you are done!
Converting Vector to Raster: Rasterizing Layers in Photopea
Rasterizing a vector layer in Photopea is a direct and essential process for enabling pixel-based editing.
To rasterize a layer:
- Select the Layer: In the Layers panel (if not visible, press
F7), click on the vector layer you wish to rasterize. - Duplicate for Safety (Recommended): Because rasterization cannot be reversed, it's highly advisable to choose
Layer - Duplicateto save a copy of your selected layer just in case. This ensures you can always revert to the original vector form if needed. - Perform Rasterization:
- Right-click on the selected layer in the Layers panel and choose
Rasterize. - Alternatively, go to the top menu and select
Layer - Rasterize.
- Right-click on the selected layer in the Layers panel and choose
Once rasterized, the layer will transform from a scalable vector shape into a grid of pixels. You can then freely use brush tools, the Eraser, Paint Bucket, and other pixel-manipulating features on this layer.
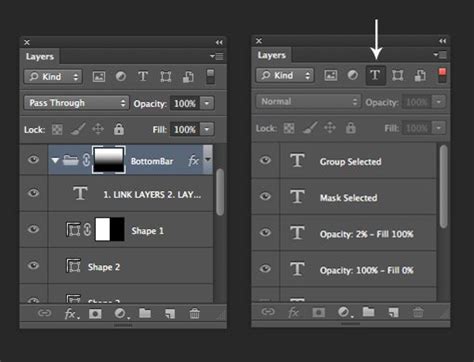
Advanced Layer Concepts in Photopea: Masks and Fill Layers
Understanding Photopea's layer system extends beyond simple rasterization. Concepts like layer masks, fill layers, and adjustment layers offer sophisticated control over your image composition.
Layer Masks: The Power of Non-Destructive Editing
We already know layers. We can think of a layer mask as an extra image, attached to the layer, as that layer (so each pixel of the mask has a corresponding pixel in the layer). It can be black and white only.
- How Masks Work:
- White: Reveals the corresponding pixels of the layer.
- Black: Hides (masks out) the corresponding pixels of the layer.
- Grays: Create semi-transparent effects, allowing partial visibility of the layer.
Each layer can have at most one raster mask and at most one vector mask. You can enable or disable each mask. It can be enabled again at any time. Any change to the layer (e.g., drawing with a Brush tool, rotation, etc.) can be applied to the mask, too. Masks can be linked to the main content of the layer; if the link is broken, you can move the mask independently, but if linked, moving the main content also moves the mask.
You can see some properties of the mask, such as opacity (0% corresponds to no mask, values in between can be useful too). There are tools to soften the mask (i.e., it removes sharp edges between white and black areas of the mask). Note that these properties do not change the actual content of the mask but rather how it's applied.
- Types of Masks:
- Raster Masks: These are simple grayscale images, consisting of pixels. Each tool that can be applied to a regular layer (e.g., Brush, Eraser) can also be applied to a raster mask.
- Vector Masks: These consist of vector shapes made of Bézier curves. They offer sharp edges and are editable using vector tools.
Fill Layers and Adjustment Layers
Photopea offers specialized layers for non-destructive color and tonal modifications:
- Fill Layers: These layers allow you to fill an area with a solid color, gradient, or pattern. There are two kinds of fill layers: solid color fill, gradient fill, and pattern fill. A fill layer has parameters (e.g., the color, the gradient, or the pattern) that can be easily modified. Press
Layer - New Fill Layerin the top menu to add a new fill layer. - Adjustment Layers: These are special layers that apply color and tonal adjustments to the layers below them. Imagine that you have a photo and you want to make it black and white (grayscale). You can use an adjustment layer for this without permanently altering the original image data. Press
Layer - New Adjustment Layerin the top menu to add a new adjustment layer.
Just like any other layers, fill layers and adjustment layers can have their own blend mode, opacity, and masks, providing immense flexibility in your editing process.
Vector Creation Tools in Photopea
Photopea offers a suite of tools for creating and editing vector graphics, allowing for precise and scalable designs.
Core Vector Tools
- Pen Tool: This tool allows you to create paths knot by knot. Press the mouse in the image area to add a knot. Then drag and release to add handles, or release immediately to keep handles collapsed. Clicking again on the first knot in the path will close the path. If there is one knot already selected, the new knot is added right after that knot (into the same path), since each new knot is selected after adding, so the next knot is added right after it.
- Free Pen Tool (or Brush Tool in Vector Mode): Click with the mouse and draw some shape. Then, release the mouse. Your stroke will be converted into a smooth vector curve.
- Shape Tools (Rectangle, Ellipse, Polygon, etc.): Click and drag with a mouse to draw a path with the specific geometric shape.
- Custom Shape Tool: With this tool, you can add a complex shape from the current gallery of shapes.
Text as Vector Paths
Each character in a text layer can become a path with knots, which you can modify manually (e.g., by editing Bézier curves). This allows for intricate customization of typography.
How to use the PEN TOOL In Photopea! (Selections, Shapes & More)
Understanding the Pixel vs. Vector Distinction
The fundamental difference between raster and vector graphics lies in their underlying structure.
- Raster Graphics: Made of pixels. Zooming in reveals jagged edges. Editing involves manipulating individual pixels. Tools like brushes, erasers, and paint buckets work on a pixel level.
- Vector Graphics: Made of mathematical paths and points. Scales infinitely without quality loss. Editing involves manipulating these paths and points. Text and shapes created in Photopea are typically vector by default.
When you rasterize a vector layer, you are essentially converting these mathematical descriptions into a grid of pixels. This is an irreversible process for that specific layer. However, it unlocks the ability to use a wide range of pixel-based editing tools and filters that are not compatible with vector data.
When Rasterization is Necessary
- Direct Painting/Erasure on Shapes/Text: To paint directly onto a vector layer with a brush or erase parts of a vector shape, you need to rasterize it.
- Color Changes with Paint Bucket: To change the color of shapes or text with the Paint Bucket tool, you need to rasterize. Alternatively, you can change shape color by selecting your shape layer in the Layers panel and going to
Window > Propertiesand changing the color with the Color Picker. - Applying Certain Filters: Filters like Blur, Sharpen, and others that operate on pixel data require rasterized layers.
Alternatives to Direct Rasterization
In some cases, you might want to edit a vector layer without permanently rasterizing it:
- Add a New Layer: Instead of rasterizing, add a new layer as an overlay on your vector layer and paint or draw on that new, raster layer. This preserves the original vector layer.
- Layer Masks: For effects that mimic erasing or selective visibility, a layer mask is often a better choice than rasterization. Select your layer and click the Layer Mask icon (a rectangle with a circle in the center) at the bottom of the Layers panel. Then select the Brush tool to paint on your layer mask (black to hide, white to reveal).
By understanding these distinctions and mastering Photopea's tools for both vector creation and rasterization, you can efficiently manage and transform your digital graphics for a wide array of creative projects.