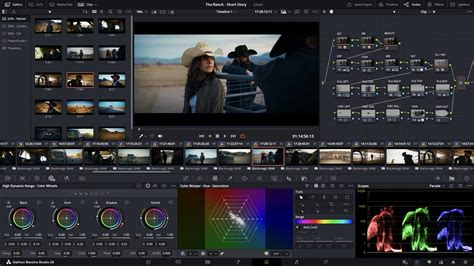
Recording voiceovers directly within DaVinci Resolve has become significantly more streamlined with the introduction of the new voiceover tool in Resolve 20. This feature, accessible from both the Edit and Cut pages, offers a more integrated and efficient workflow compared to previous versions that required navigating to the Fairlight page and manually setting up recording tracks. This advancement is a boon for editors of all levels, from seasoned professionals to those needing to quickly lay down temporary narration for a project.
Media Storage and Project Organization
DaVinci Resolve 20 also introduces a per-project "Media Location" setting. This prompted selection allows users to define a primary storage area for all newly created media within a specific project. It's important to note that this is not a mandatory location for source footage, offering flexibility similar to past workflows where source media could be stored anywhere. Within the chosen location (which can be local, external, or network storage), DaVinci Resolve automatically generates a folder structure. Initially, a folder named after the project is created. Inside this, an "Audio Files" folder appears, and within that, a "Voiceover" folder is established. This automated organization can be leveraged to build project templates, allowing Resolve to manage folder creation for voiceover recordings.
The Voiceover Recording Process
To initiate a voiceover recording on the Edit page, users simply need to click the new microphone icon located above the timeline track headers. This action reveals a floating panel that provides several convenient options. The file can be assigned a custom name, which is a significant improvement for project organization. New recordings are automatically sequenced with numerical identifiers (001, 002, 003) and are appended with a unique six-digit suffix on disk. This suffix is crucial for facilitating future relinking of audio files, ensuring project integrity.
The voiceover tool includes a straightforward dropdown menu for selecting the desired microphone connected to the system. A particularly useful "pro tip" is the ability to use an iPhone as a microphone. By connecting the iPhone via a USB-C cable and enabling Continuity Camera, users can speak into the rear of the phone, as the microphone is positioned near the camera lens.
The tool offers flexibility in choosing the recording track. While it defaults to "auto," which lets DaVinci Resolve automatically assign a track, users can manually select any existing audio track or opt to create a brand-new audio track for the recording. For those who prefer explicit control, it's possible to manually add a new mono track by double-clicking on an existing track header (e.g., A1) and selecting "Add track." This then makes the new track available in the "Record Track" dropdown menu.
Setting Optimal Recording Levels
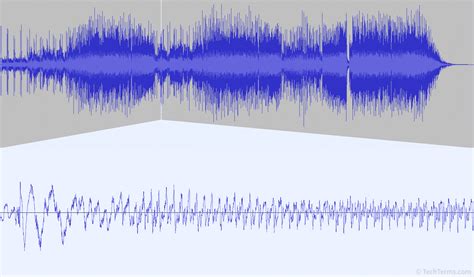
A critical aspect of achieving high-quality audio is setting the correct input recording level. The recommended peak level for voiceover recordings in DaVinci Resolve should be around -18 dBFS. It is strongly advised not to set levels to peak between -6 and -12 dBFS. Such high levels leave insufficient headroom, increasing the risk of clipping. Clipping distorts the audio signal, resulting in an unpleasant, harsh sound that is difficult, if not impossible, to recover in post-production. Given that most audio recorders can capture 24-bit lossless audio, which provides approximately 144 decibels of gain, there is ample opportunity to increase the volume in post-production without concern for clipping, provided the initial recording level is set appropriately. For instance, a common and effective setup includes an Earthworks Ethos broadcast condenser microphone and a Universal Audio Volt 2 USB interface, which converts the analog signal to 24-bit digital audio for DaVinci Resolve.
Initiating and Concluding Recordings
Recording is initiated by simply pressing the record button within the voiceover panel. Unlike previous workflows, there is no need for manual patching or arming of tracks on the Edit page. To stop the recording, users can either click the record button again or press the spacebar on their keyboard.
Advanced Recording Options
The voiceover tool provides access to additional options through a three-dot menu. These include a three-second countdown, which can be enabled or disabled, audio monitoring settings, the ability to mute the timeline audio during recording, and stereo recording options. For optimal monitoring, it is recommended to use direct monitoring through the USB interface with headphones. It is also crucial to turn down the main speakers to prevent audio bleed back into the microphone.
How to Record Voiceover Directly in Davinci Resolve 20 (Full Tutorial)
Post-Recording Audio Processing
Once the voiceover has been safely recorded at a peak level of around -18 dBFS, it will likely be too quiet for immediate delivery and will require amplification. A common and effective approach for processing dialogue involves a three-track level effects chain: Equalization (EQ), Compression, and Limiting.
Equalization (EQ)
The first step in the processing chain is typically an equalizer. An EQ allows for precise control over different frequencies. For voiceovers, a common practice is to use a "high-pass filter" (also known as a low-cut filter). This filter allows high frequencies to pass through while attenuating or removing low frequencies. This is beneficial for removing unwanted low-end rumble, plosives, or proximity effect that can muddy the dialogue.
Compression
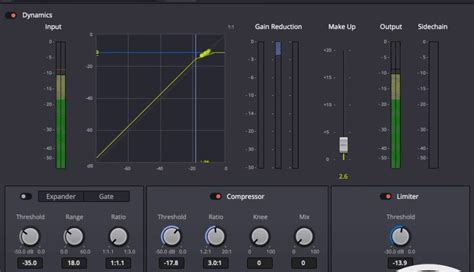
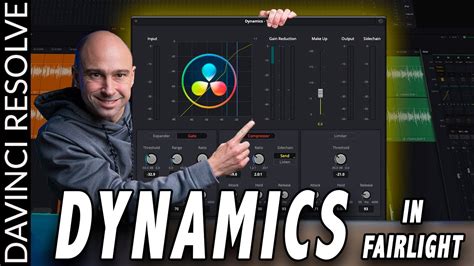
Following EQ, a compressor is applied. The compressor, found within the built-in dynamics panel on the Fairlight page, reduces the dynamic range of the audio. A typical starting point for dialogue is a ratio of 3:1. This means that for every 3 decibels the audio signal exceeds a set threshold, the compressor will reduce the volume by 1 decibel. By reducing the dynamic range, the overall signal can be increased later in the processing chain without the loudest parts (transients) clipping. The threshold setting is crucial and needs to be adjusted based on the specific recording. If the audio is peaking around -18 dBFS, setting the threshold at approximately -21 dBFS will ensure the compressor begins to engage subtly on the louder parts.
Limiting
The final stage in this dialogue processing chain is a limiter. A limiter is essentially a compressor with a very high ratio, designed to prevent the audio signal from exceeding a specific ceiling. While the dynamics panel includes a limiter, it is generally recommended to use the "Fairlight Limiter" plugin, found within the plugin FX section of the dynamics panel. This plugin offers more control and is often preferred for its sound. For a mono voice-over track, setting the limiter's high-end ceiling to -1.5 dB is a common practice. This ensures that even with increased input gain, the audio will not clip, providing a clean and professional output.
It is essential to ensure the correct processing order. The default order might be EQ, DYN (Dynamics/Compressor), FX. However, to ensure the limiter is the final stage, the processing order should be set to EQ, DYN, FX (with the Fairlight Limiter as the final FX).
Master Bus Limiting
As an additional safeguard, it is also advisable to place a limiter on the final stereo bus of the project. This final limiter acts as a protective layer, preventing any potential clipping in the overall mix during the final render, ensuring a polished and professional final product.
The integration of the voiceover tool in DaVinci Resolve 20, combined with a clear understanding of audio recording principles and post-production processing techniques, empowers users to achieve high-quality voiceovers directly within their editing environment. This streamlined workflow not only saves time but also enhances creative control by keeping the entire process within a single, powerful application.