PowerPoint offers a versatile array of tools for managing and manipulating background graphics, allowing users to tailor their presentations from subtle enhancements to dramatic visual transformations. Whether you're working with pre-designed templates, default themes, or crafting a completely custom slide deck, understanding how to edit, replace, or even remove background elements is a fundamental skill for creating engaging and professional presentations. This guide will delve into the various methods available for managing background graphics in PowerPoint, ensuring your slides are visually compelling and effectively convey your message.
Understanding Background Formatting Options
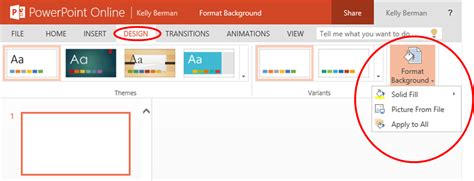
PowerPoint provides a comprehensive suite of options for customizing slide backgrounds, accessible through the "Design" tab. By selecting "Format Background," users are presented with a sidebar offering a range of fill types and adjustments.
One of the most straightforward methods is the Solid Fill. This option allows you to select a single, uniform color for your slide background. It's ideal for presenters aiming for a clean, minimalist aesthetic. Within this option, you can also fine-tune the transparency of the chosen color, allowing for subtle layering effects or a softer visual impact.
For those seeking more dynamic and colorful slides, the Gradient Fill option offers a sophisticated solution. This feature enables the creation of backgrounds with smooth transitions between two or more colors. PowerPoint provides a selection of preset gradients that can be customized to your specific needs. Adjustments can be made to the position, transparency, angle, and brightness of the gradient, offering extensive creative control.
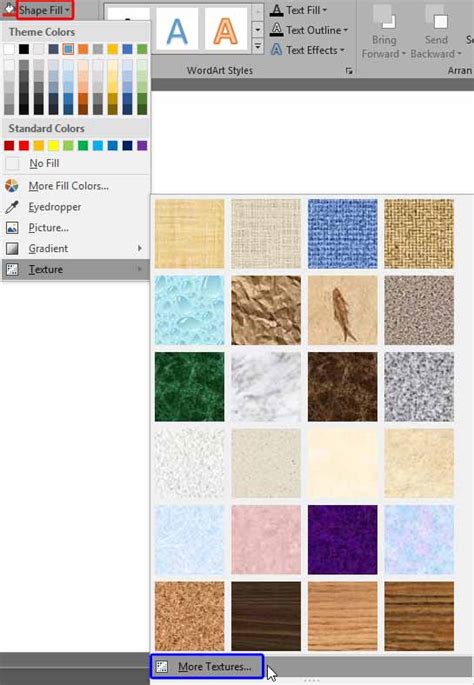
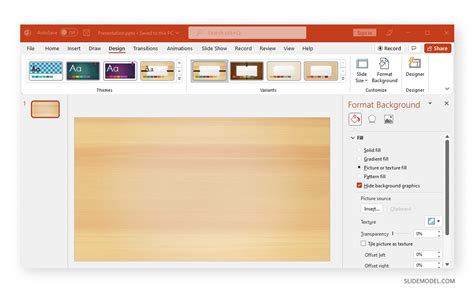
The Picture or Texture Fill option opens up a world of visual possibilities. Here, you can choose to use a pre-existing texture from PowerPoint's library or insert your own image. When selecting an image, you have several sources to choose from: your computer's files, PowerPoint's extensive stock image library, online pictures, or even icons. If you opt for a texture, the "Tile picture as texture" menu allows for further adjustments, ensuring the texture integrates seamlessly with your design.
The Pattern Fill option, while perhaps less commonly used, still offers a unique way to add visual interest to your slides. This feature allows you to select from a variety of pre-made patterns, and importantly, you can customize both the background and foreground colors of the pattern to create a unique design that perfectly matches your presentation's theme.
The Role of Slide Master in Background Management
For more advanced customization and consistent application of background elements across an entire presentation, the Slide Master feature is indispensable. Accessible via the "View" tab, Slide Master allows you to modify the fundamental elements of your presentation's design, including slide layouts, fonts, placeholders, and crucially, background styles.
When you access the Slide Master, you'll see a hierarchy of layouts on the left-hand pane. The top-most slide, the "Master Slide," dictates the overall theme for all subsequent layouts. By selecting this Master Slide and then navigating to "Background Styles" and "Format Background," you can apply changes that will propagate throughout your presentation. This is where you can set a default background image, color, or gradient that will appear on every slide unless overridden by a specific layout's settings.

If you need to adjust the background for a specific set of slides that share a common layout, you can select that particular layout within the Slide Master and apply the background changes there. This ensures that your modifications are confined to the relevant slides, maintaining consistency where needed and allowing for variation elsewhere.
Hiding Background Graphics for a Cleaner Look
Sometimes, the existing background graphics, particularly those embedded within a template or theme, can be distracting or clash with your content. PowerPoint offers a specific feature to address this: Hide Background Graphics. This option, found within the "Format Background" menu, allows you to conceal all graphical elements that are part of the slide's theme background.
This is particularly useful when you want a clean, uncluttered slide for specific content, such as charts, diagrams, or text-heavy slides, without altering the overall theme of the presentation. When this option is enabled, the slide's background becomes minimalist, allowing your content to take center stage. It's important to note that this feature specifically targets graphics associated with the Slide Master layout. If a graphic appears to be part of the background but is actually a standalone image on a slide, it may not be affected by the "Hide Background Graphics" option and would need to be removed or edited as a regular object.
Removing Backgrounds from Images within PowerPoint
Beyond managing slide backgrounds, PowerPoint also provides a powerful tool for removing the background from individual images inserted onto your slides. This built-in feature, aptly named Remove Background, is invaluable for isolating subjects, creating cleaner visuals, and integrating images more seamlessly into your designs.
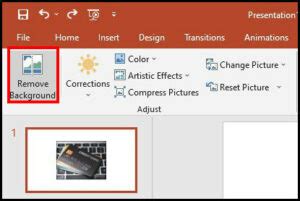
To access this tool, you first need to select an image on your slide. Once selected, a contextual tab, typically labeled "Picture Format" (or "Picture Tools → Format" in older versions), will appear in the ribbon. Within the "Adjust" group on this tab, you'll find the "Remove Background" button.
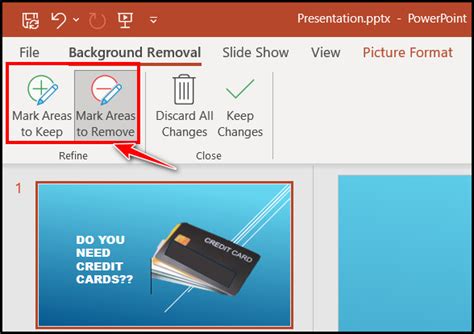
Upon clicking "Remove Background," PowerPoint automatically analyzes the image and highlights the areas it identifies as the background in a magenta color. The areas that remain in their original color are considered the subject to keep. This initial selection is a preview, and PowerPoint will not permanently alter the image until you confirm your changes.
The effectiveness of this automatic detection often depends on the clarity of the subject's edges and the contrast between the subject and the background. When the automatic selection isn't perfect, PowerPoint provides refinement tools: Mark Areas to Keep and Mark Areas to Remove. Using these tools, you can manually guide the software by drawing lines over the parts you wish to preserve or discard. Short, precise strokes are generally more effective for fine-tuning edges, especially around delicate areas like hair or fur. Zooming in on the image before making these adjustments can significantly improve accuracy.
It's crucial to understand that PowerPoint's "Remove Background" tool works best on standard bitmap image formats like JPG and PNG. It may not function correctly on objects like icons or SVGs. Additionally, the tool has limitations. It can struggle with low-contrast images, busy or textured backgrounds, soft edges, and images where the subject and background colors are very similar. In such complex scenarios, manual refinement is essential, or for professional-grade results, using dedicated image editing software might be more appropriate.
If you find that the automatic selection and manual refinements have made the cutout too messy, PowerPoint offers a "Discard All Changes" option or the ability to press "Escape" to revert the image to its original state, allowing you to start the background removal process again.
Troubleshooting and Best Practices
When working with PowerPoint's background removal tools, several common issues can arise. Low contrast between the subject and background is a frequent culprit for inaccurate automatic selections. To mitigate this, you can slightly increase the image's brightness and contrast using the "Corrections" option within the "Picture Format" tab before initiating the background removal process. Tightening the selection box around the subject before activating "Remove Background" can also help focus the algorithm.
Busy or patterned backgrounds can overwhelm the tool, leading to fragmented selections. In such cases, zooming in and using the "Mark Areas to Keep" and "Mark Areas to Remove" tools with precise strokes is key. For extremely cluttered images, cropping the image before attempting background removal can simplify the process.
Even after successful background removal, faint halos or pixel noise might remain around the edges. A second pass with the "Mark Areas to Remove" tool, focusing on these subtle artifacts, can often clean them up. For stubborn edges, a workaround involves inserting a shape with no fill but a colored outline behind the subject and grouping it with the image, effectively masking imperfections.
It's also important to be aware of the differences in functionality across PowerPoint platforms. While the desktop version offers the most robust set of tools for background removal, PowerPoint Online's AI-powered tool, introduced more recently, provides a simplified, often single-click solution that can yield impressive results, though with less manual control. The mobile version's capabilities may vary.
PowerPoint Tips and Tricks - How to use the Remove Background Tool
For those requiring highly precise or professional-level background removals, especially for images with fine details like hair or transparent objects, PowerPoint's built-in tool may have limitations. In these instances, external tools like remove.bg, Adobe Photoshop, or Adobe Express might offer superior results with less effort, even if it requires an extra step to import the edited image back into PowerPoint.
Ultimately, mastering background graphics in PowerPoint is about understanding the available tools and their respective strengths. From simple color fills and gradient blends to the intricate process of image background removal, these features empower users to elevate their presentations, ensuring visual appeal and clear communication. Experimenting with different methods, adjusting settings, and understanding when to employ more advanced techniques will unlock the full potential of PowerPoint for creating truly impactful visual narratives.