The ability to create repeating patterns is a fundamental skill in graphic design, offering a versatile method for generating backgrounds, textures, and decorative elements for both digital and print applications. Photoshop, with its robust feature set, provides intuitive tools for designers to craft these seamless visual narratives. This guide delves into the step-by-step process of creating patterns in Photoshop, from foundational concepts to advanced techniques, ensuring your designs repeat flawlessly.
Understanding the Essence of Seamless Patterns
A seamless pattern is a graphic element that can be tiled infinitely without any visible seams or hard edges where one repetition ends and another begins. Achieving this seamless quality requires careful arrangement of design elements so that the edges of the pattern tile blend perfectly when repeated. This principle is crucial for creating professional-looking backgrounds for websites, textiles, packaging, and a myriad of other design projects.

Preparing Your Canvas for Pattern Creation
Before diving into the design process, establishing the right canvas is paramount. A square canvas is generally recommended for creating a basic pattern tile. A common starting point is a 1000 x 1000 pixels document. This size offers a good balance between detail and manageability. Crucially, when creating a new document, setting the "Background Contents" to "Transparent" is often beneficial. This allows for greater flexibility, enabling individual elements to be recolored or adjusted later without being constrained by a fixed background.
Setting Up Your Document
- Create a New Document: Navigate to
File > New(orCtrl+N/Cmd+N). - Dimensions: Set your Width and Height to be equal, for example, 1000 pixels by 1000 pixels.
- Background Contents: Select "Transparent."
Pattern Tutorial Made Easy | Adobe Photoshop
Designing Your Pattern Tile: From Icons to Illustrations
The core of pattern creation lies in the design elements you place within your canvas. These elements can range from simple geometric shapes and icons to intricate illustrations or even scanned artwork. The Noun Project's Adobe Add-On is a valuable resource, allowing you to seamlessly integrate millions of icons directly into your Photoshop workflow.
Utilizing Icons for Pattern Design
When using the Noun Project Add-On:
- Install and Open: Download the Adobe Add-On and open Photoshop.
- Search and Insert: Search for icons within the Add-On. You can download them as PNGs or drag and drop them directly onto your artboard.
- Customization: Icons can be recolored using the provided color options or by entering a HEX value.
- Arrangement: Use the Move tool (
V) to position and scale icons. HoldShiftwhile scaling to maintain proportions. Hovering just beyond a corner of the bounding box will reveal a rotational arrow for easy rotation. - Consistency: For visual coherence, it’s advisable to scale and position multiple icons with similar line weights or styles in a consistent manner.
Working with Illustrations and Artwork
If you're creating your own artwork, whether digitally drawn or scanned from traditional media, the process involves preparing these elements for seamless repetition.
- Import or Create: Bring your artwork into the Photoshop document. If it's a scanned image, you might need to clean it up, isolate the objects, and ensure a uniform background color or transparency.
- Layer Management: For complex designs, keeping individual elements on separate layers is highly recommended. This allows for easier manipulation and adjustments.
- Smart Objects: Converting layers to Smart Objects (
Right-click layer > Convert to Smart Object) offers significant advantages when transforming, rotating, or scaling pattern elements. This preserves the original quality of the artwork.
Techniques for Seamless Repetition
Photoshop offers two primary methods to ensure your pattern tile repeats seamlessly: Pattern Preview and the Offset Filter.
The Power of Pattern Preview
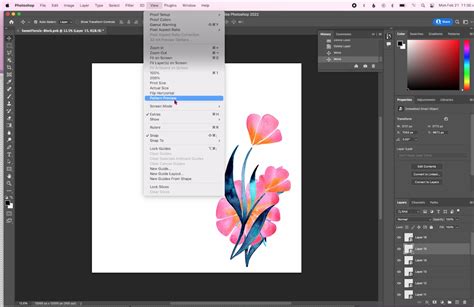
The Pattern Preview feature ( View > Pattern Preview) is a modern and intuitive way to design repeating patterns. It provides a real-time, tiled view of your canvas as you design, allowing you to see how your elements will repeat across a larger area.
- Enable Pattern Preview: Go to
View > Pattern Preview. You’ll see your canvas duplicated in a tiled format. - Design in Real-Time: As you add, move, scale, or rotate elements on your main canvas, you’ll see the changes reflected instantly in the tiled preview. This eliminates much of the guesswork involved in traditional pattern making.
- Iterative Refinement: Use this feature to experiment with different arrangements and compositions. You can easily spot and fix any elements that create jarring repetitions or visible seams.
The Classic Offset Filter Method
The Offset Filter (Filter > Other > Offset) is a long-standing tool for checking and correcting seamless patterns. It allows you to shift the image horizontally and/or vertically by a specified number of pixels.
- Prepare Your Elements: Before using the Offset filter, it's often necessary to merge your design elements into a single layer if they are on multiple layers (
Select layers > Right-click > Merge Layers). This ensures the entire design is considered for the offset. - Apply the Offset: Navigate to
Filter > Other > Offset. - Set the Offset Values: To ensure the edges of your pattern tile align perfectly, you need to offset the image by half of its width and half of its height. For a 1000x1000 pixel document, you would enter 500 pixels for both "Horizontal" and "Vertical" offset.
- Fix Seams: After applying the offset, the edges of your design will now be in the center of the canvas. Examine these seams carefully. You can then use painting tools, the Clone Stamp tool, or other editing techniques to blend these edges together seamlessly.
- Repeat if Necessary: If you make further adjustments to the seams, you may need to reapply the Offset filter to ensure everything remains aligned.
The Offset filter is particularly useful for identifying and rectifying flaws that might only become apparent when the pattern is about to repeat.
Defining Your Pattern in Photoshop
Once you are satisfied with the design of your pattern tile and have ensured its seamless quality, you can define it as a reusable pattern within Photoshop.
- Select Your Design: If your design elements are not already merged into a single layer, ensure they are consolidated or that the entire canvas content is what you wish to define as the pattern.
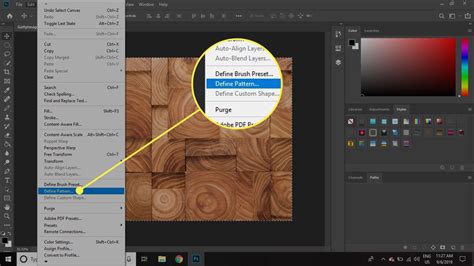
- Define Pattern: Go to
Edit > Define Pattern.... - Name Your Pattern: A dialog box will appear prompting you to name your pattern. Choose a descriptive name that will help you identify it later.
- Click OK: Your custom pattern is now saved in Photoshop's pattern library.
Applying Your Custom Patterns
With your pattern defined, you can now apply it to various elements within your designs.
Using Fill Layers
Fill Layers offer a non-destructive and highly flexible way to apply patterns.
- Create a New Document or Select an Area: Open a new document or select an area within an existing one where you want to apply the pattern.
- Add a Background (Optional): For a solid background, go to
Layer > New Fill Layer > Solid Color...and choose your desired color. Testing your pattern against different backgrounds is a good practice. - Add a Pattern Fill Layer: Go to
Layer > New Fill Layer > Pattern.... - Select Your Pattern: In the "Pattern Fill" dialog box, click on the pattern swatch to open the Pattern Picker. Your custom pattern should be listed there, usually at the beginning. Select it.
- Adjust Scale and Angle: Within the "Pattern Fill" dialog box, you can adjust the
Scaleof the pattern (lowering the percentage zooms out, showing more repetitions; raising it zooms in, showing fewer, larger icons) and itsAngle. - Clipping Masks for Gradients: To apply gradients or other effects to your pattern, create a new Fill Layer (e.g.,
Solid ColororGradient) above your pattern fill layer. Then, right-click the gradient layer and select "Create Clipping Mask." This will confine the gradient's effect to the pattern layer below.
Layer Styles: Pattern Overlay
Layer Styles provide another method for applying patterns, often directly onto existing layers.
- Select Your Layer: Choose the layer you wish to apply the pattern to.
- Open Layer Styles: Double-click the layer in the Layers panel (or go to
Layer > Layer Style > Pattern Overlay...). - Choose Pattern and Adjust: Select your custom pattern from the Pattern Picker and adjust the
Scale,Opacity, andBlend Modeas needed.
Other Application Methods
- Paint Bucket Tool: You can select "Pattern" from the
Filloption in the top toolbar of the Paint Bucket tool (G) and then choose your pattern from the Pattern Picker. - Pattern Stamp Tool: This tool (
S) allows you to "paint" with your pattern, similar to how the Clone Stamp tool works, offering more manual control.
Advanced Pattern Techniques and Considerations
As you become more proficient, you can explore advanced techniques to enhance your pattern designs.
Rasterizing for Layer Styles
If you want to apply more complex layer styles or effects to your pattern that aren't directly supported by the Pattern Fill Layer, you can rasterize the pattern layer first.
- Rasterize: Select your Pattern Fill layer and go to
Layer > Rasterize > Fill Contents. - Apply Layer Styles: You can then apply a wider range of Layer Styles (
Layer > Layer Style) such as Drop Shadow, Bevel & Emboss, or Color Overlay to the now-rasterized content.
Important Note on Rasterization: Rasterizing converts your pattern from a scalable vector-like object (within the fill layer) to pixels. This means that if you scale it up significantly after rasterizing, you may lose quality.
Designing for Different Mediums
When designing patterns, consider the intended medium:
- Web: Focus on optimal file sizes, color profiles (sRGB), and resolutions suitable for screen display.
- Print: Pay close attention to resolution (typically 300 DPI), color modes (CMYK), and potential bleed areas. Consult with your printer regarding their specific requirements.
Organizing Your Patterns
As your library of custom patterns grows, organization becomes essential.
- Create Groups: In the Patterns panel (
Window > Patterns), click the folder icon at the bottom to create a new group. - Name Groups: Give your groups descriptive names (e.g., "Floral Patterns," "Abstract Textures").
- Drag and Drop: Drag your custom patterns into their respective groups for easy retrieval.
- Renaming/Deleting: You can right-click a pattern in the panel to rename or delete it.
Exploring Alternatives and Further Resources
While Photoshop is a powerful tool for pattern creation, other software and tools can also be utilized:
- Adobe Illustrator: Offers superior vector-based pattern creation, providing infinite scalability without quality loss. The
Object > Pattern > Makefunction is highly effective. - Procreate (iPad): Features a built-in tiling feature that simplifies the creation of seamless repeating patterns directly on an iPad.
- Online Tools: Platforms like Patterninja, PatternPad, and Adobe Capture offer user-friendly interfaces for creating patterns, often with simpler workflows for beginners.
Understanding how to create patterns in Photoshop is a fundamental skill that can significantly enhance your design capabilities. Whether you're using icons from Noun Project, your own digital art, or scanned traditional media, the tools and techniques discussed here will enable you to craft visually compelling and infinitely repeatable designs for any project.