In the dynamic world of product photography and digital design, the ability to create images with transparent backgrounds is not just a useful skill-it's a fundamental necessity. Transparent backgrounds unlock a universe of creative possibilities, allowing for seamless integration of product shots across diverse digital platforms, from e-commerce websites to social media campaigns and marketing materials. This capability maximizes the return on investment for product photography, transforming static images into versatile assets that can be repurposed and restyled endlessly. This comprehensive guide delves into the intricate processes and best practices for achieving pristine transparent backgrounds in Adobe Photoshop, ensuring your subjects stand out, regardless of the final presentation context.
The Power of Transparency: Why It Matters
Product photography can represent a significant investment, and it's always good practice to look for ways to maximize this investment. One highly effective strategy is repurposing product photos for other uses. This is where the magic of transparent backgrounds comes into play. When products are presented on a transparent background, they can be used across the web in a variety of contexts and channels, offering unparalleled flexibility. This allows businesses to maintain brand consistency, adapt visuals for different marketing campaigns, and present products in a clean, professional manner that draws attention directly to the item itself, free from distracting environmental elements.

Maximizing Your Visual Assets
The versatility of transparent images means a single product shot can serve multiple purposes. Imagine a product photo initially intended for a website's product page being seamlessly transformed for use in an email newsletter, a banner ad, or even a mobile app. This eliminates the need for multiple, often costly, photoshoots for each specific application. Furthermore, transparent backgrounds are crucial for branding. Logos, icons, and key product imagery need to integrate flawlessly with various color schemes and design elements without clashing or appearing amateurish. The ability to place a product or logo over any background color or texture ensures a polished and professional appearance every time.
Creating a Transparent Background: A Step-by-Step Photoshop Tutorial
Adobe Photoshop offers a suite of powerful tools to achieve professional-grade transparent backgrounds. While the software has evolved, introducing more automated features, understanding the underlying principles of masking and export settings is key to achieving consistently excellent results.
Step 1: Removing the Background
The initial step in creating a transparent background involves isolating your subject from its existing backdrop.
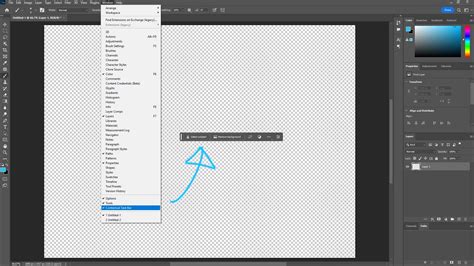
Leveraging Photoshop's "Remove Background" Feature
For users of Photoshop 2024 and later versions, an intuitive "Remove Background" feature is available, designed to simplify this process with a single click. To access this tool, navigate to the Window menu and select Contextual Task Bar. Ensure this is checked to display the Task Bar on or near your image. Once visible, clicking "Remove background" prompts Photoshop to intelligently identify and mask the subject.
When this function is employed, Photoshop doesn't truly delete the background; instead, it creates a layer mask. This mask hides the background pixels from view without permanently altering them, a crucial aspect for non-destructive editing. You will observe this in the Layers panel, where the background is now represented by a mask icon.
Alternative Methods for Background Removal
For older versions of Photoshop or for situations where the automatic tool may not yield perfect results, several manual selection methods are available. The Quick Selection Tool or the Magic Wand Tool can be effective for selecting solid or relatively uniform backgrounds. For more complex subjects or backgrounds with subtle color variations, the Pen Tool offers the highest degree of precision, allowing you to meticulously trace the outline of your subject. Once the background is selected, it can be deleted by pressing the DELETE key (or BACKSPACE on a Mac).
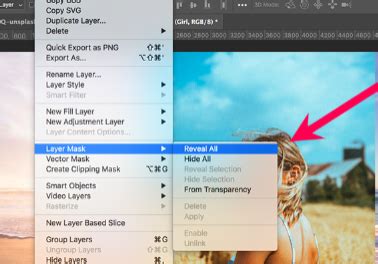
Step 2: Refining the Mask for Precision
While Photoshop's automated tools are increasingly sophisticated, manual refinement is often necessary to achieve a flawless transparent background. The mask created by the "Remove Background" feature, or one you've created manually, can be adjusted to correct any imperfections.
Modifying the Layer Mask
In the Layers panel, select the mask thumbnail-the black and white icon to the right of your image layer. A fine black outline around the mask icon indicates it's active. With the mask selected, you can use the Brush Tool to paint with white to reveal parts of the image that might have been accidentally masked out, or paint with black to hide unwanted areas of the background that remain visible. Conversely, the Eraser Tool can be used to remove pixels directly, though working with the mask is generally preferred for its non-destructive nature.
The Contextual Task Bar also provides options like "Subtract from Mask" and "Add to Mask," which function similarly to the Brush and Eraser tools, offering a streamlined workflow for mask adjustments. For intricate details like hair or fur, the Select and Mask workspace is invaluable. This dedicated environment provides advanced tools such as the "Refine Edge Brush Tool" to intelligently detect and mask complex edges, ensuring that fine details are preserved and appear natural against any background. Global refinement sliders allow for smoothing and feathering the edges of your selection, creating a seamless transition between your subject and its new environment.
Step 3: Saving Your Image in the Appropriate Format
The crucial final step is saving your image in a format that supports transparency and is optimized for web use.
The Importance of PNG-24
You haven't actually removed your background; you merely masked it from view. This is where the file format becomes paramount. For images requiring transparency, the PNG (Portable Network Graphics) format is the industry standard. Specifically, PNG-24 is recommended over older formats like PNG-8 or GIF. PNG-24 supports full alpha transparency, meaning it can represent a spectrum of opacity levels for each pixel. This prevents the undesirable "halo" effect or pixelation that can occur when transparent images are placed on different colored backgrounds, especially with older formats that only support binary transparency (fully opaque or fully transparent).
Exporting as PNG-24
To save your file as a PNG-24 in Photoshop 2024, you can use the keyboard shortcut SHIFT+ALT+CTRL+W (or SHIFT+OPTION+COMMAND+W on a Mac), which opens the Export As dialog box. Alternatively, navigate to File > Export > Export As… from the menu bar.
In the Export As dialog box, under File Settings, ensure the Format is set to PNG. Crucially, make sure the Transparency checkbox is enabled. Avoid selecting "Smaller File (8-bit)" as this will convert the image to a PNG-8, compromising the quality of transparency.
Export Images, Text and Logos with a Transparent Background - Photoshop Tutorial
Optimizing for Web Performance
The Export As dialog also allows for image optimization. On the left-hand side, you'll see a predicted file size for your PNG. Large file sizes can significantly slow down website loading times, negatively impacting user experience and search engine rankings. A good general guideline is to keep web images around 200 KB or smaller, though this can vary depending on the image's complexity and intended use.
Under Image Size on the right-hand side, you can adjust the dimensions of your image. Smaller dimensions generally result in smaller file sizes. However, it's important to strike a balance. For product images that need to display crisply on various devices, including high-resolution "retina" displays, it's often advisable to save them at a slightly larger size than their maximum intended display width. For instance, if a product will be displayed at 400px wide, saving it at 600px or even 800px here can ensure better clarity. You can then leverage responsive image techniques on your website to serve appropriately sized images based on the user's screen resolution. This strategy ensures optimal visual quality without unduly penalizing load times for most users.
Step 4: Saving Your File
With your export settings finalized, click the Export button. A Save dialog box will appear, prompting you to choose a destination folder. It is highly recommended to save your optimized, transparent images in a separate folder from your original files to prevent confusion. Name your image file appropriately, ensuring the file extension is set to .png. Click Save.
You now possess a web-ready image with a transparent background, ready to be placed seamlessly across your website, marketing materials, or any other digital canvas, ensuring it displays perfectly regardless of the underlying background color or design.
Transparent Backgrounds for Logos and Graphics
The principles for creating transparent backgrounds extend beyond product photography to include logos, icons, and other graphic elements. These assets are fundamental to brand identity and require the same level of polish and flexibility.
Handling Different Logo File Types
If your logo is already saved as a JPG or another raster format with a solid background, the process will involve removing that background and saving it as a PNG-24, similar to product images.
However, if you're fortunate enough to have your logo in a vector format (such as .AI, .EPS, or .PDF), these files are inherently scalable without loss of quality and often don't have a defined background in the same way raster images do. To use them on the web with transparency, they need to be opened in Photoshop (or Adobe Illustrator) and then exported as a PNG-24.
Opening Vector Files in Photoshop
When opening a vector file in Photoshop, a dialog box will appear asking for import settings. For logos, it's generally best to:
- Crop To: Set to "Bounding Box" to ensure the canvas fits snugly around the artwork.
- Constrain Proportions: Keep this checked to maintain the logo's aspect ratio.
- Mode: Set to "RGB Color" (or "sRGB" with a specific profile) as this is the standard color mode for web display.
Click OK.
Making Vector Logos Transparent
If you've opened a vector file and it appears on a white or colored background layer in Photoshop, you'll need to make it transparent.
- Convert Background to Layer: Double-click the "Background" layer in the Layers panel and click "OK" in the prompt to convert it to a regular layer (often named "Layer 0").
- Select and Delete Background: If there's a solid background color to remove, you can use the Select > Color Range… command. Use the eyedropper tool to sample the background color. Click "OK." With the background selected, press the DELETE key.
For vector files opened correctly, you might find they already have a transparent background, making this step unnecessary.
Exporting Logos as PNG-24
Follow the same export steps outlined previously (File > Export > Export As… or SHIFT+ALT+CTRL+W) to save your logo as a PNG-24. Logos typically have fewer colors and simpler designs than product photos, resulting in significantly smaller file sizes. Therefore, you can usually retain the original dimensions without concern for excessive file size.
Frequently Asked Questions About Transparent Backgrounds in Photoshop
Understanding common issues and queries can further enhance your proficiency with transparent backgrounds.
How do I make a transparent background white in Photoshop?
If you have an image with a transparent background and wish to add a solid white background instead, the process is straightforward:
- In your Layers panel, create a new layer (Layer > New > Layer or click the "Create new fill or adjustment layer" icon at the bottom of the panel and select "Solid Color").
- Fill this new layer with white. You can do this by selecting white as your foreground color and then using Edit > Fill (or pressing SHIFT+F5 / FN+SHIFT+F5 on a Mac) and choosing "Foreground Color."
- Crucially, drag this new white layer below your original image layer in the Layers panel. This will place the white background behind your subject.
How do I save a PNG with a transparent background in Photoshop?
To save a PNG with a transparent background:
- Go to File > Export > Export As… or use the shortcut SHIFT+ALT+CTRL+W (or SHIFT+OPTION+COMMAND+W on a Mac).
- In the dialog box that appears, ensure the Format is set to PNG.
- Make sure the Transparency option is checked.
- Click Export and choose your save location.
How do I remove the white background from a picture?
There are several effective ways to remove a white background in Photoshop:
- Remove Background Tool: In newer versions, this is often the quickest method. Access it via the Contextual Task Bar (Window > Contextual Task Bar).
- Select > Color Range…: This tool is excellent for uniformly colored backgrounds. Select the white background with the eyedropper, click OK, and then press DELETE.
- Magic Wand Tool: Click on the white background. Adjust the Tolerance in the options bar if needed to select more or less of the white area. Press DELETE.
- Quick Selection Tool: "Paint" over the background to select it, then press DELETE.
- Pen Tool: For precise selections, trace around your subject, then invert the selection (Select > Inverse) and press DELETE.
Can GIFs have transparent backgrounds?
Yes, but with limitations. GIFs support alpha transparency, meaning each pixel is either fully transparent or fully opaque. There is no in-between, which can lead to jagged edges or a limited color palette compared to PNGs. For graphics requiring smooth, gradual transparency, PNG is the superior choice.
Can I use Adobe Express to make a background transparent?
Yes, Adobe Express offers free tools that can automatically remove backgrounds from images, providing a user-friendly alternative for simpler tasks.
Can Photoshop scripts make backgrounds transparent in bulk?
Absolutely. You can create or use existing Photoshop scripts to automate the process of making backgrounds transparent across a batch of images. This is invaluable for large product catalogs. To run a script, navigate to File > Scripts > Browse… and select your script file.
Do Photoshop masks support transparency?
Yes, Photoshop masks are fundamental to achieving transparency non-destructively. They allow you to hide or reveal parts of a layer, effectively creating transparency without permanently deleting pixels.
What if transparency is lost when saving?
If transparency is lost upon saving, recheck your export settings. Ensure you are saving in a format that supports transparency (like PNG-24) and that the transparency option is enabled in the export dialog. Avoid flattening the image or merging layers before exporting if transparency is critical. Sometimes, older versions or specific export presets might inadvertently rasterize or flatten the image.
Conclusion: Empowering Your Visuals
Mastering the creation of transparent backgrounds in Photoshop is an essential skill for anyone involved in digital imaging, from e-commerce professionals to graphic designers and digital artists. The ability to isolate subjects and integrate them seamlessly into diverse visual contexts empowers creative freedom, enhances brand consistency, and ultimately contributes to more effective and impactful visual communication. By understanding the tools, techniques, and export settings, you can transform ordinary product shots into versatile assets that elevate your brand and captivate your audience.
tags: #how #to #save #transparent #background #in