Creating compelling pixel art requires a deep understanding of canvas settings and how they impact your work, especially when transitioning between screen display and print. This tutorial will guide you through the essential resolution adjustments and interpolation methods within ibisPaint, empowering you to achieve optimal results for both digital and physical outputs. We will delve into the specifics of setting pixel counts for screens and DPI for print, explore the implications of resolution changes on image quality and layer limits, and demystify the various interpolation methods and their effects on your pixel art.
Optimizing Canvas Settings for Screen Display
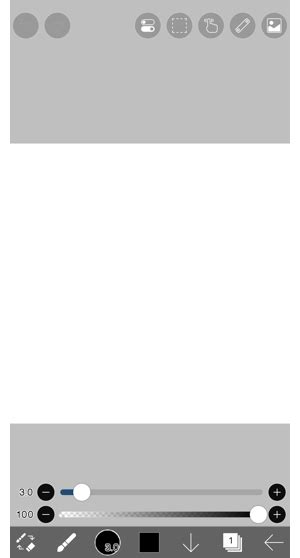
When your primary goal is to display your artwork on screens, the key lies in adjusting the pixel count. Unlike print settings that focus on dots per inch (DPI), screen resolution is determined by the number of pixels (px) that make up the image's width and height. ibisPaint offers a straightforward way to manage this.
To change the resolution for screens, you will begin by selecting the "Pixels" option. This signifies that you are working with pixel dimensions rather than print-centric measurements. For screens, you will be changing the pixel count (px), instead of DPI. Within this section, you will find options to adjust the Width and Height of your canvas.
Let's consider a practical example. If you are aiming for a specific screen resolution, or perhaps experimenting with a very low resolution to maximize your layer count, you might change the Width (px) from a standard value like 1280 to a significantly lower number, such as 75. Once you are done with these adjustments, tap on the checkmark (✓) to finalize your settings.
It is crucial to understand the consequences of altering the pixel count. Setting the pixel count to a significantly lower resolution worsens the image quality. This is an inherent trade-off. However, this reduction in resolution comes with a distinct advantage: if you decrease the pixel count, you will get more maximum layer limit. This is a critical piece of information for artists working on complex pieces with many elements. When you reach your maximum layer count and find yourself limited, try decreasing the pixel count. Furthermore, decreasing the size of the canvas can help you work faster, and make the files take up less space on your device. This translates to a smoother workflow and more efficient storage. In essence, now, you can adjust the size of the screen with pixel count (px), and not with dpi.
Preparing Your Artwork for Print: The Importance of DPI
When your pixel art is destined for physical reproduction, the resolution setting shifts to Dots Per Inch (DPI). DPI dictates the density of ink dots that will be laid down on paper, directly influencing the sharpness and clarity of the printed image. For clean printed results, it is generally recommended to set the DPI to a minimum of 300. DPI refers to dots per inch, which is equivalent to 25.4mm.
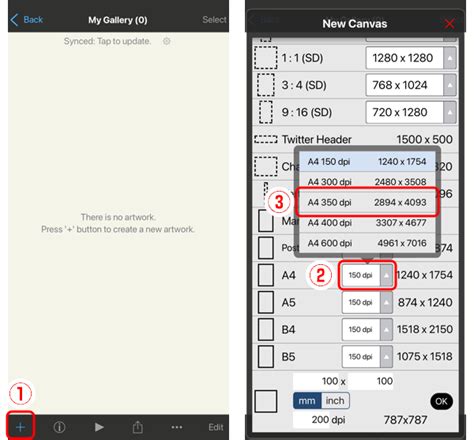
To adjust these print-specific settings in ibisPaint, you will first select the "Print" option. Within the print settings, you will then choose the DPI option. It is essential to be mindful of this setting, as it is extremely difficult to change the dpi afterwards. Therefore, when requesting a printing shop to print your artwork, make sure to be aware of your dpi and size.
To modify the DPI, you might encounter a scenario where you need to change the dpi from a higher value, such as 350, to a lower value, for instance, 10. This might be done for specific artistic effects or to test how a low-resolution file would appear if accidentally printed. Once you are done setting the new value, tap on the checkmark (✓) to finish.
However, a word of caution: Decreasing the dpi as shown will worsen the image quality. Just as with pixel count for screens, lower DPI for print will result in a less detailed and potentially blurry output.
Understanding Interpolation: Resizing Your Pixel Art
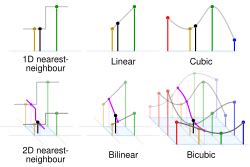
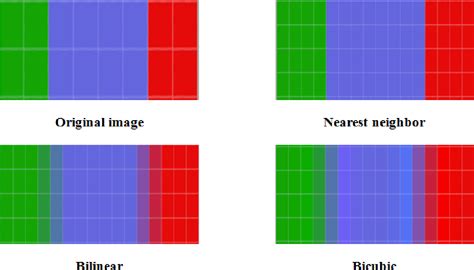
The process of interpolation comes into play when you enlarge or reduce the size of an existing image. Different interpolation methods interpret the existing pixel data in unique ways, leading to varied visual outcomes. ibisPaint offers three primary "interpolation" methods: Nearest Neighbor (Pixel), Color Average (Pixel), and Bilinear.
Let's explore the results of using each interpolation method when resizing an image. In the following examples, we'll consider two scenarios: enlarging an image from a small size to a larger one, and reducing an image from a large size to a smaller one.
For the purpose of demonstration, imagine we start with an image with a width of 75 pixels. When enlarging this image to a width of 1280 pixels, using the "Keep Aspect Ratio" setting ensures that the proportions of the image are maintained. Conversely, if we begin with an image with a width of 1280 pixels and reduce it to a width of 75 pixels, again using "Keep Aspect Ratio," we can observe the effects of different interpolation techniques.
Bilinear Interpolation
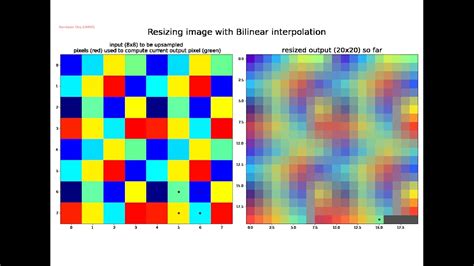
The [Bilinear] interpolation method is generally recommended for enlarging and reducing normal illustrations. Its strength lies in its ability to create smoother transitions between pixels. When enlarging, it interpolates colors to prevent the pixels of the original (smaller) image from becoming visible. This results in a less blocky, more blended appearance in the enlarged image. When reducing, it blends the colors of the original (larger) image to determine the colors of the new (smaller) image. This process aims to maintain a sense of continuity and avoid harsh pixelation.
Color Average (Pixel) Interpolation
The [Color Average (Pixel)] method offers a different approach, particularly when dealing with pixel art. When enlarging, it maintains a pixelated appearance. This means that the distinct pixel blocks of the original image are preserved, giving the enlarged image a more deliberately "pixelated" look. When reducing, it blends the colors of the original (larger) image to determine the colors of the new (smaller) image. Similar to Bilinear, it averages colors, but the emphasis remains on retaining a pixelated aesthetic.
Nearest Neighbor (Pixel) Interpolation
For those specifically creating and manipulating pixel art, the [Nearest Neighbor (Pixel)] method is often the most suitable choice. As the name suggests, it selects the nearest pixel's color value when resizing. This method is recommended for enlarging and reducing pixel art. Its primary characteristic is that it maintains a pixelated appearance. This means that when you enlarge an image using Nearest Neighbor, the individual pixels become larger and more distinct, preserving the sharp, blocky aesthetic that is characteristic of pixel art. When reducing, it simply samples the closest pixel, often leading to a more jagged but distinctly pixelated result. This method is ideal for ensuring that your pixel art retains its intended retro charm and sharp edges.
Pixel Art Advanced Shading Tutorial Part1
By understanding and strategically applying these resolution settings and interpolation methods within ibisPaint, you can ensure your pixel art looks its best, whether it's destined for a vibrant screen display or a crisp printed piece. Experimenting with these options will further hone your skills and unlock new creative possibilities in the world of pixel art.