Krita's Smudge brush is a versatile tool that, when understood and wielded correctly, can elevate your digital artwork. Often misunderstood as a simple blurring tool, the Smudge brush, particularly the Color Smudge variant, offers a unique approach to blending colors and creating painterly effects. This tutorial will delve into the intricacies of its settings, providing insights for both novice and experienced digital artists, even those working without a graphics tablet, relying solely on a mouse.
Understanding the Core Functionality of the Smudge Brush
At its heart, the Smudge brush in Krita simulates the physical act of smearing paint. However, its digital implementation allows for a level of control and nuance that traditional media cannot replicate. Unlike a standard brush that deposits color, the Smudge brush manipulates existing pixels, blending them together. This fundamental difference is key to understanding its capabilities and limitations.
When you apply the Smudge brush, it effectively "picks up" color from the canvas and drags it along the stroke path. The intensity and nature of this "picking up" and "dragging" are governed by a variety of settings, each contributing to the final visual outcome.
Navigating the Smudge Brush Settings: A Deep Dive
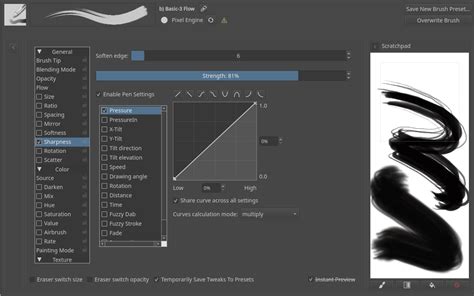
The true power of the Krita Smudge brush lies in its customizable settings. While the interface might seem daunting at first, understanding each parameter will unlock its full potential.
Spacing: The Key to Smoothness and Strength
One of the most critical settings for achieving a desired smudge effect is Spacing. This parameter dictates the distance between individual brush dabs that make up your stroke.
- Lowering the spacing results in a smoother, more continuous effect. For smearing with a round brush, a value of 0.05 or less is often preferred to achieve a seamless blend. The lower the spacing, the smoother the effect.
- Conversely, increasing the spacing will make the dabs more distinct, leading to a more textured or broken smudge.
Spacing also influences the strength of the smudging effect. When spacing is too low, the brush can become overly dominant, picking up a color and holding onto it persistently, leading to a "dulling" effect where colors become muddy. Finding the right balance between smoothness and effective color blending is crucial. Remember that spacing is proportional to the brush tip size; a larger brush with low spacing will produce a different result than a smaller brush with the same low spacing.

The "Smudge Trail" and Brush Shape Preservation
Both the standard Smudge brush and the Color Smudge Brush exhibit a "smudge trail," which is the path the brush leaves as it manipulates pixels. However, a significant distinction arises in how they handle the brush shape.
- The standard Smudge brush may alter the perceived shape as it blends, sometimes leading to a "fading off" in size.
- In contrast, the Color Smudge Brush preserves the brush shape and size. This means that even as it blends colors, the outline and form of the brush tip remain consistent throughout the stroke, offering more predictable results. This characteristic is particularly useful when you want to maintain a specific brush texture while still achieving smooth color transitions.
Scattering: Controlling Randomness
Scattering introduces an element of randomness to the brush dabs. For most mid-sized brushes, especially when aiming for controlled smudging rather than a chaotic effect, it's advisable to lower the scatter rate to 0.50 or lower. High scatter values can lead to a more dispersed and less controlled smudge, which might be desirable for specific artistic styles but generally hinders precise blending.
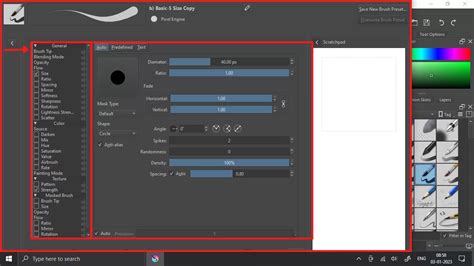
Gradient: Introducing Color Variation
The Gradient setting in the Smudge brush functions similarly to the Gradient option in Pixel brushes. When enabled, the color applied by the smudge brush will vary between the colors defined in the selected gradient. This allows for the creation of strokes that transition through multiple colors, adding depth and complexity to your smudges. This can be particularly effective for creating iridescent effects or simulating complex natural phenomena.
Blending Modes: Interacting with Layers
Just like with regular Pixel brushes, Blending Modes dictate how the Smudge brush interacts with the underlying pixels and layers. By default, the Color Smudge Brush primarily takes information from the layer it is currently on. However, by experimenting with different blending modes (such as Overlay, Multiply, or Screen), you can achieve a wide array of sophisticated effects by allowing the smudge to interact with multiple layers or to modify the existing colors in unique ways.
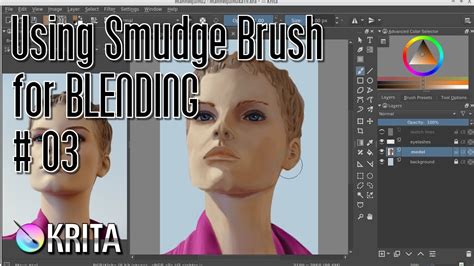
The Color Smudge Brush: A Closer Look
The Color Smudge Brush is a specialized tool within Krita's smudge brush family. It possesses all the same brush tip options as a standard Pixel Brush, but its smudging behavior leads to distinct outcomes.
- Layer Interaction: By default, the Color Smudge Brush only manipulates information on its own layer. This isolation can be beneficial for maintaining control over your artwork. However, you can leverage blending modes to influence how it interacts with other layers.
- Transparency Blending: The Color Smudge Brush blends with the transparency of the layer it is on. This means that areas with lower opacity on the layer will result in a less pronounced smudge effect, allowing for subtle blending and the preservation of underlying details.
- "Digital Watercolor" Style: For artists aiming for a "digital watercolor" aesthetic - characterized by soft, smooth shading rather than photorealistic rendering - the Color Smudge Brush, often in conjunction with specific blending modes, is invaluable.
Advanced Techniques and Creative Applications
Beyond the basic settings, several advanced techniques can unlock the full potential of the Krita Smudge brush.
Shading on Separate Layers
A highly recommended practice for effective shading is to use a separate layer for shading, possibly making use of alpha-inheritance. This provides a non-destructive workflow, allowing you to easily adjust or remove shading without affecting your base colors.
- Overlay Mode: Shading on a separate layer using Overlay mode can be particularly effective. This mode allows the shading to interact with the base colors in a way that enhances depth and form, often producing more vibrant and natural-looking results than simply lowering opacity.
- Contrast for Effect: When using the Color Smudge brush for blending, particularly for creating strong transitions, consider using colors that contrast highly with what you're using for the best effect. This allows the smudge to more dramatically alter the underlying colors.
Building Intermediate Values vs. Smudging
While the Color Smudge Brush can facilitate smooth color transitions, it's important to recognize its limitations. In many cases, building up intermediate values by painting in transitional colors directly can be a more effective and controlled method for achieving smooth blends than relying solely on smudging. The Color Smudge brush remains, in fact, a so-so way of making truly smooth transitions for certain applications.
However, for achieving specific stylistic effects, smudging can be superior. For instance, if you first passed over a blue area three times with a red color using the Color Smudge brush, you would achieve a blended purple hue. This is mainly achieved with the "Color Smudge" mode on. Add dynamics as needed to further refine the brush's behavior.
Foreground and Background Color Dynamics
A particularly interesting technique involves setting different foreground and background colors, then turning on a specific brush dynamic. This can lead to unique and unexpected results. With pixel brushes, you can achieve all sorts of frill designs by using elongated brushes and setting the dynamics to rotation. You won't get that with Color Smudge Brushes. Instead, you'll get something that looks more like… yarn. Which is cool too, and opens up possibilities for creating textured effects.
When to Use Smudge vs. Blur
It's a common misconception that the Smudge brush is primarily a "blur" tool. While it does blend pixels, it's not a very good method of "smooth" blending in the traditional sense. For genuinely smooth, uniform blurring, Krita's dedicated Blur filters (such as Gaussian Blur) are far more appropriate and efficient. The Smudge brush excels at creating painterly strokes, simulating the movement of paint, and achieving textured blends rather than simply softening edges.
If you want even smoother effects, well, just use Blur. The Smudge brush is for intentional manipulation and artistic expression, not for indiscriminate softening.
How to Use the Blur Tool in Krita (Tutorial)
Mouse vs. Graphics Tablet: Adapting the Workflow
The provided information emphasizes that these tutorials are created using a mouse, not a graphics tablet. This is a crucial point for many aspiring digital artists who may not have access to a tablet.
- Control with a Mouse: While a graphics tablet offers pressure sensitivity and natural pen-like control, it is entirely possible to achieve excellent results with a mouse. The key lies in meticulous adjustment of brush settings, particularly spacing and flow, and careful, deliberate mouse movements.
- Patience and Precision: Working with a mouse requires more patience and precision. Instead of relying on pressure, you'll be relying on the speed and angle of your mouse movements, combined with carefully selected brush parameters.
- Leveraging Krita's Features: Krita's robust feature set, including the detailed brush configuration options, allows users to compensate for the lack of pressure sensitivity. By fine-tuning settings like spacing, scatter, and blending modes, mouse users can achieve results comparable to those using a tablet, albeit through a different workflow.
Conclusion: Experimentation is Key
The Krita Smudge brush, especially the Color Smudge variant, is a powerful tool that offers a unique avenue for artistic expression. By understanding its core mechanics, delving into its settings like spacing, scattering, and blending modes, and experimenting with advanced techniques such as shading on separate layers, artists can unlock a world of creative possibilities. Whether you're aiming for a soft, digital watercolor look or a more textured, painterly effect, the Smudge brush, even when used with a mouse, can be an indispensable part of your digital art toolkit. The most effective way to master this tool is through consistent practice and experimentation.