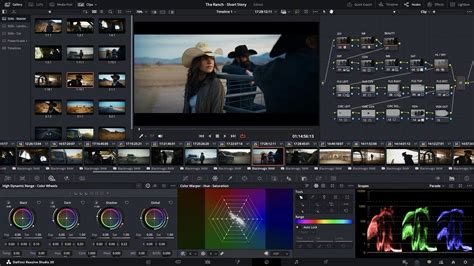
DaVinci Resolve, a powerhouse in the realm of video editing software, offers a robust suite of tools for both novice and seasoned professionals. Among the foundational skills crucial for an efficient post-production workflow is the ability to effectively split and manage audio and video clips. Whether you're aiming to refine a single take, create complex visual effects, or ensure pristine audio quality, understanding how to split clips in DaVinci Resolve is paramount. This guide will delve into the various methods for splitting audio and video, from basic operations to more nuanced techniques, applicable across versions 17 and 18 of the software.
Understanding Clip Splitting in DaVinci Resolve
At its core, clip splitting in DaVinci Resolve is the act of dividing a single video or audio clip into two or more distinct segments. This fundamental technique serves a multitude of purposes. It is indispensable when you need to excise unwanted portions of footage, seamlessly insert other media like additional video clips or still images, or meticulously adjust different sections of a clip independently. DaVinci Resolve, with its intuitive interface and powerful features, provides several accessible pathways to achieve this. By mastering clip splitting, editors can significantly enhance their workflow, removing extraneous elements and sculpting a more polished, professional final product. This skill is not just for the experienced; beginners will find it an essential tool to incorporate into their editing repertoire from the outset.
The Art of Splitting a Single Clip
Splitting a single clip in DaVinci Resolve is a straightforward process, achievable through a combination of timeline navigation and specialized tools. The initial step involves selecting the target clip on your timeline by clicking on it. Subsequently, you must position the playhead precisely at the juncture where you intend to make the split. For granular control, DaVinci Resolve offers the arrow keys to advance the playhead frame by frame, or the zoom functionality to magnify the timeline for a more accurate selection of the desired frame.
Once the playhead is perfectly positioned, the "Blade Tool" becomes your primary instrument for division. This tool can be activated either by clicking its corresponding icon in the toolbar or by utilizing the keyboard shortcut Ctrl+B (or Cmd+B on macOS). An alternative method involves right-clicking directly on the clip and selecting "Blade" from the contextual menu.
With the Blade Tool engaged, a simple click on the clip at the designated point will execute the split, creating two independent segments. If further divisions are required, you can reposition the playhead to the next desired cut point and repeat the process. This allows for the creation of multiple segments from a single original clip, each of which can then be edited and manipulated independently.
For expedited splitting at specific points, DaVinci Resolve offers specialized shortcuts. To split a clip precisely at its defined "in point," you can use Ctrl+Alt+B (or Cmd+Opt+B on macOS). Similarly, to split at the "out point," the shortcut is Ctrl+Shift+B (or Cmd+Shift+B on macOS). These shortcuts bypass the need for manual playhead positioning, significantly accelerating the editing process for common trimming scenarios.
Dividing Multiple Clips Simultaneously
In more complex projects, the need to split multiple clips at once often arises. This might be necessary when working with sequences that require a uniform cut across several clips to introduce new footage or apply a consistent effect. Fortunately, DaVinci Resolve simplifies this task.
The first step is to select all the clips you wish to split. This can be achieved by clicking and dragging a selection box over the desired clips on the timeline, or by holding down the Shift key while clicking on individual clips to add them to a multi-selection.
Once the clips are selected, you can employ the "Blade Edit Mode" to perform a simultaneous split. To activate this mode, click the Blade Tool icon in the toolbar or press the B key on your keyboard. With the Blade Tool active and multiple clips selected, clicking on the timeline at your desired cut point will result in a split being made across all selected clips at that exact location.
Alternatively, if you need to split all selected clips at the exact same point in time, the "Split at Playhead" command offers a streamlined solution. Simply position the playhead at the desired cut point and press Ctrl+B (Windows) or Cmd+B (macOS). This action will divide all selected clips precisely where the playhead is located.
Rejoining Split Clips: Restoring Continuity
The process of rejoining split clips in DaVinci Resolve is as intuitive as splitting them, allowing for seamless integration of previously divided segments. After splitting a clip, you can easily merge the resulting parts back into a single, cohesive unit.
To rejoin split clips, begin by selecting the two adjacent clips you wish to merge on the timeline. This can be done by clicking on the first clip and then, while holding the Shift key, clicking on the second clip.
Next, right-click on one of the selected clips. From the contextual menu that appears, choose the "Join Clip" option. A quicker method is to use the keyboard shortcut Ctrl+J (on Windows) or Cmd+J (on Mac). Executing this command will merge the two selected clips into a single, continuous clip.
Should further adjustments be needed after rejoining, the newly merged clip can be further trimmed or modified using any of DaVinci Resolve's editing tools, including the Blade Tool. This flexibility ensures that your editing remains precise and adaptable throughout the post-production process.
Isolating Audio from Video: Creative Control
Splitting audio from a video clip is a powerful technique that grants discrete control over each element. This is particularly useful when you need to apply specific audio treatments, replace the original audio entirely, or synchronize external audio sources. DaVinci Resolve offers straightforward methods to achieve this separation.
The most direct approach involves selecting the video clip in the timeline or the Media Pool that you wish to detach the audio from. Then, right-click on the clip and choose "Detach Audio" from the presented options. This action will generate a new, independent audio clip in the Media Pool, now separate from its original video counterpart.
Another effective method utilizes the Blade Edit Mode. Select the clip in the timeline and activate the Blade Tool (either via the toolbar icon or the B shortcut). Position the playhead at the desired split point for the audio and press Ctrl+B (or Cmd+B). This action splits both the video and audio components into separate clips. Once separated, you can then manipulate the audio independently.
After successfully splitting the audio from the video, DaVinci Resolve's Fairlight page becomes your primary hub for advanced audio editing. This dedicated audio post-production environment provides a comprehensive suite of tools and special effects to enhance audio quality, adjust levels, and fine-tune sound design. Once your audio edits are complete, you can re-sync and rejoin the audio and video clips by simply dragging them together in the timeline or by using the "Join Clips" command, ensuring perfect synchronization.
Working with Poly WAV Files: Advanced Audio Management
For users working with professional audio recorders or cinema cameras, the concept of "Poly WAV" files is highly relevant. A Poly WAV file is a single audio file that encapsulates multiple individual audio tracks. This is a common output from devices like the Sound Devices MixPre II or Zoom F-series recorders, which are designed to capture more than two channels of sound, often with each channel corresponding to a different microphone or audio input. This multi-track format offers significant flexibility during post-production, allowing for detailed sound mixing.
How to split poly wav files
When a Poly WAV file is imported into DaVinci Resolve and placed on the timeline, the Fairlight page often automatically deconstructs it, presenting each captured audio channel on its own dedicated audio lane. This automatic separation is invaluable for immediate editing. You might observe that channels one and two are identical, potentially representing a stereo mix, while subsequent channels could be individual microphone feeds. To edit these tracks independently, particularly if one source is louder or requires distinct processing, it's crucial to ensure they are not linked.
Unlinking Audio Tracks for Individual Editing
By default, DaVinci Resolve may link the audio tracks within a Poly WAV file upon import. This means that selecting one track inadvertently selects all linked tracks. To gain granular control, you must unlink them. Right-click on any of the audio tracks in the timeline and select "Link Clips" from the contextual menu. Within this submenu, uncheck the "Link Clips" option. Once unlinked, each audio track can be selected, edited, or deleted individually. If any empty tracks remain after such operations, a subsequent right-click and selection of "Delete Empty Tracks" can help tidy up the timeline.
Exporting Individual Audio Tracks
Should you need to utilize these separate audio tracks in an external Digital Audio Workstation (DAW) or another editing program, DaVinci Resolve facilitates their individual export. Select the specific audio tracks you wish to export by clicking on the first track and then using the Shift key to select subsequent tracks. Right-click on the selected tracks and choose "Export Audio Files."
In the export dialogue box, several key settings require attention:
- Folder Name: Select "Clip Name" or specify a custom folder for organization.
- Auto-Rename Each Duplicate: Ensure this is checked to guarantee each exported track receives a unique filename.
- Format: Choose "BWAV" (Broadcast Wave Format), as it is a widely compatible standard for professional audio.
- Sample Rate: Select "Same As Project" to maintain consistency with your timeline settings.
- Bit Depth: Opt for "24 bit" for optimal audio fidelity.
- Interleaved: This setting is typically suitable for most export scenarios.
- Export Individual Clips: Crucially, check this box to ensure each selected track is exported as a separate file.
- Entire Timeline: While this option exists, if you only intend to export specific tracks, ensure "Selected Tracks Only" is also chosen.
Upon clicking "Export," DaVinci Resolve will generate individual audio files for each track you have selected, ready for use in other applications.
Advanced Scenarios: Audio for Multicam and Beyond
The ability to split and manipulate audio is also critical in scenarios involving multicam editing. For instance, if you have two camera angles, one with excellent built-in audio and another with poor, wind-affected audio, you might wish to use the superior audio source for both camera angles. While DaVinci Resolve's multicam feature is robust, sometimes directly assigning audio from one source to another clip is a more straightforward approach for specific editing needs. This level of control is precisely what clip splitting and audio detachment enable.
Furthermore, for users requiring professional audio delivery with distinct tracks, such as for commercials or broadcast, DaVinci Resolve offers comprehensive export options. When exporting a ProRes file, for example, you can meticulously configure the audio tab in the Deliver page to route specific tracks to designated output channels. This involves creating the necessary tracks (mono, stereo, etc.) in either the Edit or Fairlight page and then mapping them correctly in the export settings. This ensures that all sound effects are routed to track 2, music to tracks 3 and 4, and so on, providing a highly organized and professional final audio mix.
Conclusion: Empowering Your Editing Workflow
Mastering the art of splitting clips, and specifically audio, in DaVinci Resolve is a fundamental skill that significantly enhances post-production efficiency. It empowers editors to refine their work with precision, create compelling visual narratives, and achieve a polished, professional output. With the intuitive tools and flexible workflows offered by DaVinci Resolve, whether you are working with version 17 or the latest iteration, you can effortlessly split clips, isolate audio, and manage complex audio arrangements. The ability to split, detach, and re-join elements provides unparalleled creative control, allowing your ideas to flow seamlessly from concept to screen without being hindered by technical limitations.