Keeping your Procreate application up-to-date is crucial for unlocking the latest creative tools, performance enhancements, and bug fixes. This guide will walk you through the process of updating Procreate, explore significant changes in recent versions, and clarify how these updates impact your workflow, particularly for Procreate Dreams.
Updating Procreate: A Seamless Process
The process of updating Procreate is straightforward and mirrors the update procedure for most applications on your iPad.
- Access the App Store: Begin by opening the App Store on your iPad.
- Navigate to Your Account: Once the App Store is open, tap on your profile picture, typically located in the top right corner of the screen. This action will take you to your Account menu.
- View Available Updates: Within your Account menu, you will find a comprehensive list of all applications that have available updates.
- Initiate the Update: Locate Procreate in this list. To begin the update process, simply tap the "Update" button adjacent to the Procreate listing.
It's important to note that many of the enhancements and modifications introduced in the latest versions of Procreate are intricately linked with and built upon the most recent advancements in iPadOS technologies. This ensures a cohesive and optimized user experience.
Understanding Key Changes in Recent Procreate Versions
Procreate, and its related applications like Procreate Dreams, have seen substantial updates that introduce new features, refine existing ones, and alter how certain elements are managed.
The Brush Revolution: Procreate 5.4 and Beyond
One of the most significant overhauls in Procreate's history arrived with version 5.4, focusing on a revolutionary approach to brushes. This update is described as the "largest overhaul to Procreate brushes… ever."
- New Brush Collection: Procreate 5.4 introduced an impressive 18 handcrafted brush sets, curated to amplify creativity across a wide spectrum of artistic styles. These sets encompass traditional painting and drawing mediums such as gouache, oils, watercolor, and inking, alongside specialized styles like comic, lettering, and street art.
- Collaboration with Kyle T. Webster: The renowned brush maker, Kyle T. Webster, joined the Procreate team in 2024 as a brush developer. He collaborated closely with the Procreate team to refine the final collection, resulting in the 18 Brush Sets and over 150 individual brushes.
- The .brushlibrary Format: This update introduced a new Procreate brush file format:
.brushlibrary. This new format and its associated installation process differ slightly from previous methods. Brushes in this format are now stored within your iPad's Files app, typically found underFiles → On My iPad → Procreate → BrushesorFiles → iCloud Drive → Procreate Brushes. - Installation of .brushlibrary Files: To install brushes in the
.brushlibraryformat, it is essential to update Procreate to version 5.4 or higher before attempting the installation. Brushes in this format will not function with older versions of Procreate. If your iPad is not automatically recognizing the new file type, there are workarounds detailed in associated video tutorials. - Brush Organization: The
.brushlibraryformat significantly enhances brush organization within Procreate. After installation, your custom brushes can be accessed by performing a pinch-in gesture on the Brushes interface and selecting 'Classic Library' to reveal additional brush libraries. - Icon Recognition: Due to it being a new file format, iPadOS might take some time to associate the
.brushlibraryfiles with Procreate. This does not indicate that the file is broken, damaged, or incompatible. - Maintaining Old Formats: If you wish to continue using the older
.brushsetformat, you can simply keep your current brushes installed and use them as you always have. - Organizing Your Own Brushes: The update also empowers users to organize their own custom brushes into brush libraries.
How to Install Brushes & Files in Procreate | Easy Steps
Procreate Dreams 1 to Procreate Dreams 2: A Significant Leap
The transition from Procreate Dreams 1 to Procreate Dreams 2 involves a substantial upgrade, particularly concerning brushes and existing movie projects.
- Brushes Upgrade: Procreate Dreams 2 provides a significant brush upgrade, featuring 180 new brushes meticulously crafted with animators in mind.
- Brush Storage: Similar to Procreate 5.4, brushes in Procreate Dreams 2 are moved from within the app itself to the iPad's Files app. If you utilize iCloud, they will be stored in
Files → iCloud Drive → Procreate Dreams → Brushes. - Upgrade Time: This brush upgrade may require a considerable amount of time, especially if you have a large collection of brushes.
- Accessing Custom Brushes: Post-upgrade, custom brushes are accessible by pinching inwards on the Brushes interface and selecting 'Classic Library'.
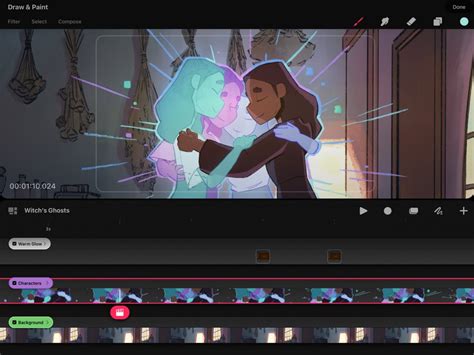
- Movie File Conversion: Movies created in Procreate Dreams 1 must be converted to the new system to be viewed, edited, and shared in Procreate Dreams 2. When you first tap to edit a drawing within a freshly upgraded file, you may be prompted to convert the content into a Flipbook. Alternatively, the Timeline Edit tool can be used to convert content to a Flipbook at any time within Procreate Dreams 2.
- Resizing Content: After upgrading and accessing a file that originated in Procreate Dreams version 1, you might need to resize some of your content. This is dependent on your iPad model.
- Troubleshooting File Upgrades: If you encounter issues with file upgrades, a primary troubleshooting step is to ensure you have ample free space on your iPad. Navigate to
Settings → General → iPad Storageand clear up a substantial amount of space before attempting the upgrade again. As a general guideline, check the size of your movie file by going toFiles → On My iPad/iCloud Drive → Procreate Dreams → Theater, then tap and hold the file and select 'Get Info'. Ensure your iPad has at least 150% of that file's value free. - New Flipbook Functionality: The upgraded Flipbook in Procreate Dreams 2 is designed to enhance the experience of frame-by-frame animation.
Other Notable Updates and Features
Beyond brushes and Procreate Dreams, other aspects of Procreate have also seen refinements.
- Layer Opacity: In Procreate 5X, layer opacity was removed from the Adjustments menu. However, you can still adjust the opacity of a layer directly on the Layer itself.
- Color Panel Rework: The interface of the Colors panel has been redesigned to offer a more stable and visually appealing experience.
- Color History: All iPads can now utilize the Color History feature, irrespective of their screen size.
- Hover Functionality: Hover mode operates exclusively on specific iPad models that are equipped with the necessary screen technology.
- 3D Models: The downloadable Procreate Model pack, featuring 3D objects, is not available for any form of commercial use. Users are welcome to paint on these models and share their work on social media, but they cannot be used for licensing or sale.
- Content Ownership: Any art created with the default tools provided by Procreate and Procreate Pocket (including brushes, color swatches, and Time-lapse videos) is considered your content. You are free to use it as you wish, although the developers appreciate attribution.
- Bundled Fonts: Procreate, Procreate Pocket, and Procreate Dreams come bundled with the fonts Eina 01, Impact, and Jack Armstrong BB. These specific fonts are licensed for personal use only. Other fonts available within the apps may be system fonts or those you have downloaded to your device.
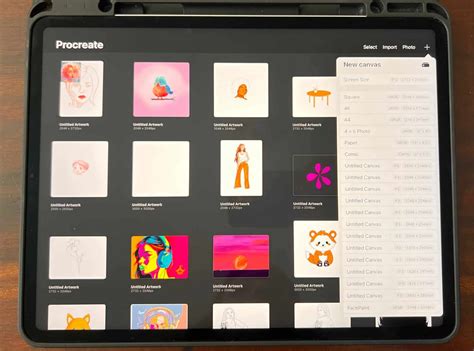
- Maximum Canvas Size: The maximum canvas size achievable in Procreate varies depending on the specific iPad model being used.
Understanding Brush Settings and Parameters
Recent Procreate updates have also introduced finer control over brush behavior, offering a more granular approach to customization. These detailed adjustments allow artists to sculpt the exact feel and response of their digital tools.
- Stroke Path: Within the brush studio, the "Stroke Path" settings provide control over how individual brush strokes are rendered.
- Spacing: This parameter dictates the distance between the "stamps" or "grains" of the brush as it moves across the canvas. Adjusting spacing can transform a dense, solid line into a stippled effect or a textured stroke.
- Jitter: Jitter introduces randomness to the stroke.
- Spacing Jitter: Varies the spacing between brush stamps unpredictably, creating a more organic or chaotic texture.
- Lateral Jitter: Causes the brush to deviate from the intended path, moving slightly left or right. This can simulate the unevenness of physical media like charcoal or pastels.
- Linear Jitter: Affects the alignment of the brush's shape along the stroke path, potentially creating a warped or skewed appearance.
- Shape: The "Shape" settings define the fundamental form or silhouette of the brush tip.
- Roundness Vertical Jitter & Roundness Horizontal Jitter: These parameters introduce variations to the roundness of the brush shape. By jittering the roundness, you can create brush tips that are not perfectly uniform, mimicking the wear and tear of real-world brushes or creating unique artistic effects. For instance, a slightly varied roundness can make a digital ink brush feel more like a brush pen with a slightly flattened tip.
- Dynamics: "Dynamics" control how certain input parameters influence the brush's appearance and behavior.
- Spacing: While also found under "Stroke Path," "Dynamics" can link spacing adjustments to other input sources, such as tilt or speed, offering more complex stroke variations.
- Rendering: The "Rendering" settings determine how the brush's shape and color are applied to the canvas.
- Alpha Threshold: This setting affects the transparency of the brush stroke. A higher alpha threshold can lead to more opaque strokes, while a lower one can result in more transparent, delicate marks, particularly useful for watercolor effects or subtle shading.
- Apple Pencil: These settings allow you to map the physical input from your Apple Pencil to specific brush parameters.
- Pressure Graph: The pressure graph is a powerful tool that visualizes the relationship between the pressure applied to your Apple Pencil and a chosen brush attribute (e.g., size, opacity, flow). By adjusting this graph, you can precisely control how sensitive your brush is to pressure, enabling nuanced control over line weight and color intensity.
- Preview: A new "Preview" tab offers a clear and immediate visual representation of how your brush settings will affect the final output, streamlining the customization process.
These detailed brush settings, when combined with the new .brushlibrary format and the extensive collections developed by Kyle T. Webster, represent a significant expansion of Procreate's capabilities, offering artists unparalleled control over their digital painting and drawing experience.