Procreate Dreams is an incredible iPad app that serves as one of the best animation programs for beginners. Its intuitive design makes it accessible even to those new to digital animation, allowing them to create impressive results with ease. This tutorial will guide you through the fundamental concepts and practical steps to master this fun and engaging animation program.
Understanding the Procreate Dreams Workspace
When you begin working on an animation in Procreate Dreams, you'll encounter two primary active spaces: The Stage and The Timeline.
The Stage and The Backstage
The Stage is where your animation comes to life visually. It consists of the main active Stage area, but also includes a surrounding grayed-out area known as The Backstage. The Backstage acts as a director's workspace, allowing you to house elements of your animation before they appear on the main Stage. This area is crucial for organizing and preparing assets without them being visible in the final exported movie. Anything left in The Backstage will not be included when you export your animation.

The Timeline and Tracks
The Timeline is where you assemble and arrange the various components of your animation. It's structured using "Tracks," which function similarly to layers in the Procreate drawing app. Within each Track, you'll find a Clapper Board icon. This icon represents The Playhead, which indicates your current position in the animation sequence.
Navigating Procreate Dreams: Gestures and Terminology
Procreate Dreams offers a range of intuitive gestures to streamline your animation workflow.
Essential Gestures
- Pinch and Zoom: Use two fingers to pinch, zoom, and resize your Stage area, allowing you to focus on specific details or get a broader view of your scene.
- Timeline Zoom and Scaling: For the Timeline, utilize three fingers. Scrubbing them side-to-side will zoom your timeline in and out, giving you a better overview of your project's duration. Scrubbing three fingers up and down will scale the size of your tracks, making them easier to manage. A quick way to zoom in on a specific track is by double-tapping it.
Previewing Your Animation
There are several methods to preview your work in progress:
- Scrubbing the Playhead: Tap and hold the Playhead icon and drag it backward and forward across your Timeline. This allows for frame-by-frame review.
- Play Button: Tap the play button to see your animation play automatically at full speed.
- Viewport Playback: Be aware that if you are zoomed in on the Timeline, the Play button will only play the portion of your animation currently visible on the screen.
- Resetting the View: If you're deeply zoomed into the Timeline and wish to reset your view to see the entire animation from the beginning, grab the Playhead and flick it backward. This action will zoom out and reveal your entire Movie.
- Preview Mode: For a full-screen preview without any interface elements, tap four fingers on your screen to enter Preview Mode.
Intro to Procreate Dreams 2
Importing and Integrating Files
Procreate Dreams, being from the same creators as Procreate, offers seamless integration with the popular drawing app.
Importing from Procreate
This integration is a significant advantage for illustrators, as it simplifies bringing existing Procreate artwork into Procreate Dreams for animation.
- Open your Procreate gallery.
- Tap and hold the artwork you wish to animate.
- Navigate to your Procreate Dreams file.
- Drag and drop the artwork into your Procreate Dreams project.
Upon importing a Procreate file, tapping on the imported track will reveal an option: "Convert layers to tracks." Selecting this option magically imports all your Procreate layers as individual animation tracks, allowing for independent manipulation.
Importing Procreate Dreams Files
For collaboration or to incorporate provided practice files, importing existing Procreate Dreams files is straightforward.
- Download the Procreate Dreams file onto your iPad.
- Open the Files app on your iPad.
- Locate the downloaded file: If downloaded from Safari, it will likely be in "iCloud Drive." If from another browser, check "On My iPad."
- Tap and hold the Procreate Dreams file until a menu appears. From this menu, you can select how to open or import the file into your Dreams workspace.
Animating with Keyframes
Procreate Dreams offers three primary methods for animation: keyframing, Perform Mode, and frame-by-frame animation. Understanding keyframing is foundational, as it underpins many other animation techniques.
The Concept of Keyframing
Keyframing allows you to define specific points in time where an element's properties (like position, scale, or rotation) should change. You essentially draw or set an element once and then instruct the software how to animate it without redrawing it for every single frame.
To illustrate, consider animating a ghost illustration to move up and down on the screen.
Creating Movement Between Keyframes
- Attach an Animation Track: When you use keyframes, you're essentially attaching an animation track to your artwork that dictates its movement.
- Set Initial Keyframe: The "keyframes" are markers on the timeline indicating where specific actions begin and end. For movement, you'll select the "Move" action. This creates a new mini-track.
- Create a Second Keyframe: Tap the Playhead icon and drag it across the track to create a second keyframe. Think of this as moving from "point A" to "point B."
- Define the Between-State: Your goal is to tell Procreate Dreams what should happen between these two points. In our ghost example, this means moving the ghost down on the Stage.
- Animate the Movement: Tap the second keyframe. A bounding box will appear around your ghost. Now, simply drag the ghost artwork down on the Stage to animate the movement between the two keyframes. Procreate Dreams interpolates the motion automatically.
Animating with Perform Mode
Perform Mode is a powerful feature that automates keyframe animation, offering more control over the motion between keyframes. It essentially records your manual movements and translates them into animation, automatically generating keyframes for you.
- Select the Track: Choose the track containing the element you wish to animate.
- Enter Perform Mode: Tap the round Perform Mode icon.
- Manually Animate: Move the selected element on the Stage in the desired way. Procreate Dreams will record your movements.
- Automatic Keyframes: Upon exiting Perform Mode, the app will have captured your actions and generated the necessary keyframes to create the animation. For instance, moving a leaf element down the screen in Perform Mode will result in an animation of that leaf falling.
While Perform Mode has many advanced options, this provides a foundational understanding of its capabilities.
Editing Keyframes and Tracks
Procreate Dreams offers extensive flexibility for editing your animations after their creation.
Modifying Your Animation
- Deleting a Keyframe: If you're unhappy with a specific keyframe, tap and hold it to bring up a menu with the option to delete it.
- Deleting a Track: To remove an entire track, tap and hold between two keyframes on that track. A menu will appear, offering the delete option.
- Duplicating a Track: To duplicate an entire track, tap and hold the track, select "Track options," and then choose "Duplicate."
- Editing Specific Transformations: For more complex animations where elements have multiple movements (e.g., falling and twisting), you can edit individual aspects. Tap on the track, select "Expand Transformation," and you'll see all the animated properties for that specific track, allowing you to fine-tune each transformation.
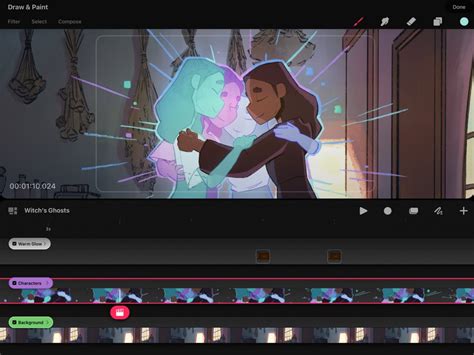
Draw and Paint Mode
As expected from the makers of Procreate, Procreate Dreams includes a robust Draw & Paint mode that functions almost identically to its sibling app.
Integrating Drawing and Painting
To access this mode, tap the Squiggle icon located on the right side of your Timeline. This will open familiar Procreate tools, including a brush menu, color palette, and layers panel, allowing you to draw, paint, and refine your animation directly within the app.
Flipbook Animation (Frame-by-Frame)
Frame-by-frame animation, a classic technique, is fully supported in Procreate Dreams and can be utilized within Draw & Paint mode. This method involves creating individual illustrations for each frame, which, when played in sequence, create the illusion of movement, much like a traditional flipbook.
Creating Frame-by-Frame Animations
While a video is often the best medium to explain this concept in detail, the core idea is to draw each frame as a distinct illustration.
- Set Up for Frame-by-Frame: To begin, you might want to set your project's frame rate to a lower setting, such as 12 FPS (the frame-by-frame preset) or 15 FPS (the anime preset), which can be adjusted when creating a new project by tapping the three dots in the project window.
- Drawing the First Frame: Ensure you are in "Drawing mode" (the squiggly line icon). Select a brush, such as the '6B Pencil' from the 'Sketching' category, for rough animation sketches.
- Add New Frames: After drawing your first frame, tap on that frame in the timeline. A pink '+' sign will appear. Tap this '+' icon to create a new frame.
- Onion Skinning: To make drawing subsequent frames easier, utilize the "Onion Skin" feature. Tap the timestamp under the opacity slider on the left of the screen to bring up a menu where you can enable and customize Onion Skin layers, allowing you to see previous and subsequent frames.
- Flipbook Mode: For an even more focused drawing experience, you can drag the entire timeline up or down by its gray center bar. This hides the timeline and dedicates your full screen to drawing, entering "Flipbook mode." New frames are added by tapping a frame and then the '+' icon in the upper right corner.

Advanced Techniques: Clipping Masks
Clipping masks are essential for controlling where textures or other elements appear within your animation.
Containing Elements with Clipping Masks
For instance, if you want to add texture to your ghost illustration but ensure it stays within the ghost's boundaries, a clipping mask is the solution.
- Select the Masking Track: Tap and hold on the track you wish to mask (e.g., the texture track).
- Apply Clipping Mask: Select "Mask" from the menu, followed by "Clipping Mask." This will confine the content of the masking track to the shape of the track directly below it.
Exporting Your Animation
Once your animation is complete, you'll want to share it with the world.
Sharing Your Creation
- Access Share Menu: Tap the name of your Movie. From the displayed menu, select the "Share" option.
- Export as Video: To export your animation as a video file, tap "Video."
- Select Quality and Save: Choose your desired export quality and tap "Save Video." Your animation will be saved to your iPad's Photos app, ready for easy sharing. Alternatively, you can export as individual frames if needed.
Further Learning and Resources
Procreate Dreams is a continually evolving application, with the development team actively incorporating community feedback. This means new features and improvements are regularly released.
Recommended Learning Paths
- Official Procreate Dreams Class: For a comprehensive visual guide, consider the free Procreate Dreams class that walks through the same information as this tutorial.
- In-depth Animation Courses: To gain a deeper understanding of animation principles and how to apply them in Procreate Dreams, explore dedicated courses. Many instructors offer detailed sessions covering everything from fundamentals to professional workflows.
- Industry Veteran Insights: Learning from experienced animators can provide invaluable insights into both the software and the art of animation. Courses taught by industry professionals often focus on practical projects and real-world challenges.
- "Introduction to Animation" by Tom Bancroft: This course is highly recommended for anyone looking to build a strong foundation in animation principles, which can then be effectively applied within Procreate Dreams.
Intro to Procreate Dreams 2
Customizing Project Settings
Before diving into animation, it's beneficial to configure your project settings.
Adjusting Frame Rate and Duration
When creating a new animation project, you'll be presented with various "movie" options. To customize settings like frames per second (FPS) and the duration of your Movie, tap the three dots on the right side of the white project creation box. This menu allows you to select your preferred frame rate and set the overall duration of your animation. For beginners, starting with a lower frame rate like 12 FPS or 15 FPS is often recommended.
Advanced Brush Integration
Procreate Dreams supports all Procreate brushes and compatible file types (.brush and .brushset).
Importing Custom Brushes
- Splitscreen Method: A quick way to import brushes from Procreate to Dreams is by using the iPad's splitscreen mode. Open both Procreate and Dreams side-by-side. In Procreate, select the brush you want to use in Dreams. Drag and drop this brush onto the canvas in Dreams. A green plus symbol will indicate when you can release the brush. The original brush in Procreate will remain unaffected.
- Files App Integration: You can also import .brush and .brushset files directly from your iPad's Files app using the same drag-and-drop method. Organizing your brushes in a dedicated folder within the Files app can streamline this process. Importing a .brushset file will create a new folder in Dreams containing all the brushes from that set.
Learning Procreate Dreams, like any new software or skill, involves a learning curve. However, with its intuitive interface and powerful features, it provides an accessible and rewarding entry point into the world of digital animation. By understanding the workspace, utilizing gestures, and exploring different animation techniques, you can begin creating your own animated stories and projects with confidence.