Zooming in on your photographs within Adobe Lightroom is a fundamental and frequently used function, essential for meticulous editing and critical evaluation. Whether you're aiming to confirm the tack-sharpness of your focus, scrutinize specific details like whether eyes are open in a group portrait, or assess the extent of image noise in the shadow areas, effective zooming is paramount. While the core actions of zooming in Lightroom are remarkably straightforward and intuitive, particularly within the Library and Develop modules, a deeper understanding of the available controls unlocks finer precision and a more efficient workflow.
The Fundamentals of Zooming in Lightroom
At its most basic, zooming in on a photo in Lightroom can be achieved through several simple methods. One of the most direct approaches is to simply click anywhere on the image in the main Loupe View. Alternatively, pressing the 'Z' key on your keyboard will immediately initiate a zoom action. These methods provide quick access to a closer inspection of your image.
However, the user experience with zooming in Lightroom might differ from expectations set by other applications, such as Photoshop. A behavior commonly found in other software, like using a mouse's scroll wheel, a touchpad gesture, or a vertical swipe on an Apple Magic Mouse for incremental zooming, is not natively supported for this function in Lightroom. This means you'll need to rely on other specific Lightroom tools and shortcuts to achieve the desired zoom levels and control.
Navigating the Loupe View: The Navigator Panel
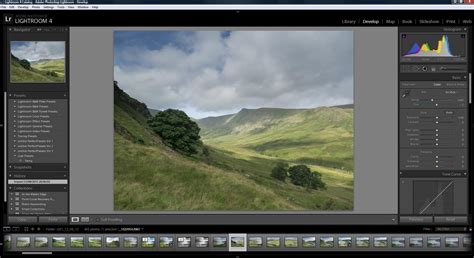
When you are in the Loupe View, which is the primary display area for your image in both the Library and Develop modules, the Navigator panel is typically visible on the left side of the screen. This panel is a crucial hub for controlling your zoom behavior. Within the Navigator panel, you will find four primary zoom options displayed. These are usually labeled FIT, FILL, 1:1, and a customizable ratio to its right.
The first grouping, FIT and FILL, offers distinct ways to display your entire image within the visible screen boundaries.
FIT: This option ensures that the entire image is displayed within the bounds of the visible display box. It scales the image up as large as possible while still maintaining the complete image within these boundaries. This means you will see the whole photograph, but it might not fill the entire screen area.
FILL: In contrast, FILL makes at least a part of the image fill the full area of the visible display box, eliminating any blank space. This often means that only a portion of your image will be visible on the screen, as the software prioritizes filling the display area.
If you expand the Navigator panel to reveal the thumbnail view, you'll notice a small white box superimposed on the thumbnail. This box visually represents the portion of the image that is currently visible in the main Loupe View. This is an invaluable tool for understanding your current framing, especially when zoomed in closely.
The Power of 1:1 Zoom
The 1:1 setting is a permanent menu option within the Navigator panel, meaning it is always visible regardless of your current zoom level. This is a critical setting for critical image evaluation. When you select 1:1, Lightroom zooms into the image at full resolution. In this mode, one pixel of your image corresponds to one pixel on your screen. For many users and in the context of most other image editing software, this is equivalent to a "100% zoom" setting. This level of zoom is indispensable for checking sharpness, identifying fine details, and assessing image quality at its native resolution.
Customizable Zoom Ratios
The last option in the Navigator panel is a customizable ratio. This allows you to set a specific zoom level that suits your workflow. You can click directly on the ratio itself to zoom to that magnification in the main panel. To the right of this ratio, you'll find a small drop-down icon. Clicking this icon reveals a menu of other predefined zoom ratios, allowing you to quickly select different magnifications. The ability to customize these default zoom levels is a powerful way to tailor Lightroom to your specific needs and preferences.
Advanced Zooming Techniques and Workflow Enhancements
Beyond the basic zoom functions, Lightroom offers several advanced features and techniques to refine your zooming experience and make your editing process more efficient.
Remembering Your Zoom Preferences
Lightroom has a general behavior of remembering your last used zoom options. This means that the next time you zoom in or out, it will revert to the same zoom settings you previously employed. For example, if you last used FIT and then zoomed to 1:1, Lightroom will likely remember these settings for your next editing session. Similarly, if you used FILL and then a 1:4 zoom, that preference might be retained. This "memory" can streamline your workflow by automatically setting your preferred zoom levels.
Navigating When Zoomed In
As you zoom further into an image, your field of view becomes more limited. This makes it essential to have effective ways to move around the zoomed-in image.
Clicking and Dragging: Once zoomed in, you can click and drag your cursor within the main image panel to pan around the image. This allows you to explore different areas of your photograph without having to zoom out and back in.
Zoomed Point Centering: Under Preferences > Interface > Tweaks, there's an option for "Zoom clicked point to center." While its exact behavior can be a little nuanced and best understood through experimentation, this setting influences where the zoom action is centered when you click on the image. Trying it out is the most effective way to grasp its functionality.
Preserving Zoom Level and Location Between Images
A particularly useful feature for comparing similar images or maintaining consistency across a series of shots is the ability to preserve the zoom level and location between different images. This means that as you navigate from one photo to another, Lightroom can maintain the exact same zoom magnification and the specific area of the image you were focused on. This comes in incredibly handy when you need to make subtle adjustments or comparisons across multiple photographs.
Locking Zoom Position
To control this behavior, Lightroom offers a "Lock Zoom Position" function. You can toggle this setting using the keyboard shortcut:
- Mac: Command + Shift + "="
- Windows: Control + Shift + "="
When "Lock Zoom Position" is enabled, Lightroom will zoom to the exact same area of each image you view, irrespective of where you might have previously zoomed in on a different image. When this feature is disabled, Lightroom will remember and display the zoom position from when you last viewed that specific image. This provides flexibility in how you manage your zoom context when moving between photos.

Keyboard Shortcuts for Efficient Zooming
For many photographers, keyboard shortcuts are the key to a faster and more fluid editing experience. Lightroom offers several powerful keyboard shortcuts for zoom control.
The Primary Zoom Shortcuts
Zoom In:
- Mac: Command + "+"
- Windows: Control + "+"Each press of this combination will zoom in incrementally, allowing you to get progressively closer to your image.
Zoom Out:
- Mac: Command + "-"
- Windows: Control + "-"Similarly, each press of this combination will zoom out, allowing you to see more of your image.
If your initial zoom doesn't achieve the desired magnification, simply repeat the zoom-in command. Lightroom will continue to zoom closer with each press of the "+" key. The same principle applies in reverse for zooming out with the "-" key.
The 'Z' Key Toggle
The 'Z' key serves as a quick toggle between your last two zoom states. Once you have zoomed into a specific spot on your image using any of your chosen tools, pressing the 'Z' key will instantly switch you back to the previous zoom level (often the Fit or Fill view) and then back again to your zoomed-in state with another press. This is incredibly useful for rapidly switching between a broad overview and a detailed inspection.
The Spacebar for Panning
When you are significantly zoomed in and the area you wish to edit is no longer fully visible, the Spacebar becomes your best friend. Holding down the Spacebar temporarily activates the Hand tool. With the Hand tool active, you can click and drag anywhere within the image area to pan and reposition the view, bringing the desired section into focus. This is a seamless way to navigate your image when zoomed in close.
Alternative Zooming Methods
While the Navigator panel and keyboard shortcuts are primary tools, Lightroom offers a few other methods for zooming, though their utility can vary based on user preference.
The Toolbar Zoom Slider
In the Toolbar, which is typically located below the histogram in the Develop module, you can find a Zoom Slider. This slider allows you to quickly zoom in or out on an image by dragging a control along a scale. While functional, some users find this method less precise or slower than keyboard shortcuts or Navigator panel selections.
Scrubby Zoom
The Develop module offers a feature called "Scrubby Zoom." By holding down the Shift key and then dragging your mouse left or right within the image area, you can zoom out or in, respectively. This offers a more fluid, drag-based zooming experience.
The 'Z' Key and Loupe View Default
When you enter Loupe View (by tapping "L" or double-clicking an image thumbnail in Grid view), Lightroom automatically activates the zoom tool. Clicking on the image at this point will zoom to the default zoom percentage. In Lightroom Classic, this default is typically set to 1:1.
Customization and Workflow Integration
Lightroom's flexibility extends to how you can customize its zoom behavior to better suit your personal workflow.
Setting Default Zoom Levels
As mentioned earlier, you can set your preferred default zoom levels within the Navigator panel. By clicking on the customizable ratio or its drop-down menu, you can select which zoom levels you want to be readily accessible. This proactive customization can save significant time by ensuring your most frequently used zoom settings are always at your fingertips.
The Missing Mouse Wheel/Trackpad Gesture
It's worth reiterating that the absence of a native mouse wheel or trackpad gesture for incremental zooming is a point of difference for users migrating from other applications. While some users have expressed a desire for this functionality, the current methods, when mastered, offer robust control. Some users have found specific third-party tools or scripts that can enable such gestures, but these are outside the scope of standard Lightroom functionality. For instance, the Cmd Opt = shortcut is noted by some as a useful alternative for managing zoom position.
How to Zoom in Lightroom Classic (No One Explains THIS!)
Beyond the Basics: Understanding Zoom Previews
It's important to understand that "zooming" in Lightroom-Classic is fundamentally about selecting and displaying different-sized previews of your image. Lightroom doesn't always re-render the entire image at every zoom level in real-time. Instead, it utilizes optimized previews. This is why zooming and panning are generally very fast. When you select a zoom ratio from the Navigator panel or use a keyboard shortcut, Lightroom is primarily calling up the appropriate preview for that magnification. This underlying mechanism contributes to the speed and responsiveness of the zoom functions.
Visualizing Your Zoomed Area
The white box on the thumbnail in the expanded Navigator panel is a critical visual aid. It clearly indicates which section of the overall image is currently displayed in the main Loupe View. This is particularly helpful when you are zoomed in very closely, as it provides context and allows you to easily reorient yourself within the entire photograph.
Conclusion: Embracing Lightroom's Zoom Capabilities
Mastering the various zoom functions in Lightroom is not just about getting closer to your image; it's about enhancing your ability to critically assess detail, refine your edits with precision, and ultimately improve the quality of your photographs. From the simple click and 'Z' key to the more advanced Navigator panel options, keyboard shortcuts, and preference settings, Lightroom offers a comprehensive suite of tools. By understanding and integrating these features into your workflow, you can transform your editing process, making it more efficient, accurate, and enjoyable. Experiment with the different methods, leverage the keyboard shortcuts, and customize your settings to find the zoom approach that best suits your photographic journey.