The digital tattoo design process offers a significant leap in speed and precision compared to traditional hand-drawn methods. This digital approach allows for the creation of flawless stencils that can be effortlessly resized, streamlining the workflow for tattoo artists and designers. However, for those new to digital art, the Procreate app can present a steep learning curve. This tutorial aims to demystify the process, breaking down essential settings and addressing common queries about digital design within Procreate, with a particular focus on utilizing tattoo stamps.
Navigating the Procreate Interface: Organization and Canvas Setup
Upon launching Procreate, you are greeted with your "Stacks," which visually resemble miniature stacks of paper. These stacks serve as a powerful organizational tool, allowing you to categorize your artwork. You can name and arrange these stacks according to your preference, perhaps creating dedicated folders for "Finished Tattoo Designs" or "Art Prints." Alongside these stacks, you'll find individual drawings. To group multiple drawings into a single stack, simply tap and hold one drawing, then drag it onto another drawing you wish to combine. Tapping the stack's title provides the option to rename it, further enhancing your organizational system.
When embarking on digital design, even though you are working on a screen, it is crucial to define the "size" of your canvas. This decision is particularly important if you intend to print your tattoo designs. For designs destined for standard printer paper, selecting a canvas size of 8.5” x 11” is advisable. For larger projects, such as prints and posters, you will need to adjust the canvas dimensions accordingly. A key consideration when working with larger designs is the impact on the number of available layers. As the canvas size increases, the number of layers you can utilize typically decreases. This reduction in layers can present challenges in creating intricate and well-defined designs. Therefore, for larger prints, a canvas size of 11”x17” is generally recommended as a practical limit.
The Power of Layers in Digital Tattoo Design
A fundamental principle in drawing tattoo designs on an iPad, with many artists favoring the iPad Pro, is the strategic use of layers. The core idea is to dedicate a separate "layer" to each distinct phase of the drawing process. For instance, your initial sketch, your rough draft, and your final, polished design should each reside on their own individual layers. This method offers immense flexibility and error correction. Should you make a mistake during the drawing process, it is easily rectifiable because your edits will be confined to the specific layer you are working on, leaving all other layers unaffected.
A highly useful Pro Tip regarding layers is the ability to adjust their opacity. This function allows you to control the visibility of a layer. For example, if you wish to retain your red sketch as a visual guide but reduce its prominence, you can simply lower its opacity. To modify the opacity of a layer, tap the "N" icon associated with that layer.
Furthermore, layers are instrumental in achieving a sense of flow in your artwork, especially crucial for tattoo designs that must conform to the contours of the body. It is highly recommended to include a layer that features an image of the body part for which you are designing. This reference will greatly assist in incorporating the natural flow and curves of the body into your tattoo design. If you are employing a reference image for inspiration or accuracy, it can also be placed on its own dedicated layer.
Achieving Perfect Shapes and Flawless Linework
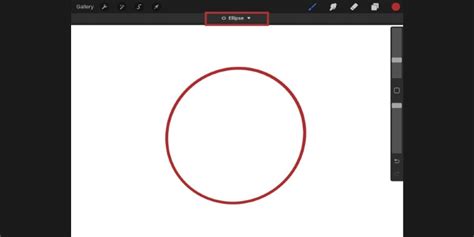
Procreate offers intuitive tools for creating perfect geometric shapes. If your goal is to draw a perfect circle, the process is remarkably simple: draw a circle and then hold your stylus steady. If the resulting shape is more of an oval than a perfect circle, continue to hold down the pen as you normally would, and then use your other hand to tap the screen with a finger somewhere near the circle. This technique will automatically refine your drawing into a precise circle. This shape-correction functionality extends to other geometric forms as well, making it easy to achieve clean and accurate outlines.
When it comes to adding color to your designs, maintaining a distinct layer for color is a best practice. This allows you to easily "hide" the color layer and view just the linework for your plain stencil. However, attempting to color on a new layer without any linework can lead to "freehand" coloring, making it challenging to stay within the lines.
To simplify the process of coloring within the lines, a highly effective method involves designating your linework layer as a "Reference." To do this, navigate to the layer containing your linework, double-tap it with your pencil, and select "Reference." Once this is set, you can then easily add shading and color on separate layers. When you select an area to fill with color, Procreate's program will intelligently prevent you from drawing outside the established linework boundaries.
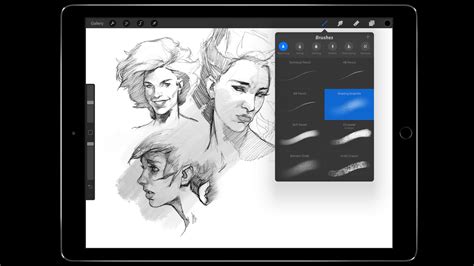
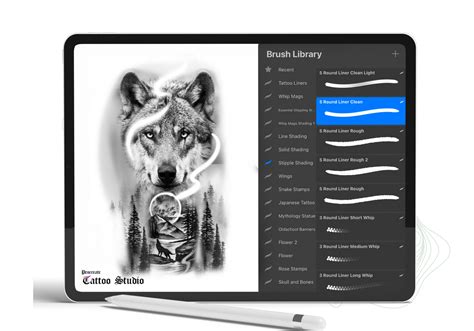
Essential Brushes for Tattoo Design
Procreate boasts a vast array of brushes, and selecting the right ones can significantly enhance your workflow. For initial sketching and conceptualization, the "Perfect Sketcher" brush, found within the "Battle Damage" set, is an excellent choice. If you aim for varied line weights within your linework without the need to switch brushes, the "Sushi Liner" brush is highly recommended. For tattoo designs requiring precise and clean lines, the "Digital Pen Steady" brush from the "Liners" set performs admirably.
For creating atmospheric effects, such as textured smoke, the "Murder Weapons 2 Particle Smoke" brushes offer a comprehensive set that is ideal for backgrounds. When it comes to shading, the "Weapons: Texture" brush from the "Murder Weapons" set is a top recommendation. This brush is particularly adept at creating digital drawings that emulate the tactile feel of being drawn or painted on actual paper. The "Murder Weapons 1" set also provides a variety of shade brushes that can be effectively incorporated into your designs or used for background elements.
Unleashing the Power of Procreate Tattoo Stamps
Stamps in Procreate are essentially pre-designed brush sets containing ready-made graphic elements. This feature is a game-changer for tattoo artists, offering a wide variety of stamp sets for virtually any design element imaginable. You can find stamps for natural elements like clouds and leaves, as well as intricate geometric patterns. Critically, there are numerous sets specifically curated for tattoo designs.
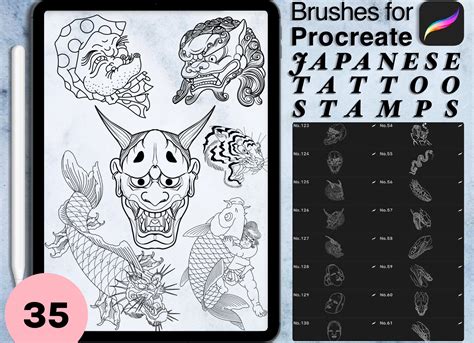
The utilization of Procreate stamps can dramatically simplify and accelerate the process of drawing tattoo designs, proving especially beneficial for individuals who are new to digital drawing or are exploring a new artistic style. The choice of stamp set will inherently depend on the specific style of tattoos you aim to create. Below are a few types of stamps that are particularly useful and come highly recommended for tattoo artists.
Exploring Specific Stamp Categories
Rope: While not always perfectly rendered, rope stamp sets in Procreate can be immense time-savers. These stamps function similarly to regular brushes; however, your brush strokes will manifest as rope-like textures rather than simple lines. This is invaluable for designs incorporating nautical themes, traditional motifs, or any element that requires a rope aesthetic.
Watches: Designs featuring watches and clocks often demand a multitude of small, intricate details. Drawing these elements manually can be both time-consuming and frustrating. Watch stamps provide a significant advantage. You can simply select the desired watch design, tap your screen once with your stylus to place it onto your canvas, and instantly have a solid foundation to build upon, allowing you to focus on customization and integration into the larger design.
Flowers: Flowers, with their diverse and often complex shapes and sizes, can be challenging to render consistently. Stamp sets for flowers, such as those for poppies or roses, offer a starting point. These stamps allow you to quickly lay down the basic form of a flower, and then you can easily add your unique artistic flair, adjust elements, and integrate them seamlessly into your tattoo composition.
Script: For artists who struggle with lettering or script, stamp sets can be an indispensable tool. These sets can serve as an excellent learning resource, helping you to understand and practice drawing and writing in various lettering styles. By using script stamps, you can achieve professional-looking lettering with greater ease and accuracy, even if freehand calligraphy is not your strongest suit.
How to create a stamp brush in procreate (easy & simple)
Achieving Realism with Reference Images in Procreate
Creating realistic tattoo designs in Procreate often hinges on the effective use of reference images. If a reference image appears too dark on its own, making it difficult to discern details, it is highly recommended to utilize the "Hue, Saturation, Brightness" adjustment. This tool is invaluable for revealing highlights and any subtle details that might be obscured in dark areas.
For those working on realistic tattoo designs, having multiple versions of a reference image can be extremely beneficial. Printing off or digitally preparing a dark version, a lighter version, and one with intermediate brightness levels will allow you to perceive the full depth and detail of the original image.
The most frequently used adjustments within this feature are saturation and brightness. If you are aiming to convert a color design into a black and gray tattoo, reducing the saturation is the key. Conversely, if you need to identify and emphasize the highlights within an image, increasing the brightness will bring them to the forefront.
The "Paper" Feel on Your iPad
The smooth, slick surface of an iPad screen can feel quite different from the tactile experience of drawing on thicker sketchbook paper. To bridge this gap and create a more familiar drawing sensation, you can apply a matte screen protector to your iPad. These protectors alter the surface texture, providing a friction that more closely mimics the feel of paper, thereby enhancing your drawing comfort and control.
Professional Development in Tattoo Artistry
Pursuing a career in tattooing can be an incredibly fulfilling and financially stable path for artists. However, for many decades, the traditional route to becoming a tattoo artist has been notoriously arduous. The conventional apprenticeship model often requires aspiring artists to dedicate 50-60 hours per week, unpaid, for periods of two to four years. Compounding these demands is the unfortunate reality of a toxic culture that has historically involved the exploitation of apprentices, making entry into the industry exceptionally challenging for newcomers.
Recognizing these systemic barriers, programs like the Artist Accelerator Program have been developed. These online courses offer a structured and simplified approach to learning the art of tattooing, a method that has been proven effective by over 2,500 successful students. Many of these graduates have gone on to establish their own tattoo studios worldwide. Within such programs, the tattooing process is broken down into clear, easy-to-follow modules, typically around nine in number. Crucially, ongoing support is provided through dedicated online communities, such as the Tattooing 101 Mastermind. In these mastermind groups, students can collaborate with their peers, receive answers to their questions, and obtain personalized video feedback on their artwork and tattoo practice from experienced professional tattoo artists.