Adobe InDesign stands as a powerful tool for designers and publishers, offering robust features for creating professional layouts. For those looking to produce booklets, zines, or even full-fledged books, understanding how to leverage InDesign's template capabilities is paramount. This guide delves into the intricacies of setting up InDesign for book creation, from initial document setup and master pages to print-ready export, providing a thorough understanding for users of all levels.
The Power of Book Files in InDesign
At its core, InDesign's "Book File" functionality is a sophisticated system for managing and organizing multiple InDesign documents that collectively form a single, cohesive book. This feature offers significant advantages for larger projects. It allows for the seamless sharing of Styles, such as Paragraph Styles and Character Styles, across all the documents within the book. Furthermore, numbering sequences can be maintained consistently from one document to the next, simplifying the management of page numbers and chapter designations. The ability to make edits efficiently and quickly is another key benefit, as changes can be applied across multiple files more readily. This tutorial focuses on creating the internal pages of a book, with the understanding that the principles can be extended to cover entire book projects.
To begin, you first need to create a Book File. Open InDesign and, from the Welcome Window, select "Book" from the "Create New" list. Alternatively, you can navigate to "File > New > Book." You will then be prompted to provide a name for your Book File and choose a location to save it. Upon saving, a small, initially empty window will appear-this is your Book panel.
Structuring Your Book Project
Before adding documents to your Book File, it's crucial to consider how your book will be divided. For extensive works, splitting the text into individual Chapters is a common and effective strategy. This modular approach aids in organization and management.
Your initial task involves creating a document that will serve as the foundation for your book's formatting Styles. This "style source" document is where you'll define the visual language that will be applied consistently throughout the entire book. A logical starting point is to create a document for the first chapter of your book.
Setting Up New Documents for Print
When creating a new document for your book, whether it's for the first chapter or any subsequent section, adhere to these essential settings:
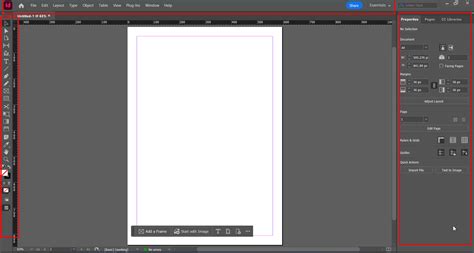
- New Document Window: Go to "File > New Document."
- Intent: Ensure the "Intent" is set to "Print." This optimizes the document for physical output.
- Page Size: This is a critical decision.
- Standard Sizes: You can choose from pre-defined "Letter" or "Half-Letter" sizes, which are suitable for smaller publications like booklets or zines.
- Custom Sizes: For more specific dimensions, select "Custom…" from the "Print Size" drop-down menu. In the "Custom Page Size" window, you can define a "Name" for your custom size, such as "B - Paperback" or "Hardback Novel."
Tailoring Margins for Binding
The way pages are bound significantly impacts margin requirements.
- Paperback (Perfect Bound): When designing for a paperback, observe that the "Inside Margin" (the margin adjacent to the book's spine) should be more generous than the "Outside Margin." This extra space accommodates the few millimeters of the page that will be absorbed into the binding and the fold created by it.
- Hardback (Stitch or Glue Bound): For hardback books, the inside margin needs to be even more generous, especially if the binding involves stitching. For a glue-bound (perfect bound) hardback, regardless of page size, allow an additional 5 mm on the inside margin.
Incorporating Bleed
A "Bleed" is an essential element for print design when content extends to the edge of the page. This includes elements like colored backgrounds or images that cross the page boundary.
- Setting the Bleed: For print, set the Bleed as follows: Top 5 mm, Bottom 5 mm, Inside 0 mm, Outside 5 mm. You won't require a bleed on the inside edge as it typically aligns with the binding.
Harnessing the Power of Master Pages
Master Pages in InDesign are templates that govern the recurring elements of your document, such as page numbers, headers, and footers. They ensure consistency across all pages.
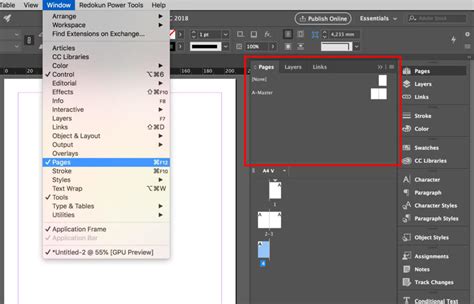
- Accessing the Pages Panel: Open the "Pages Panel" by navigating to "Window > Pages."
- Default Master: At the top of the Pages Panel, you'll see a section with a default "A-Master" spread.
- Editing Master Options: Click in the top-right corner of the Pages Panel to reveal a drop-down menu. Select "Master Options for A-Master…" to open its settings. This master can be designated for pages that begin a chapter.
- Creating a Body Master: To create a master for the standard text-filled pages within chapters, click again in the top-right corner of the Pages Panel. In the "New Master" window, set the "Prefix" to "B" and name the Master "Body - Master."
Implementing Page Numbers and Running Headers
- Page Numbers: On the "Start of Chapter - Master," you can insert page numbers at the bottom of each page. Use the "Type Tool (T)" to create a text frame, stretch it centrally across the margins of the left-hand page, and set your desired font, size, and alignment. Then, go to "Type > Insert Special Characters > Markers > Current Page Number." This inserts a dynamic page number glyph. Copy and paste this text frame to create a second frame for the right-hand page.
- Running Headers: For running headers at the top of pages, remain on the "Start of Chapter - Master." Create two new text frames using the "Type Tool (T)" and place them at the top of the left and right master pages, matching the formatting of your page numbers.
Managing Page Numbering and Sections
InDesign offers flexible options for page numbering, allowing for simple sequential numbering or more complex section-based systems.
Section Numbering Example (Paperback Document)
- Select Page 1: In the Pages Panel, click the "Page 1" icon to select it.
- Numbering & Section Options: Click the right-hand corner of the panel to access the drop-down menu and select "Numbering & Section Options…".
- Configure Section: Check the "Start Page Numbering at:" box, keeping the value at "1." In the "Style" drop-down menu, choose "i, ii, iii, iv…" and click "OK."
- Select Another Page: Now, click on "Page 5" in the Pages Panel.
- Repeat Configuration: Access "Numbering & Section Options…" again. Check "Start Page Numbering at:" and set the value back to "1." This effectively creates a new section starting from page 5 with new numbering.
Adding Documents to Your Book File
Once your individual chapter documents are set up, you can add them to your Book File.
- Open the Book File: If the Book File isn't already open, go to "File > Open" and navigate to where you saved it.
- Add Documents: In the Book panel, click the "+" icon. You will be prompted to locate and select the InDesign document you wish to add. Ensure your documents are saved with descriptive names, such as "Chapter One."
How to Make an InDesign Book Layout Template
Synchronizing Styles and Master Pages
A key advantage of Book Files is the ability to synchronize elements across documents.
- Style Source: By default, the first document added to the book acts as the "style source." You can change this at any time.
- Synchronization Process: When you synchronize, InDesign checks for consistency between the style source and other documents in the book. If elements (styles, swatches, master pages) are missing in a document, they are added from the style source.
- Parent Page Synchronization: Parent pages are synchronized by name. If a parent page with the same name exists in the style source, it will replace the one in the document. This is particularly useful for maintaining consistent headers and footers. It's recommended to synchronize parent pages early in the design process to avoid detaching overridden elements.
Preparing Your Book for Print
Before exporting your InDesign book for printing, it's crucial to ensure all files are correctly set up for the press.
Setting Up for Offset Printing
Printers like PrintNinja emphasize the importance of proper file setup.
- Interior Page Count: When specifying the number of pages for your interior, include your main content pages plus any inside front and back cover pages, and end sheets if your project requires them.
- Margins and Safe Area: Margins are used to define the safe area for your content, ensuring that critical elements are not too close to the edge of the page. If you are not a frequent InDesign user, be aware that your default unit of measurement might be set to picas.
- Image Resolution: For print, an ideal image resolution is 300 pixels/dots per inch (ppi/dpi), though up to 400 ppi/dpi is acceptable.
- Color Conversion:
- If your images are in CMYK, choose "No Color Conversion" in the output settings.
- If your images are in RGB, select "Convert to Destination (Preserve Numbers)" and choose an appropriate profile, such as "Japan Color 2001 Coated" for coated paper or "Japan Color 2001 Uncoated" for uncoated paper.
Exporting to PDF for Print
The final step before sending your book to a printer is exporting it as a high-quality PDF.
- Export Command: Go to "File > Export."
- File Naming and Format: Name your file appropriately (e.g., "Book Jacket Template") and select "Adobe PDF (Print)" from the "Format" drop-down menu.
- PDF Export Settings:
- Adobe PDF Preset: Choose "Press Quality."
- Marks and Bleeds: On the left side of the panel, select "Marks and Bleeds." Check "All Printer's Marks" and "Use Document Bleed Settings."
- Click Export: This will generate a print-ready PDF file.
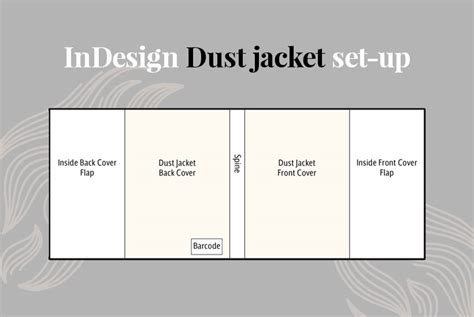
Creating Book Covers and Dust Jackets
InDesign is equally adept at designing book covers and dust jackets, which often involve more intricate layouts and design elements.
Dust Jacket Template Setup
Designing a dust jacket involves setting up each section (front cover, spine, back cover, flaps) as a distinct page or section within your InDesign document.
- New Document: Start with "File > New."
- Page Tool: Select the "Page Tool (Shift-P)" from the Tools panel.
- Page Dimensions: You'll need to define the width and height for each section of the jacket. For instance, a common book size might be 5 inches wide by 8 inches high. The spine's width will depend on the page count of the book.
- Margins and Columns: Adjust margins for each section as needed. For example, the front and back covers might have different margin settings than the flaps. Use "Layout > Margins and Columns" for this.
- Layers: Utilize layers to organize different elements of the design, such as text, images, and background elements. Create new layers by going to "Window > Layers" and selecting "New Layer."
Designing Cover Elements
- Text Styles: Employ Paragraph Styles and Character Styles to maintain consistency in typography for titles, author names, and any other text elements.
- Image Placement: Use the "Rectangle Frame Tool (F)" or "Ellipse Frame Tool (E)" to create frames for images. Place images using "File > Place" (or "Command-D").
- Transparency Effects: InDesign's "Effects" panel ("Object > Effects > Transparency") allows for sophisticated visual treatments like gradient fades, which can add depth and polish to your design.
- Bleeding Elements: Ensure that any background colors or images that extend to the edge of the cover or flaps are extended beyond the trim line to create a "fake" bleed, preventing white slivers after trimming.
Exporting Covers for Print
The export process for covers is similar to exporting the interior pages, using "File > Export" and selecting "Adobe PDF (Print)" with "Press Quality" settings and including printer's marks and bleed.
Advanced Tips and Workflow Enhancements
Beyond the fundamental steps, several advanced techniques and considerations can further streamline your InDesign book creation process.
Utilizing Templates and Assets
- Pre-made Templates: For those who prefer a head start, numerous customizable InDesign book cover and layout templates are available from sources like Envato Elements. These can significantly reduce the initial setup time.
- Asset Management: Keep your project assets (fonts, images, style guides) organized in a dedicated folder to ensure easy access and maintain project integrity.
Style Management and Consistency
- Paragraph and Character Styles: Mastering the use of Paragraph and Character Styles is fundamental. Define styles for headings, body text, captions, and any other recurring text elements. This ensures uniformity and allows for global changes if needed.
- Redefining Styles: If you paste text into InDesign that already has a default style, you can often redefine that style to match your desired formatting, saving considerable time.
Handling Overset Text
When text exceeds the capacity of a text frame, it becomes "overset." InDesign indicates this with a small red plus sign (+) at the bottom of the frame.
- Adding Pages: The most straightforward solution is to add more pages to your document.
- Shift-Click Placement: If you're manually creating new text frames for overset text, holding down the "Shift" key while clicking on the next page will automatically create a new page and link the text frame to it.
- Copy and Paste: As a quick cheat, you can copy and paste the first paragraph and heading from your initial chapter to the beginning of subsequent chapters, then replace the placeholder text with your actual content.
Font Management
Ensure that all necessary fonts are installed on your system before you begin a project, especially when collaborating or sharing files. Missing fonts can lead to significant layout issues.
Conclusion
Creating a book template in Adobe InDesign is a multi-faceted process that requires attention to detail and a strategic approach. From establishing the correct document settings and mastering master pages to managing complex numbering systems and preparing files for print, InDesign offers a comprehensive suite of tools. By understanding and implementing the techniques outlined in this guide, users can confidently create professional, polished books and publications, whether they are crafting a simple booklet or an extensive novel. For those seeking further assistance or looking to expedite the process, exploring pre-made templates and professional services can also be valuable resources.