Adobe Lightroom Classic is a powerful tool for photographers seeking to streamline their editing workflow and achieve consistent, professional-looking results. At the heart of this efficiency lie presets - pre-defined sets of editing adjustments that can be applied to images with a single click. This guide will walk you through the process of installing and leveraging these valuable assets in the latest versions of Lightroom Classic, ensuring you can quickly enhance your photographic vision.
Understanding Lightroom Presets: Your Shortcut to Style
Before diving into the installation mechanics, it's beneficial to understand what Lightroom presets truly are. Essentially, presets are collections of specific adjustments made to the various editing sliders within Lightroom. These adjustments can encompass a wide range of parameters, including but not limited to changes in exposure, contrast, color balance, saturation, sharpness, and even the application of effects like split toning. By saving a particular configuration of these sliders as a preset, you create a reusable tool that allows you to apply a consistent look and feel across multiple images, significantly saving time and effort in your post-processing. They are a fantastic way to apply new styles and effects to your images with just one click.
Installing Presets in Lightroom Classic for Mac and PC
The installation process for Lightroom Classic presets is designed to be straightforward, whether you're working on a Mac or a Windows PC. The instructions are for the latest versions of Adobe Lightroom Classic, released since mid-2018 and utilizing the XMP preset format, requiring at least version 7.3.
Method 1: Importing Presets Directly Through Lightroom Classic
This is the most common and user-friendly method for installing presets.
- Launch Adobe Lightroom Classic: Open the application on your computer.
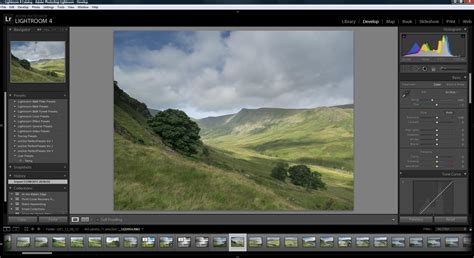
- Navigate to the Develop Module: You can switch to this module by clicking on ‘Develop’ at the top of the screen or by pressing ‘D’ on your keyboard.
- Locate the Presets Panel: On the left-hand side of the Develop module screen, you will find the Presets panel.
- Initiate Preset Import: Click on the small ‘+’ icon situated near the top of the Presets panel.
- Select 'Import Presets': From the dropdown menu that appears, choose the ‘Import Presets’ option.
- Browse for Your Preset Files: A file explorer window will open, allowing you to navigate to the location where your downloaded presets are saved. These files should be in either the
.xmpor.lrtemplateformat. - Select and Import: Choose the presets you wish to install. You have the flexibility to select multiple presets at once. Once selected, click the ‘Import’ button.
After completing these steps, the imported presets will appear in your Presets panel, ready for immediate use.
Method 2: Manual Installation (For .lrtemplate files or specific scenarios)
While importing directly is preferred for .xmp files, manual installation might be necessary for older .lrtemplate files or in specific troubleshooting scenarios.
For Mac Users:
- Locate the Presets Folder:
- Open Finder.
- Click on the ‘Go’ menu at the top of the screen.
- Hold down the ‘Option’ (or ‘Alt’) key. The ‘Library’ option will appear in the menu. Click on ‘Library’.
- Navigate through the following folders:
Application Support>Adobe>Lightroom. - Inside the
Lightroomfolder, you should find a folder namedDevelop Presets. If it doesn't exist, you can create it.
- Copy Preset Files: Copy the folder(s) containing your
.lrtemplatepreset files into theDevelop Presetsfolder. - Restart Lightroom Classic: Close and reopen Lightroom Classic for the changes to take effect.
For Windows Users:
- Locate the Lightroom Presets Folder:
- Open File Explorer.
- Navigate to:
C:\Users\[Your Username]\AppData\Roaming\Adobe\Lightroom\Develop Presets - Note: The
AppDatafolder is hidden by default. To access it, you can either type the full folder path directly into the address bar of File Explorer or enable the ‘Hidden items’ option under the ‘View’ tab in File Explorer.
- Copy Preset Files: Copy the folder(s) containing your
.lrtemplatepreset files into theDevelop Presetsfolder. - Restart Lightroom Classic: Close and reopen Lightroom Classic for the presets to be recognized.
For .xmp files on Windows, a slightly different manual approach might be needed if direct import fails:
- Locate the Camera Raw Settings Folder:
- Navigate to:
C:\Users\[Your Username]\AppData\Roaming\Adobe\CameraRaw\Settings - Again, ensure hidden items are visible in File Explorer.
- Navigate to:
- Copy Preset Files: Copy the
.xmpfiles directly into thisSettingsfolder. - Restart Lightroom Classic: After manually copying the presets, restart Lightroom Classic.
Whether you choose to import presets directly through Lightroom Classic or install them manually, either method will efficiently integrate new creative tools into your workflow.
Installing Presets in Lightroom Mobile (iOS and Android)
Lightroom Mobile offers a streamlined experience for applying presets on your smartphone or tablet, and importantly, you do not need a paid version of Lightroom to use them. The process differs slightly between iOS and Android devices.
For Android Devices:
- Download the .ZIP File: After your purchase, download the
.ZIPfile that starts with "mobile-presets_android…". - Open Lightroom Mobile: Launch the Lightroom Mobile application on your Android device.
- Access the Presets Tab: Slide the toolbar at the bottom of the screen to the right and press the "Presets" tab.
- Import from File Explorer: Your device's file explorer will appear. Navigate to the folder on your phone where you downloaded the
.ZIPfile. Press the.ZIPfile to import the presets directly into the app.
For Apple iOS Devices (iPhone/iPad):
- Download the .ZIP File: After your purchase, download the
.ZIPfile that starts with "mobile-presets_iphone…". - Open the Files App: Once the download is complete, press the download icon (usually in the upper right corner of your screen) to open the "Files" app on your iPhone or iPad.
- Extract the ZIP File: Press on the downloaded
.ZIPfile. The content will be extracted, and a new folder containing the preset files should automatically appear. - Create a New Folder in Lightroom: Open the Lightroom Mobile app on your iPhone. Click the "+" icon in your library and choose to create a new "Folder". Name this new folder "Presets" and open it.
- Create a New Album: Within the "Presets" folder, press "Create New Album" and name the album after the downloaded presets, appending "DNG" to the name (e.g., "Dark & Dramatic DNG").
- Add DNG Files to the Album: Open the newly created album and press the "Add" icon (usually a plus sign) to add new images. Navigate to the folder where you extracted the
.ZIPfile's contents and select all the DNG files. These DNG files are essentially the presets in a compatible format for mobile. - Create Presets from DNGs: Once the DNG files are added to the album, open one of them. Go to the editing screen, tap the three dots (…) in the top right corner, and select "Create Preset".
- Name and Save Your Preset: Name your preset descriptively (e.g., "Dark & Dramatic - 01"). In the "Preset Group" option, select "Create New Preset Group" and name it after the preset pack (e.g., "Dark & Dramatic").
- Important: Deselect Unnecessary Settings: Crucially, before saving, uncheck "Tools", "Details", "Optics", and "Geometry". Under the “Light” tab, uncheck “Exposure”, and under the “Color” tab, ensure “White Balance” is unchecked. This prevents these specific settings from being applied when you use the preset, ensuring it functions as intended.
- Repeat for All DNGs: Repeat steps 7-9 for each DNG file to create all your individual presets within the chosen group.
Once installed on your desktop application, these presets will automatically sync to your mobile device via the cloud if you are using the same Adobe ID.

Leveraging Presets for Enhanced Workflow
Presets are not just about quick edits; they are powerful tools for developing a consistent photographic style. By using presets, you can save valuable time, especially when working with large batches of photos from a single event or shoot. They provide a consistent look and feel across your projects, helping to build brand recognition for your work.
For instance, imagine you've meticulously crafted a set of adjustments for a moody landscape photograph. Saving these as a preset means you can apply that exact mood and tonal balance to other landscape shots with a single click, rather than recreating each step. This is particularly useful for specific genres like moody landscape, travel, and aerial photography, where a cohesive aesthetic is often desired.
Exploring Preset Collections and Resources
The world of Lightroom presets is vast, with numerous creators offering specialized packs. For example, the "Master Collection by Northlandscapes" offers 8 professional preset packs tailored for moody landscape, travel, and aerial photography, bundling a total of 362 presets. Such collections can provide a diverse range of styles to experiment with and integrate into your editing repertoire.
For those seeking deeper knowledge and community support, resources like the "Lightroom Queen Forums" offer a platform to connect with other users, ask questions, and find solutions. Additionally, comprehensive guides like "Adobe Lightroom Classic - The Missing FAQ" can help you overcome common challenges and master advanced techniques, moving beyond basic preset application.
3 Reasons to CREATE YOUR OWN Lightroom PRESETS
Advanced Considerations: Catalog Management and Cross-Platform Use
When working with Lightroom Classic across multiple computers, such as a PC and a Mac, understanding catalog management is key. If you create two separate catalogs and store your imported images on each computer independently, you generally won't encounter significant issues.
However, if you intend to run the same catalog and image files on different operating systems, potential problems can arise due to how Lightroom Classic stores file paths. Lightroom Classic stores two path fields in its database: relativePath and absolutePath.
The relativePath is resolvable only if the path to the catalog file and the path to the image files are on the same volume. Windows uses drive letters (e.g., C:), while macOS does not. As long as the relativePath is resolvable, it doesn't matter which OS you use to open the catalog file.
The absolutePath, on the other hand, attempts to locate your image files on any volume. However, it specifies to the operating system. The absolutePath in Windows includes a drive letter, which is not present in macOS paths. This difference can lead to broken links when transferring catalogs or accessing files across different operating systems if not managed carefully. To avoid these issues, it's often recommended to ensure your image files reside on a drive that is consistently accessible and recognized by both operating systems, or to use relative paths where possible and ensure the catalog and image folders maintain a consistent hierarchical relationship.
By mastering the installation and application of presets, and understanding the nuances of catalog management, you can significantly elevate your photo editing efficiency and creative output within Adobe Lightroom Classic.