Photoshop has evolved into an indispensable tool for a wide array of creative professionals, offering versatile applications for interior design. Its compatibility with industry-standard design software, including AutoCAD for 2D drafting and SketchUp for 3D modeling, makes it a seamless addition to any design workflow. Whether you are a seasoned interior designer, an aspiring student, or a content creator seeking to present compelling visuals, understanding Photoshop's capabilities can significantly elevate your projects. This article delves into practical Photoshop tips and tricks specifically tailored for interior design, focusing on enhancing realism, refining presentations, and streamlining the creative process.
Bringing Designs to Life: From Sketch to Rendered Visuals
The journey from a basic concept to a polished interior design presentation often involves transforming simple drawings into visually appealing and realistic representations. Photoshop excels in this area, allowing designers to build upon existing visuals and imbue them with depth and detail.
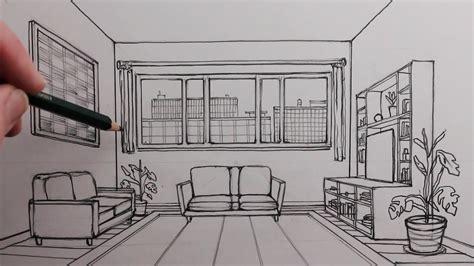
Initially, a basic line drawing, whether generated from CAD software or created by hand, can serve as the foundation. Applying a few simple Photoshop tools can breathe life into these foundational sketches. For instance, a simple black and white drawing can be rendered with the use of gradients, textures, and subtle shading to suggest form and material. Views taken directly from 3D modeling software, such as SketchUp, can also be significantly enhanced. Simple rendered elevations can be transformed by adding sophisticated lighting effects, casting realistic shadows, and introducing atmospheric elements.
The process of adding external landscape views to interior renderings further enhances their realism. This can be achieved by skillfully integrating photographic elements or creating custom digital paintings that complement the interior scheme. Once these foundational skills are mastered, they can be applied to more complex and larger-scale projects, allowing for the creation of fully realized, immersive visual narratives.
The Power of Mockups and Mood Boards
Creating compelling mood boards and project mockups is a fundamental skill for interior designers. These visual tools serve a dual purpose: they provide clarity for personal projects and offer a powerful proof of concept for clients or potential sponsors.
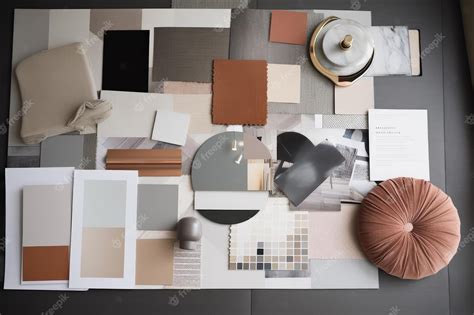
Mood boards are an excellent starting point for establishing a general design vibe. They allow designers to experiment with the interplay of different colors, textures, and materials. By arranging images of furniture, finishes, and inspirational spaces, a cohesive aesthetic can be quickly established. For optimal results, utilizing real estate photos of a space, if available, is highly recommended. These are often captured when the space is empty and clean, minimizing the need for extensive editing around existing furniture or clutter. If such images are not accessible, starting with your own photographs is a viable alternative.
Mockups, on the other hand, allow for a more detailed visualization of specific design elements within a space. They are particularly useful for testing out different paint colors, wallpapers, or even the placement of furniture. The appeal of image-based mockups, using actual photos of a space, lies in their perceived realism, especially when the existing structure of the space is being retained. This approach can feel more tangible than 3D computer renderings, particularly when significant structural changes are not being made.
Essential Photoshop Tools for Interior Design Visualizations
Several key Photoshop tools are instrumental in creating effective mockups and mood boards. Mastering these will significantly streamline your workflow and enhance the quality of your output.
Background Removal Tool: This tool is invaluable for incorporating product images into your designs. When using online product photos, which often feature white backgrounds, the background removal tool allows you to seamlessly integrate them into your scene without the tedious task of manually removing the background from the added element.
Distort and Transform Tools: Once you've isolated an object, the Distort and Transform tools are crucial for fitting it realistically into your background. These tools enable you to manipulate the perspective of the added image to match that of the existing space, ensuring a cohesive and believable visual. This might require a bit of trial and error to achieve the desired perspective alignment.
Polygonal Lasso Tool: This tool is excellent for selecting specific areas within an image, such as a wall. Once a section is selected, you can use other tools, like the Paint Bucket, to fill it with a new color or texture, effectively demonstrating changes like repainting a wall.
Clone Stamp Tool: The Clone Stamp tool is a powerful utility for retouching and refining images. It allows you to sample pixels from one area of an image and paint them onto another. This is incredibly useful for fixing imperfections, such as dead spots in a grass texture, removing unwanted objects like a wheelbarrow and hose from a deck mockup, or covering up elements that were difficult to remove during the photoshoot.
Magic Wand Tool: Similar to the background removal tool, the Magic Wand tool can be used to select areas with similar color values. It's particularly helpful when the background removal tool doesn't achieve the desired precision, or when dealing with more complex backgrounds. After selection, the background can be deleted.
Step by step tutorial Apply design on subject Photoshop Tutorial
Enhancing Interior Design Photography with Photoshop
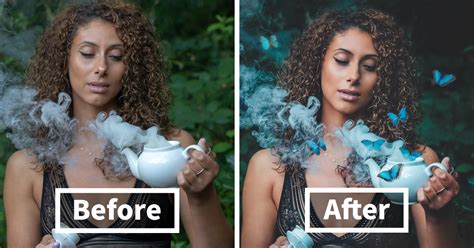
While meticulous preparation during a photoshoot is paramount to minimize post-processing work, Photoshop remains an essential tool for refining interior design photography. Even with the best photographic practices, numerous opportunities exist within Photoshop to clean up, enhance, and perfect final images, especially when pitching projects to design publications.
Key Interior Design Spaces and Photoshop Enhancements
The principles discussed here apply broadly across various interior design spaces, including living rooms, kitchens, and bedrooms. The goal is to ensure images are as clean and high-quality as possible, presenting the designer's vision accurately.
Photoshoot Preparation and Post-Processing Checklist
A comprehensive checklist for photoshoots and post-processing is crucial. This list helps ensure attention is paid to critical details both during the shoot and in the editing phase.
Avoid Overexposed Windows: Overexposed windows appear as a bright, jarring white, obscuring any outdoor scenery. Professional photographers experienced in interior design photography often use a technique called 'bracketing.' This involves taking multiple photos of the same scene at different exposure settings, which are then composited in Photoshop to retain detail in both the interior and exterior views.
Straighten TVs and Reduce Glare: TV glare can be a significant distraction, reflecting unwanted elements into the scene. While difficult to avoid entirely during a shoot, TV glare is relatively easy to remove in Photoshop. Ensuring that elements like TVs and artwork are perfectly straight is also critical for a professional look.
Reduce Glare on Other Surfaces: Similar to TV glare, bright reflections on other glossy surfaces can detract from the image's professionalism. Identifying and mitigating these distractions in Photoshop is key to showcasing the space effectively.
Minimize Excess Visual Information: Many editing tips focus on reducing unnecessary or distracting elements. Loose wires, colored lights on electronics, and prominent logos can clutter an image and draw attention away from the primary design features.
Remove Unnecessary Speakers: Ideally, loose elements like extra speakers should be removed before a photoshoot. If they are present, they can often be removed in post-processing.
Color Correcting Complex Elements: Specific elements, such as stained glass windows, can be time-consuming to color correct in Photoshop. Addressing such features during the shoot, if possible, can save significant editing time.
Adjust Sculpture Placement: Even when a room appears "ready," small adjustments can make a big difference. Elements like sculptures should ideally be positioned so they are fully within the frame or entirely removed. It's important to check photos on a screen during the shoot to identify and rectify such issues.
Remove Unidentifiable Accessories: Objects that are unclear or don't contribute to the narrative of the space, like an extraneous microphone in a shot intended to show a client hosting guests, should be removed. While sometimes easy to fix in Photoshop, it's more efficient to remove them during the shoot.
Remove Cut-Off Elements: Similar to sculptures, partially visible objects that are not identifiable or do not add value should be removed. Using the clone stamp tool to blend these elements with existing textures can be time-consuming. A good rule of thumb: if an object's purpose or identity is unclear in the scene, consider removing it.
Check and Adjust Curtains: Curtains that reach the floor require careful attention. Crumpled or poorly arranged curtains are notoriously difficult to fix in Photoshop and can significantly detract from the overall look of a shot.
Pro Tip for Photoshoot Efficiency
To save time in Photoshop, study images from your favorite design publications. Pay close attention to how elements like sculptures, books, furniture, curtains, and TVs are arranged and how the overall room is styled. This observational practice can inform your shooting and styling decisions.
Specific Photoshop Editing Techniques
Beyond the initial preparation, several specific Photoshop techniques can dramatically improve final images:
Re-cropping Images: Experimenting with different crop ratios can transform an adequate shot into a great one. Cropping can help to eliminate distracting elements, such as an unnecessary window, resulting in a cleaner and more focused image.
Straighten Hanging Elements: Just like TVs and artwork, any hanging fixtures, such as pendant lights, must be perfectly straight. This should be checked during the shoot and in post-processing.
Remove Labels: While clients may sometimes request labels to remain, they can often be removed in Photoshop to achieve a cleaner aesthetic.
Tuck Away Cords: Blind cords, or any other visible wires, can make a shot appear less polished. If possible, tucking them away during the shoot is ideal, but they can also be removed in Photoshop.
Strategic Cropping for Ceiling Elements: If only a small, unidentifiable portion of a ceiling light is visible after cropping, it can be confusing and distracting. Zooming in to remove such partial elements can significantly improve the image's clarity.
Reduce Excess Glare: As a recurring theme, reducing distracting glare on various surfaces is crucial for a professional appearance.
Remove Unintended Objects: An object that appears fine from one angle might look out of place from another. Composing each shot carefully and making minor adjustments to element placement can prevent these issues.
Adjust Bedding Color: In some cases, the color of bedding might be misinterpreted. Photoshop allows for artistic adjustments during the editing process to ensure elements are perceived as intended, such as clarifying that bedding is not a bare mattress.
Remove Unclear Elements: Similar to point 9, if a small element is not clearly identifiable, it likely detracts from the image. This applies to both visible labels and cut-off sculptures.
Remove External Blinds: Fixed external blinds can sometimes appear visually jarring in final interior shots. While potentially more challenging to fix, Photoshop can be used to address these issues.
Zoom to Remove Cut-Off Elements: When composing shots, ensure that elements like nightstands are either fully within the frame or entirely removed. A slight zoom-in crop can often resolve issues with partially visible objects.
Remove Excess Wires and Clutter: Throughout the shooting and editing process, the focus should remain on showcasing the space, not on clutter. Removing extraneous items that do not add to the scene is essential.
Remove Outlets: Electrical outlets, particularly those positioned mid-wall, can be distracting. Vigilance during post-processing is required to identify and remove these elements for a cleaner image.
Fix Seams in Large-Format Prints: For projects utilizing large-format photographic prints, such as on sliding doors, small seams between printed pieces can be corrected in Photoshop.
Remove Unplanned Add-ons: Client requests or unexpected additions, like a corner mirror, can be challenging to remove but are crucial for presenting the designer's original vision and attracting like-minded clients.
Advanced Photoshop Techniques for Interior Designers
Beyond basic retouching, Photoshop offers advanced features that can elevate interior design visualizations to a professional level.
Layer Management and Selection Tools
The foundation of effective Photoshop work lies in understanding and utilizing layers.
Layer-Based Workflow: Creating a new layer for each distinct elementâwalls, furniture, accessoriesâprovides granular control. This allows for easy modification of colors, textures, and positions without affecting other parts of the design. Experimenting with different color schemes or furniture arrangements becomes a straightforward process.
Mastering Selection Tools: Tools like the Magic Wand, Quick Selection, and Lasso variations are indispensable for isolating specific areas. For instance, selecting a sofa to change its upholstery color or texture is made efficient with these tools. Applying changes via layer styles or adjustment layers ensures non-destructive editing.
Brushes, Blending Modes, and Textures
Photoshop's brush engine and blending modes are powerful tools for adding realism and depth.
Custom Brushes: Beyond standard brushes, custom brushes can introduce unique textures and patterns. A brush mimicking wood grain can be used to paint realistic floor textures, while others can simulate stucco, fabric, or other surface finishes. Adjusting brush opacity and blending modes further refines the appearance.
Blending Modes: These modes dictate how layers interact, enabling the creation of realistic shadows, highlights, and atmospheric effects. The 'Multiply' mode is excellent for casting shadows under furniture, adding a sense of grounding, while 'Screen' mode can enhance highlights on reflective surfaces, simulating light play.
Mockup Templates and Smart Objects
Leveraging pre-made resources and advanced layer features can significantly speed up workflow.
Mockup Templates: Using pre-designed mockup templates for items like framed art, cushions, or even entire room scenes can save considerable time. These templates often use Smart Objects, allowing designers to simply drop their designs into designated layers for an instant, professional presentation.
Smart Objects: Layers imported into Photoshop are often automatically converted to Smart Objects. However, any layer can be converted into a Smart Object. This preserves the original image data, allowing for non-destructive scaling, rotation, and filtering. If a layer is obstructing others, holding the Alt key and clicking the eye icon of the desired layer isolates it for focused editing.
Color Correction and Enhancement
Achieving accurate and appealing colors is crucial in interior design.
Color Fill Layers and Blending Modes: A simple yet effective technique for achieving a vintage or stylized look is to create a Color Fill layer (e.g., mustard yellow) and set its blending mode to 'Multiply.' This can subtly alter the overall color cast of an image.
Color Lookup Adjustment Layers: These lesser-known adjustment layers offer a powerful way to apply pre-defined color grades to an image, quickly achieving a specific mood or aesthetic.
Frequency Separation: For high-fashion skin retouching, a technique called frequency separation is used. This involves splitting an image into two layers: one for color and tone (achieved with Gaussian Blur) and another for texture (using a High Pass filter). When set to Linear Light, these layers can be edited independently to refine skin tone and texture without compromising detail.
Adding Dynamic Effects
Photoshop can introduce subtle or dramatic effects to enhance visual interest.
Light Bleed: To help blend images or add a subtle atmospheric glow, create a new layer, paint with a large, soft white brush towards the top of the image, and then reduce the layer's opacity.
Simulated Rain: For added drama, create a new layer, fill it with black, add 'Noise,' apply a slanted 'Motion Blur,' and set the layer's blending mode to 'Screen.' This effectively simulates falling raindrops.
Depth of Field: To add depth, duplicate the image, apply a 'Field Blur' from the Blur Gallery, and then mask out the subject so only the background is blurred.
VHS/Glitch Effects: To emulate vintage aesthetics, duplicate a layer, apply a specific channel separation (e.g., unchecking the 'R' channel) and then offset the layer slightly to create a glitch effect.
Precision Editing and Refinement
Fine-tuning details ensures a polished final product.
Brush Size and Hardness: The square bracket keys
[and]can be used to quickly adjust brush size. HoldingShiftwhile tapping these keys modifies the brush's hardness, offering precise control over edge definition.Guide Creation: Guides can be created by clicking and dragging from the rulers on the side of the canvas, aiding in precise alignment of elements.
Color Banding Reduction: To combat color banding, create a new layer, fill it with black, apply a subtle 'Noise' filter, and set the layer's blending mode to 'Screen.' This smooths out gradient transitions.
Pressure Sensitivity: With a graphics tablet, all brushes can be configured to use pressure sensitivity, allowing for more natural and expressive brushwork.
Unlimited Undos: Photoshop allows for up to 1,000 undo steps, providing ample flexibility to experiment and correct mistakes without concern.
Custom Brushes from Images: Any black and white image can be converted into a custom brush, offering unique artistic possibilities.
Refine Edge Brush: For complex selections, especially with fine details like hair or fur, the Refine Edge Brush within the 'Select and Mask' workspace can significantly improve the accuracy of selections made with tools like the Quick Selection tool.
Conclusion: Elevating Interior Design with Photoshop
Photoshop is more than just an image editing tool; it's a powerful creative suite that empowers interior designers to visualize, refine, and present their work with unparalleled clarity and impact. From crafting initial mood boards and realistic renderings to meticulously retouching photographs for professional portfolios, the techniques explored in this article provide a robust framework for leveraging Photoshop's capabilities. By mastering these tips and tricks, designers can not only enhance the aesthetic appeal of their projects but also communicate their visions more effectively, ultimately leading to more successful collaborations and client satisfaction. The continuous evolution of Photoshop ensures that it will remain at the forefront of digital design tools for years to come.