Discord, a vibrant platform for online communities, thrives on visual identity. From the initial impression of a server icon to the nuanced details of role icons, these elements are crucial for distinguishing communities and expressing individuality. This guide delves into the intricacies of creating compelling visual assets for your Discord server, leveraging intuitive tools like Kapwing to simplify the process. Designing a unique visual identity for Discord just got easier, empowering users to make eye-catching content with a growing collection of resources.
Elevating Your Server with a Distinctive Banner
When your Discord server reaches level 2, a significant perk unlocks: the ability to add a server banner. This feature, achieved with 15 boosts, allows for a prominent background image that creates a distinct server identity for all members to see. Given the valuable real estate this banner occupies, ensuring it looks just right is paramount. This section will cover the essential dimensions, formatting, and arrangement tips to help you create the best server banner possible.
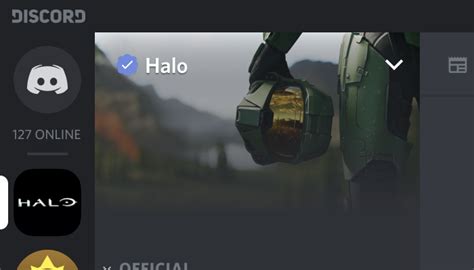
Understanding Optimal Banner Dimensions
The aspect ratio required for a Discord server banner is a common 16:9. However, simply adhering to this ratio isn't enough for optimal display. Discord recommends an image dimension of at least 960x540 pixels. For superior crispness and quality, it's advisable to use a larger 16:9 aspect ratio, such as 1920x1080 or even 2560x1440.
The Kapwing Studio offers a user-friendly environment to crop any photo to the desired 16:9 aspect ratio and resize it to the correct dimensions. To begin, navigate to Kapwing.com in your browser and click "Start Editing." You can then upload a photo from your device or paste a link to an image found online. Alternatively, the "Images" tool within Kapwing allows you to search for suitable banner images using phrases like "mountains wallpaper" or "geometric background." Once your image is loaded, utilize the "Crop" tool to set it to a 16:9 aspect ratio. Subsequently, use the "Output Size" options to ensure your image's dimensions exceed the 960x540 minimum.
Ensuring Key Elements Remain Visible
A critical aspect of setting up your Discord server banner is understanding what will be visible once uploaded. Discord's guidance on the "safe zone" suggests keeping important elements out of the top 28% of the banner, as this area is occupied by the server's name and options button. However, the actual text coverage is closer to the top 22% of the banner photo. On a 960x540 banner, this translates to keeping text and crucial image elements below the top 120 pixels.
Furthermore, it's important to note how the banner displays at the bottom. It gradually fades, blending into Discord's dark gray background at the bottom edge. This means any design elements, text, titles, or significant visuals intended for the lower portion of your banner should be moved closer to the center of the frame to ensure they are visible.
Kapwing can be instrumental in arranging, cropping, and even flipping your banner image to ensure it looks its best within Discord's display constraints. Within the Kapwing Studio, use the "crop" button to frame the most important parts of your photo. You can also add text boxes for customization and flip your image horizontally to keep elements away from the upper-left corner. Once your image is arranged and cropped according to Discord's specifications, click the green "Export Image" button, followed by "Download," to save your banner to your device.
Uploading Your Server Banner
Adding a banner image to your Discord server is a straightforward process once your server has achieved Level 2 status through boosts. Open the server dropdown menu, click on "Server Settings," and then select "Upload Background." Locate the image file on your device or camera roll and upload it to your Discord server.
How to Create an ANIMATED Discord Profile Banner!
Crafting Engaging Animated Server Icons
A distinct server icon is essential for standing out in the crowded landscape of Discord servers. A single user can join up to 100 servers, making a unique visual identity crucial for recognition. A quick search reveals the creativity server owners invest in their icons, with common designs including memes, anime characters, or emotes. For those seeking an even more eye-catching presence, an animated icon is the way to go. Unlocking and uploading an animated icon involves a few key steps.
Unlocking Animated Icon Capabilities
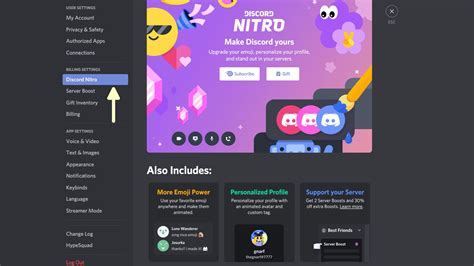
To utilize animated icons, your server needs to reach Level 1 perks, which requires two boosts. There are two primary methods to acquire these boosts. Firstly, upgrading to Discord Nitro automatically grants you two boosts that can be applied to your server. You can find this option by clicking the settings icon next to your profile picture and locating "Discord Nitro" under billing settings. Secondly, you can achieve Level 1 without Nitro by rallying your community to contribute boosts. Reaching out to members who have boosts can help level up the server. Once your server reaches Level 1, you are ready to upload an animated icon.
Creating an Animated Discord Server Icon
The process of creating an animated icon often involves converting a video or an existing GIF. Before you begin, consider the desired perception of your server. Is it fun and relaxed, or does it represent a brand? The chosen icon should help your server make a strong first impression.
Step One: Open the Discord Server Icon TemplateKapwing offers a 512x512 template specifically designed for perfectly sized Discord icons. This free, browser-based editor can be accessed by clicking the "make it" button below the template.
Step Two: Upload Your VideoClick "upload" to import a video from your computer or paste a video URL. Delete any placeholder images. It's advisable to select a video where the main content is centered, as Discord server icons are cropped into circles, meaning the edges will be cut off. You can resize your video to fit the background by dragging the blue anchor points.
Step Three: Isolate a GIF-Worthy SectionScan your video to find the ideal segment for a GIF. Use the "split" tool to cut out this section and delete the remaining parts of the video. Adjust the ends of the clip to create a duration of a few seconds. While audio is removed upon GIF export, you can proactively remove it by lowering the volume bar on the right side of the studio or by right-clicking the video, selecting "detach audio," and then deleting the audio layer.
Step Four: Export and Download Your GIFClick the dropdown arrow next to "export video" and select "export as GIF." Once your server icon has processed, click "download" to save it to your computer.
Step Five: Upload the Animated Icon to DiscordTo upload your newly created animated icon, right-click the existing server image and select "server settings." Then, click "upload image" to add your GIF and click the green "save changes" button at the bottom. Remember, the maximum file size for a Discord animated server icon is 10.24MB. Hovering over the icon with your mouse will reveal the animation.
Designing a Memorable Discord Profile Picture (PFP)
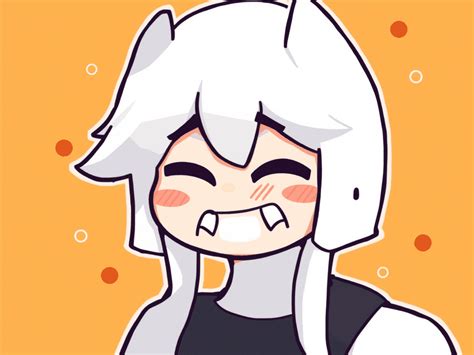
While server identities are crucial, your personal presence on Discord is equally important. Your profile picture (PFP), also known as an avatar, is consistent across all servers you join, unlike your nickname which can vary. This makes your Discord PFP a vital element in representing your online persona. You can use JPG, PNG, or GIF files for your PFP, and many users opt for illustrations, icons, or cartoon characters to express their personality.
Creating a Custom PFP Avatar
Designing a custom PFP involves creating the image or GIF file outside of Discord and then uploading it to your profile. Discord's PFP media uploader lacks editing tools, meaning you cannot rotate, filter, crop, or add padding to an image once it's uploaded. Therefore, preparation is key.
Step 1: Find Your Base PFP ImageConsider the character or personality you wish to embody. Many choose something that personifies them, such as a character, a memorable moment, an illustration, an abstract drawing, or a cartoon. It's also beneficial to consider the servers you frequent and observe other users' PFPs for inspiration.
Step 2: Upload and Resize Your PFP in KapwingNavigate to Kapwing.com and click "Start Editing" to begin a new Studio project. Upload your chosen image. Once your image is loaded, you'll want to crop it into a perfect circle. In Kapwing, select your image layer and drag the "Rounded Corners" button all the way to the right. This transforms your square image into a perfect circle. You also have the option to make the background transparent.
Step 3: Enhance Your PFP with Text, Backgrounds, and FiltersWhile you can download the circular version of your PFP at this stage, Kapwing offers further tools to make it more unique.
- Remove Background: Use the "Erase" button to remove the background of your picture, a popular PFP tactic. You can then upload a new image to serve as the background.
- Add Overlays and Adjustments: Utilize the "Adjust" tool to modify the color or contrast of your PFP. The "Text" and "Images" tools allow you to add text, stickers, GIFs, or other overlays. These are particularly useful for showing support for movements like Black Lives Matter, Pride, or political campaigns. You can also decorate your PFP with emojis directly from the Upload modal.
- Add a Border: The "Outline" button in the right-hand column enables you to add a colored border to your PFP. You can adjust the thickness and resize it to your preference.
- Incorporate Text: Add and style text to convey a message or create a meme. Select the "Text" button in the left toolbar, enter your desired text, and use the tools on the right to customize its font, color, style, position, and animation.
To make your PFP a GIF, add a text animation or a video clip. Once you have a short clip (around a second or less), select the "Settings" button (gear icon) and choose "GIF" to process your avatar as an animated GIF file. Note that the current file size limit for PFPs is 10.24 MB, so GIF avatars should typically be under a second long and ideally have a white background rather than a transparent one.
Step 4: Upload Your PFP to DiscordWhen you've finished designing your Discord PFP, click "Publish" to process the file, then "Download" to save it to your device. In Discord, go to "Edit" and click or tap on your profile avatar to browse your files and upload your new, circular PFP. Since you've already formatted it, no further zooming or repositioning will be necessary.
How to Create an ANIMATED Discord Profile Banner!
Implementing Custom Discord Role Icons
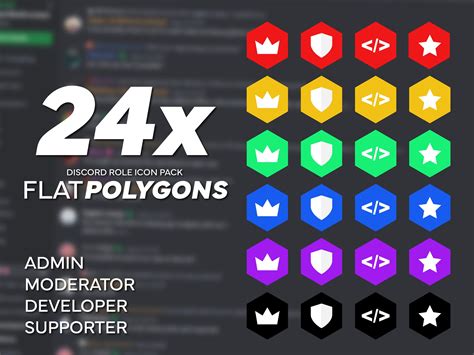
Discord server role icons, introduced for Level 2 servers, add another layer of visual customization and organization. These 64x64 pixel icons appear next to a user's name in the member list or chat, aiding in identification and improving server aesthetics. Owners can leverage this feature to align with various themes, with tokens, badges, and emblems serving as excellent examples for role icons.
Designing and Uploading Role Icons
To ensure visibility, it's crucial to design role icons that are visually appealing and easily discernible. Centering the icon within the 64x64 pixel canvas is recommended to prevent cropping issues. Both JPG and PNG files are compatible for role icons.
Step One: Find or Create a Role Icon ImageBrainstorm role icons that are visually engaging and align with your server's identity. Images with minimal text or busy backgrounds are best for clarity. Consider using tokens, badges, or emblems as inspiration.
Step Two: Upload and Resize the Image in Kapwing StudioKapwing, a free browser-based editor, is ideal for this task. Create a new workspace or click "Start Editing." You can upload your image by clicking "Upload," pasting an image link, or dragging and dropping the file onto the canvas. Once the image is loaded, navigate to "Custom" under "Output size" on the right side of the Studio and change the dimensions to 64x64 pixels. If you're still searching for the perfect image, Kapwing's "Plugins" feature allows you to browse high-quality images from Pexels, Unsplash, and Pixabay.
You can further refine your role icon using Kapwing's editing tools. The "Adjust" tool allows you to modify parameters like brightness and contrast, while "Filters" offers 17 distinct visual options. The "crop" tool can be used to highlight a specific portion of an image before resizing the canvas again to 64x64 pixels.
Step Three: Export and Download Your Role IconWhen you've finished editing, click "Export Image" in the top right corner. After the icon processes, save the image to your device with a memorable filename.
Step Four: Upload the Role Icon to DiscordTo upload your custom role icon, launch your Discord server and click the down carrot next to the server's name in the upper-left corner. Select "Server Settings," then "Roles." Choose the role you wish to customize. Under "Role Icon," click "Choose Image," then "Browse Files" to upload your 64x64 image. Ensure your image is under 256kb to display correctly. Finally, click the green "Save" button at the bottom of the screen. Your custom role icon will now be visible to your server members.
By leveraging these tools and techniques, you can significantly enhance the visual appeal and distinctiveness of your Discord server, fostering a more engaging and personalized experience for all members.