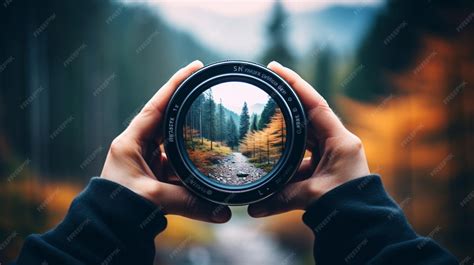
Lens flare, a phenomenon that occurs when intense light sources hit a camera lens, can be a fleeting distraction or a powerful creative tool. While often manifesting as distracting concentric circles of light or chromatic aberrations, lens flare can also add a dramatic, atmospheric, or even magical quality to an image. Photoshop offers a versatile suite of tools to both simulate and refine this optical effect, allowing photographers and digital artists to control its appearance with precision. This tutorial explores various methods for incorporating lens flare into your images, ranging from subtle, non-destructive application using the Lens Flare filter to the creation of custom lens flare brushes for repeated use.
Understanding the Nature of Lens Flare
Lens flare is an optical artifact caused by the scattering of light within the various glass elements of a camera lens. When a bright light source, such as the sun or a powerful artificial light, enters the lens at a specific angle, light rays can reflect off internal surfaces. These reflections can manifest as ghost images, streaks, or a general haziness that overlays the intended photograph. The type and intensity of the lens flare depend on several factors: the intensity and angle of the light source, the design and number of optical elements within the lens, and the presence of anti-glare coatings. While some lenses are designed with advanced coatings to minimize flare, it can still occur, especially when shooting directly into bright lights.
Method 1: Non-Destructive Lens Flare with Smart Filters
One of the most effective ways to incorporate lens flare into an image while maintaining flexibility is by utilizing Photoshop's Lens Flare filter in conjunction with Smart Objects. This approach ensures that the filter can be adjusted, removed, or modified at any time without permanently altering the original image data.
Setting Up for Non-Destructive Editing
Begin by opening your image in Photoshop. To ensure non-destructive editing, convert your background layer into a Smart Object. This can be done by right-clicking on the layer in the Layers panel and selecting "Convert to Smart Object." Alternatively, you can press Ctrl+Alt+G (Windows) or Cmd+Option+G (Mac).
Initial Placement and Adjustment
To accurately position the lens flare, a common technique involves applying the filter to the background layer first, then undoing it. This allows you to preview the placement and settings. Go to Filter > Render > Lens Flare. A dialog box will appear, offering various lens types such as "Movie Prime," "50-300mm Zoom," "35mm Prime," and "105mm Prime." Each type produces a distinct visual characteristic. For this initial setup, you can select any type and increase the brightness to make the flare visible in the preview area.
A crosshair within the preview window indicates the center of the flare. You can click and drag this crosshair to reposition the lens flare. For instance, if you want the flare to appear from the upper right corner, you would drag the crosshair to that general area. Once you have an approximate position, adjust the brightness slider. When satisfied with the preview, click "OK." Photoshop will apply the lens flare directly to your image.
Undoing and Reapplying on a Separate Layer
The crucial step for non-destructive editing is to undo the applied lens flare: go to Edit > Undo Lens Flare (or use the shortcut Ctrl+Z/Cmd+Z). Now, create a new layer. For added control, hold down the Option key (Mac) or Alt key (Windows) while clicking the "Create New Layer" icon at the bottom of the Layers panel. This will open the "New Layer" dialog box.
Change the "Mode" (blend mode) of this new layer to "Overlay." Then, select "Fill with Overlay-neutral color (50% gray)." While this fills the layer with 50% gray, it will appear invisible in the image area because the Overlay blend mode doesn't display 50% gray. However, this gray fill is essential because Photoshop's filters require pixel data to operate on.
Applying the Lens Flare as a Smart Filter
With the new layer set up and filled with 50% gray, right-click on this layer in the Layers panel and select "Convert to Smart Object." This is key to making the subsequent filter a "Smart Filter." Now, go back to Filter > Render > Lens Flare. Since you previously set up the position and brightness, Photoshop will remember these settings. Simply click "OK" to apply the lens flare to this Smart Object layer. You will now see the lens flare on your image, but because it's a Smart Filter, you can double-click on "Lens Flare" under the layer in the Layers panel to re-open the dialog and make further adjustments to its position, brightness, or type at any time.
Refining the Lens Flare
Often, the default lens flare can appear a bit harsh or contain distracting circular artifacts. To soften these, you can add a Gaussian Blur. With the lens flare layer still selected, go to Filter > Blur > Gaussian Blur. Apply a subtle blur, perhaps around 3 pixels, to soften the edges and make the flare look more integrated.
To further refine the intensity and distribution of the flare, you can use layer masks. Add a layer mask to the lens flare layer by clicking the "Add layer mask" icon at the bottom of the Layers panel. Select the Brush Tool (B), set its opacity to around 50%, and choose black as your foreground color. By painting with black on the layer mask, you can selectively hide parts of the lens flare. For example, if the upper right corner is too bright, you can paint over it with black to reduce its intensity. You can paint multiple times to gradually decrease the brightness, allowing you to control exactly where the flare is most prominent and where it recedes.
Photoshop Layer Masks Explained in 7 Minutes!
Method 2: Creating a Lens Flare Brush
For scenarios where you need to apply lens flare effects repeatedly or with greater artistic control, creating a custom lens flare brush is an excellent solution. This method involves generating the lens flare on a separate document and then defining it as a brush preset.
Generating the Lens Flare for a Brush
Start by creating a new document in Photoshop with dimensions suitable for a brush, such as 1000 pixels wide by 300 pixels high. Fill this new layer with black using Edit > Fill > Black.
Next, go to Filter > Render > Lens Flare. Choose the desired lens type and adjust the brightness. Position the flare in the preview window where you want the center of your brush to be. Click "OK."
Now, to make the lens flare more dynamic and less like a single static element, you can apply additional filters. For instance, you could add a subtle Filter > Blur > Gaussian Blur to soften it. To create more scattered light effects, you might experiment with Filter > Stylize > Solarize or other filters that break up the light.
Defining the Brush Preset
Once you are satisfied with the appearance of the lens flare on your black background, it's time to define it as a brush. Go to Edit > Define Brush Preset. Give your brush a descriptive name, like "Custom Lens Flare 1." Click "OK."
You can now access this brush from the Brush Tool (B). Select your newly created lens flare brush from the brush presets. You can then use this brush on any layer, with any blend mode, to add lens flare effects to your images. For example, you could create a new layer, set its blend mode to "Screen" or "Linear Dodge (Add)," and then paint with your lens flare brush. Adjusting the brush size, opacity, and flow will give you fine-tuned control over the intensity and spread of the flare.
Method 3: Using the Gradient Tool for Subtle Light Effects
The Gradient Tool can also be employed to create subtle, radiating light effects that mimic certain types of lens flares. This method is particularly useful for adding a soft glow or a gentle light source.
Applying the Gradient
Select the Gradient Tool from the Tools Panel. In the options bar at the top, choose the "Foreground to Transparent" gradient. Set your foreground color to a bright color that would be representative of your light source, such as a warm yellow or orange for sunlight.
On your image, create a new layer. Position your cursor at the point where you want the light source to originate. Click and drag the gradient tool towards the area where you want the light to dissipate. The length and angle of your drag will determine the spread and direction of the gradient. You can experiment with different foreground colors and drag distances to achieve various subtle lighting effects.
Method 4: PNG Lens Flare Overlays
A quick and accessible method for adding lens flare is to use pre-made PNG files. Many websites offer free or premium lens flare overlays that you can download. These are typically images with transparent backgrounds, making them easy to integrate into your Photoshop workflow.
Integrating PNG Overlays
Download a lens flare PNG file. Open your image in Photoshop and drag the PNG file into your document. It will appear on a new layer. You can then move, resize, and rotate this layer to position the lens flare as desired.
To blend the PNG overlay seamlessly with your image, experiment with different blend modes in the Layers panel. "Screen" is often a good starting point, as it will make the black transparent background disappear, leaving only the light effect. Other blend modes like "Lighten," "Linear Dodge (Add)," or "Screen (Projects)" can also yield interesting results. Adjust the layer's opacity to control the intensity of the flare.
Photoshop Layer Masks Explained in 7 Minutes!
Considerations for Natural-Looking Lens Flare
Regardless of the method used, achieving a natural-looking lens flare requires careful consideration of the original image:
- Source of Light: Always ensure your image has a visible or implied strong light source. Adding a lens flare to a dimly lit scene without a clear light source will look artificial. The direction of the added flare should align with the direction of the existing light.
- Subtlety: Often, less is more. Overly dramatic or large lens flares can distract from the main subject. Aim for subtle enhancements that add depth and atmosphere.
- Aperture Simulation: The appearance of lens flare can be influenced by the camera's aperture. Wide apertures (low f-numbers) can result in softer, more orb-like flares, while smaller apertures (high f-numbers) can produce more defined starbursts. While Photoshop's filter offers some simulation, remember that real-world aperture plays a role.
- Color Matching: Use adjustment layers like Hue/Saturation to match the color of your lens flare to the dominant colors in your image. This helps in creating a cohesive and believable effect.
- Shadows: If you're adding a strong light source, consider if it would cast shadows in your image. Adding subtle shadows can enhance realism, especially in composite images.
By understanding the principles of lens flare and leveraging Photoshop's powerful tools, you can effectively transform ordinary images into visually compelling compositions, adding a touch of cinematic flair or a subtle atmospheric enhancement.