When the real storm eludes your camera lens, the digital realm offers a powerful alternative. You can still invite dozens of different lightning strikes onto your Photoshop canvases, transforming ordinary images into dramatic scenes. Real lightning, in its raw photographic form, is one of the most difficult effects to capture. However, with a few essential tools and adjustment layers within Photoshop, you can effectively turn a photograph of lightning into a versatile lightning bolt brush. Photoshop brushes are incredibly adaptable tools; you can meticulously adjust their color, opacity, and a myriad of other elements to achieve the precise electric spark your creative vision demands. For those seeking a more stylized, less realistic lightning bolt, the process can be simplified by foregoing a photograph altogether. Instead, you can simply draw a black lightning bolt on a white background using Photoshop's Brush or Pen tools. Furthermore, Photoshop offers a suite of lightening tools designed to enhance the overall illumination and mood of your digital artwork, proving that the power to create is at your fingertips.
Creating Your Custom Lightning Brush: From Photo to Brush Tip
The journey to crafting your own lightning brush begins with a foundational element: a suitable image.
Finding the Perfect Lightning Reference
First, locate an actual picture of lightning that aligns with the aesthetic and scale you aim to achieve in your composite image. The quality and character of your source image will directly influence the final brush.
Grayscale Conversion for Brush Definition
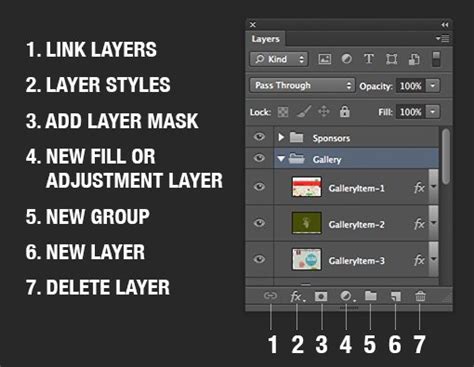
To prepare your lightning image for brush creation, it needs to be converted to grayscale. Click "Create New Fill or Adjustment Layer" in the Layers panel and select the "Gradient Map" option. Ensure this new layer is positioned directly above your original background layer. Set your colors to black on white. This crucial step will render your image in grayscale, and importantly, it will ensure your lightning bolt appears black against a white background, a prerequisite for defining a brush.
Fine-Tuning Contrast with Levels
Next, it's time to fine-tune the tonal range to achieve a starker black and white contrast. Once again, click "Create New Fill or Adjustment Layer" in the Layers panel and choose "Levels." This adjustment layer will allow you to precisely control the highlights and shadows, ensuring the lightning bolt is pure black and the background is pure white.
Isolating the Lightning Bolt
When defining a brush in Photoshop, the dark areas of your image will become the brush tip. Therefore, any areas of shadow or darkness that are not part of the desired lightning bolt must be meticulously removed. To do this, click the plus icon to create a new layer and position it directly above your original background layer. Select black as your foreground color. Utilizing the Brush tool, carefully paint over and conceal any unwanted dark areas, ensuring only the lightning bolt remains clearly defined.
Defining the Brush Preset
With your lightning bolt now isolated as a black shape on a white background, you are ready to transform it into a brush. Ensure both the Brush tool is active and the layer containing your isolated lightning image is selected. Navigate to "Edit" > "Define Brush Preset." A dialog box will appear, prompting you to name your new brush. Once you confirm, you have successfully created a custom lightning brush, ready for immediate use.
Applying and Manipulating Lightning Brushes
Having created your lightning brush, the next phase involves its application and the subsequent manipulation to ensure it seamlessly integrates into your scene.
Importing and Placing the Brush
Begin by opening your target photograph in Photoshop. If you're working with an existing image that has already been converted to black and white, you can proceed directly. Drop your image into Photoshop. Navigate to the options bar at the top of the screen. Select a lightning brush from your newly created presets. To add the lightning to your image, create a new layer above your background layer. This is a critical step to avoid damaging the original image.
Positioning and Sizing the Lightning
Hover the brush over your image without clicking to preview its placement. You'll likely find the initial size isn't quite right. Use the square bracket keys ([ and ]) on your keyboard to adjust the brush size until it's appropriate. Once you've determined the ideal location, click once to apply the lightning. For added intensity, you can click a second time without moving the mouse.
Transforming and Refining the Lightning
Because the lightning is now on its own layer, you have complete control over its positioning and form. You can effortlessly move the lightning slightly left or right, or even up and down. Furthermore, you can transform the scale of the lightning. If you like the overall appearance but wish it were longer or wider, the Free Transform tool (Ctrl+T or Cmd+T) is your ally. A bounding box with handles will appear around the lightning. Dragging these handles allows you to resize and reshape the lightning. Holding down the Ctrl (Win) or Command (Mac) key temporarily switches you to Distort mode, offering even greater freedom in manipulating the handles for more complex transformations.
Free Transform and the Shift Key in Photoshop
Enhancing Realism and Adding Dynamic Effects
A raw lightning brush application is just the beginning. True artistry lies in the subtle enhancements that bring the digital lightning to life.
Adding a Natural Glow
A flash of lightning is rarely without an accompanying aura of light. To simulate this, duplicate the layer containing your lightning (Ctrl+J or Cmd+J). Apply a Gaussian Blur filter to this duplicated layer (Filter > Blur > Gaussian Blur). Adjust the Radius value to create a soft glow around the lightning. Experiment with the blur radius until it looks natural within your scene. You can further intensify this glow by duplicating the blurred layer again or by lowering the layer's opacity to achieve a more subtle effect. The Opacity slider is located at the top of the Layers panel.
Coloring the Lightning
While white or blue lightning is common, you can imbue your lightning with any color imaginable. Select the lightning layer and navigate to "Image" > "Adjustments" > "Hue/Saturation." Check the "Colorize" option. Use the Hue slider to select your desired color, and then adjust the Saturation slider to control the intensity of the color. For instance, a Hue value of 232 might yield a blue/purple hue, while a Saturation of 50% provides a vibrant appearance.
Creating Highlights and Refinements
To add further depth and realism, the Dodge Tool can be employed to create bright highlights. Set the Dodge Tool's Range to "Highlights" and ensure its Hardness is set to 0% for the softest possible edges. Carefully paint over areas where light would naturally reflect or intensify. Each pass with the Dodge Tool will subtly brighten the area, allowing for precise control over the highlights. If the highlights become too intense, you can always lower the opacity of the Dodge Tool layer or the overall lightning layer.
Blending Options for Seamless Integration
For quick alterations to how your lightning appears to interact with the underlying image, explore the Layer Styles. Navigate to "Layer" > "Layer Style" > "Blending Options." Here, you can experiment with various blend modes to control how the lightning layer merges with the layers beneath it, contributing to a more authentic integration into the scene.

Alternative Methods: Drawing Lightning from Scratch
When a photographic source isn't available or desired, Photoshop's tools allow for the direct creation of stylized lightning.
Drawing the Initial Stroke
Start with a new document and a white background. Select the Brush tool (B) and set your foreground color to black. Choose a round, hard-edged brush. For precise control, consider using the Pen tool to create a path that defines the lightning's shape, then stroke that path with your brush. Alternatively, you can directly paint a jagged black stroke on the canvas where you envision the lightning bolt appearing.
Refining the Stroke with Filters
To give the painted stroke a more organic, electric quality, a series of filters can be applied. After creating your black stroke, you might use a filter like "Difference Clouds" (Filter > Render > Difference Clouds). This filter can generate complex, random patterns that resemble electrical discharges. Following this, the "Levels" adjustment (Ctrl+L or Cmd+L) is crucial. Use the black and gray sliders to darken the surrounding areas, making the lightning bolt stand out sharply against a black background. It's important to maintain a degree of softness to the edges of the lightning to avoid a harsh, artificial look.
Softening Edges and Cleaning Up
After applying filters, it's often necessary to refine the edges. You can use a softer brush with reduced hardness (around 50%) to paint over any remaining unwanted gray areas, ensuring a clean transition. The Gaussian Blur filter can also be used to soften edges where needed, influencing the width and intensity of the final lightning bolt.
Advanced Techniques and Creative Exploration
The power of Photoshop lies in its layered approach, allowing for complex compositions and unique effects.
Layer Masks for Non-Destructive Editing
Layer masks are indispensable for fine-tuning and concealing different areas of your image nondestructively. By using a soft brush with a layer mask, you can gradually reveal or hide parts of your lightning, allowing for seamless blending and precise control over its appearance within the scene.
Understanding Blend Modes
Beyond the basic Blending Options, understanding various blend modes (such as "Screen," "Linear Dodge (Add)," or "Color Dodge") can dramatically alter how your lightning interacts with the background. Experimenting with these modes can unlock unique visual effects and contribute significantly to the realism or stylization of your lightning. For instance, "Screen" or "Linear Dodge (Add)" are often excellent choices for making bright, luminous elements like lightning pop against darker backgrounds.
Iterative Refinement and Duplication
Don't hesitate to duplicate your lightning layers and apply transformations, filters, or adjustments to them individually. This allows for the creation of multi-branched lightning, varying intensities, and complex electrical phenomena. Reuse elements by flipping and rotating them to build more elaborate compositions efficiently. Merging these individual lightning elements together carefully, ensuring they don't merge into the background, consolidates your creation for further manipulation.
Thematic Applications: Spooky Scenes and Beyond
The ability to create realistic or stylized lightning opens up a world of creative possibilities. For instance, during the Halloween season, adding realistic lightning to an image of a cemetery can instantly set a spooky and atmospheric scene. The tutorial by Blue Lightning TV Photoshop, while sometimes missing explicit step-by-step instructions for every detail, highlights the potential for creating unique lightning from scratch, emphasizing that the creator's imagination is the primary limitation.

The evolution of Photoshop tutorials, such as those that have progressed significantly over the years, showcases the continuous development of techniques. What might have been considered advanced 13 years ago is now a fundamental skill. The emphasis remains on empowering users to create their own unique lightning effects, rather than simply dropping in pre-made assets. This approach fosters a deeper understanding of Photoshop's capabilities and encourages genuine artistic expression. The process of learning to create lightning in Photoshop is a journey of exploration, where each adjustment layer, filter, and brush stroke contributes to a powerful and dynamic visual outcome.