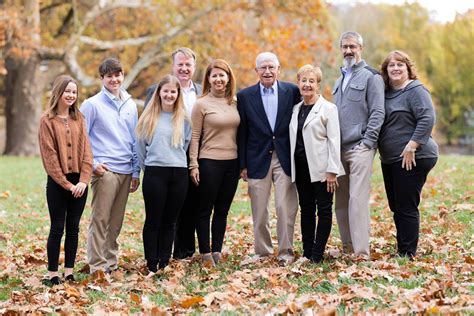
Creating captivating family portraits that resonate with emotion and professionalism is a goal for many photographers, from seasoned professionals to enthusiastic parents capturing cherished moments. While the perfect shot often relies on a blend of the right expression, a fleeting moment, and sometimes a bit of patience with younger subjects, the post-processing stage plays a crucial role in elevating these images. Adobe Lightroom, a powerful and versatile editing software, stands as a perfect application for this task. This tutorial will guide you through leveraging Lightroom presets to transform your family photographs, offering a streamlined approach to achieving breathtaking results, whether you're a professional photographer or a parent documenting your family's journey.
The Power of Presets in Family Photography
Presets in Lightroom are essentially pre-configured editing settings that can be applied to an image with a single click. They are a fantastic tool for achieving a consistent look and feel across a series of photos, saving significant time and effort in the editing process. For family photography, where capturing genuine moments often involves dealing with varying lighting conditions and the unpredictable nature of children, presets offer a rapid path to a polished and professional output.
The Embrace Presets collection, for instance, is specifically designed to work harmoniously with family photography, newborn sessions, and portraits. These presets are compatible with a wide array of camera types and offer numerous collection options to suit diverse editing styles and needs. Whether you aim for a timeless feel with strong, faded colors or a more vibrant and contemporary aesthetic, there’s a preset collection to match. It's important to note that while some specific presets, like "Wanderlust," may be retired, the underlying philosophy of creating impactful edits remains.
For amateur photographers or parents looking to enhance their family photos, using presets can be a significant cost-saver compared to professional photoshoots and extensive editing services. The goal is to take any family portrait to the next level, providing a gorgeous Lightroom preset collection that aligns with your vision.
Understanding Your Editing Style and Goals
Before diving into applying presets, it's essential to consider the mood and aesthetic you wish to convey. Are you aiming for a colorful and vibrant portrayal of your family's joy, or do your clients and family members prefer more neutral and understated photographs? By answering this question, you can begin to sort through the vast array of available presets to find those that best align with your desired outcome.
The Embrace Presets, for example, are known for their moody yet vibrant qualities, designed to help photographers create breathtaking edits. They work well with any style and color palette, offering flexibility and adaptability. This adaptability is key, as even the best presets may require slight adjustments to perfectly suit a specific image.
The Lightroom Editing Workflow: A Step-by-Step Approach
While presets provide a powerful starting point, a nuanced editing process often involves a few key adjustments. Professional photographer Jasmin Jade, who transitioned from family photography to boudoir, shares a simple, 11-step process for beautiful portrait editing in Lightroom. This process can be adapted and applied even if you're using other editing software like Capture One, ON1 PhotoRAW, ACDSee, or Luminar, as the fundamental principles of image manipulation remain consistent.
It's crucial to remember that every photograph is unique. Lighting, color temperature, and subject characteristics vary from shot to shot. Therefore, while a standardized process is beneficial, be prepared to make minor tweaks to ensure optimal results for each individual image.
Step 1: Initial Import and Presets
Many photographers, myself included, like to start by applying a sharpening preset upon import. This simple step can give RAW images a bit of extra "pop" and significantly cut down on editing time, especially when working with a large volume of images from a session. In Lightroom, you can achieve this by navigating to the "Apply During Import" tab in the righthand panel.
Lightroom Just Made Presets Obsolete (Try This!)
Step 2: Color Correction and White Balance
Every photograph features a slightly different tint and temperature, influenced by the color of the light and the shooting location. Fortunately, color correction is a straightforward process. A common method is to identify a neutral surface within the image - an area that should ideally be pure white or gray. Once identified, select this area with the White Balance Eyedropper tool. This action will help to neutralize any color casts. For instance, if an image appears too cool (bluish), you'll need to warm it up using this tool or by manually adjusting the temperature slider.
Step 3: Adjusting Exposure, Highlights, and Shadows
After addressing the overall color cast, take a careful look at your portrait subject’s skin tones, hair, and background. Adjusting the Highlights and Shadows sliders is a critical step in refining the image's tonal range. A common adjustment involves boosting the shadows to reveal more detail in darker areas while dropping the highlights to prevent blown-out areas in brighter parts of the image. For example, if a model's skin tone appears too light and their hair and background too dark, these sliders will be instrumental in balancing the exposure.
Step 4: Enhancing Vibrance and Saturation
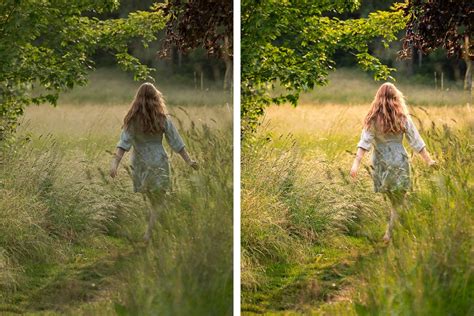
Once the foundational exposure and tonal adjustments are made, it’s time to bring your portrait to life with color. You can increase the Vibrance and Saturation sliders to add richness and depth to the colors. Vibrance is particularly useful as it intelligently boosts muted colors while protecting already saturated tones, preventing an unnatural look. Increasing the Whites slider can also add a bit more "punch" to the image. After making these adjustments, toggling the before and after view (by pressing the "\" key) is highly recommended to assess the impact of your edits.
Step 5: Cropping for Composition
Cropping can be done at various stages of the editing workflow. Some photographers prefer to crop early to establish the final composition, while others find it more effective to do so at the end, after all other adjustments have been made. Cropping can help to refine the framing, remove distracting elements, and emphasize the main subject.
Step 6: Portrait-Specific Edits: Skin Softening
Now, it's time to focus on the details that make a portrait truly shine, starting with the skin. Select the Brush mask tool in Lightroom. The specific adjustments will vary depending on the subject's skin type and the desired effect. A common technique for skin softening involves adjusting settings to even out skin tones and impart a soft, glowing appearance. If the brush inadvertently covers areas like eyes, eyebrows, mouth, nostrils, or hair, you can use the "Subtract" option with a second brush to refine the masked area.
Step 7: Enhancing the Eyes
Zooming in close is essential for detailed portrait work, and the eyes are often the focal point. Use the Brush tool again to add sparkle and definition to the eyes. Boosting Clarity slightly can enhance the texture and detail within the iris. Many photographers perform eye edits in two steps. This allows for increased saturation of the iris and a subtle lift with an increased Whites adjustment, adding a catchlight and making the eyes appear more luminous. It's important to be subtle with these adjustments to maintain a natural look.
Step 8: Refining Mouth and Teeth
Some subjects may benefit from subtle adjustments to their mouth area, while others are perfectly fine as they are. Always zoom in to assess the details. To lighten teeth, use the Brush tool, decrease the saturation, and increase the exposure in the targeted area. Again, subtlety is key to avoid an unnatural, overly bright appearance.
Step 9: Subject-Background Separation
The final step in this portrait editing system is to ensure the subject "pops" off the background. If the subject-background separation is already sufficient, you may be done. However, if the subject blends too much with the background, further adjustments might be needed. This could involve subtle dodging and burning, or adjusting contrast and color selectively to create more depth.
Step 10: Review and Refine
Once you've completed the targeted adjustments, take a step back and review your portrait. Does the subject command attention? Do the colors look natural and appealing? Are there any areas that still require attention? This is the stage for making final, minor tweaks to ensure overall harmony and impact.
Step 11: Saving Your Edits as a New Preset (Optional)
If you've developed a unique editing style through these adjustments that you'd like to replicate consistently, you can save your final settings as a new custom preset. This allows you to apply your refined workflow to future portraits with ease.
Beyond Presets: The Role of the Photographer
While presets are powerful tools, they are not a substitute for good photography. The underlying skills of composition, lighting, and understanding your subject remain paramount. Photographer Karen Quist, who transitioned from portraiture to food photography, emphasizes that capturing the right expression and moment often requires multiple cues, retakes, prompts, and a suitable location, especially when children are involved.
The goal at Visual Flow, as described by Pye Jirsa, is to achieve a final, professional product in a single click for each image, then apply those settings across similar images with minor tweaks. This efficiency is a hallmark of professional workflows, enabled by well-chosen and well-applied presets. The rich, organic, and earthy vibe seen in recent sessions utilizing the "Mood Pack" exemplifies how presets can enhance the narrative nature of family images.
Ultimately, mastering Lightroom presets for family portraits is about understanding the tools available, developing a consistent workflow, and knowing when and how to make those crucial, subtle adjustments. The ability to confidently improve your images with post-processing magic is within reach. So, grab a portrait and practice - the journey to stunning family photography is an ongoing and rewarding one.