In the dynamic world of portrait photography, efficiency and consistency are paramount. Professional photographers often find themselves managing hundreds, if not thousands, of images from a single session. This is where the power of Lightroom Develop Presets can significantly streamline the editing workflow, transforming daunting tasks into manageable processes. A Develop Preset in Lightroom is essentially a saved collection of editing adjustments made within the Develop Module. The core idea is to capture a desired aesthetic, a specific look, and then apply it effortlessly to multiple photographs, saving invaluable time and ensuring a cohesive final gallery.
Understanding Lightroom Develop Presets
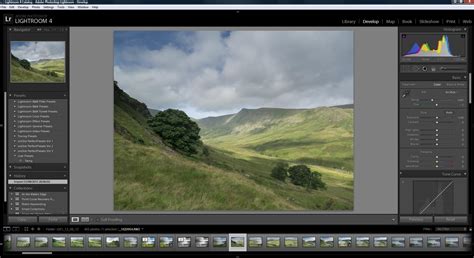
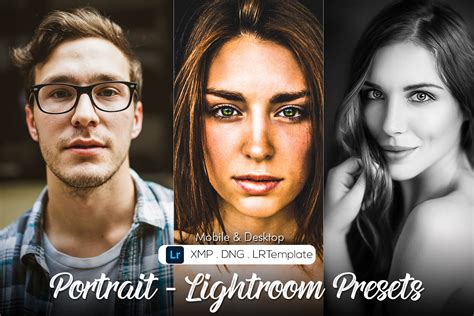
At its heart, a Lightroom Develop Preset is a snapshot of your editing choices. When you meticulously adjust sliders for exposure, color, contrast, and other parameters on a portrait, you have the option to save these settings. This saved set of instructions can then be applied to other images, providing a consistent starting point for your edits. This is particularly beneficial for headshots, where a uniform style across a series of images is often desired.
The process of creating a preset is straightforward. You begin by selecting a portrait that you have already adjusted to your liking in the Develop Module. Once you are satisfied with the edits, you can initiate the creation of a new preset. This action opens the "New Develop Preset" window, where you'll define key aspects of your preset.
Naming and Organizing Your Presets
A crucial step in creating a usable preset is giving it a descriptive and memorable name. This allows you to quickly identify its purpose later on. Furthermore, Lightroom provides a folder system for organizing your presets. While the default location is "User Presets," you have the flexibility to create new folders, categorizing them by style, client, or project. This organizational structure becomes increasingly important as your library of presets grows, preventing clutter and ensuring easy access.
Deciding Which Settings to Include
When saving a preset, Lightroom offers granular control over which adjustments are included. While you can save all settings, it's often recommended to exclude certain parameters that are inherently unique to each individual photograph. For instance, settings like White Balance and Exposure are highly dependent on the original lighting conditions of the shot. Applying a preset with pre-defined exposure or white balance to a different image can lead to undesirable results, requiring further manual correction. Similarly, if you've used specific local adjustments like a Graduated or Radial filter to darken a background, you might choose to exclude these if you anticipate needing to reposition or re-size them for other images. The "Auto Tone" option is also generally best left unticked, as it can sometimes override your carefully crafted adjustments with its own interpretation.
Applying Develop Presets to Your Portraits
Once your Develop Preset is created and saved, applying it to other portraits is remarkably simple. You can open a new portrait in the Develop module and access your saved presets from the Presets panel, typically located on the left-hand side of the screen. A key advantage of presets is their ability to be applied to multiple images simultaneously. This is a significant time-saver when you have a batch of headshots from the same session that you want to develop with a consistent look.
To apply a preset to multiple photos, you would navigate to the Library Module, select all the desired portraits, and then access the Quick Develop panel. Within this panel, your saved presets are readily available under the "Saved Preset" menu. Selecting your newly created portrait preset will apply it to all the chosen images, providing a uniform starting point for your editing process.
Creative Adjustments Within the Develop Module
Beyond the basic application of presets, the Develop Module offers a wealth of creative tools that can be incorporated into your presets or used to fine-tune existing ones. These tools allow for nuanced control over the final look of your portraits.
Vignetting Techniques
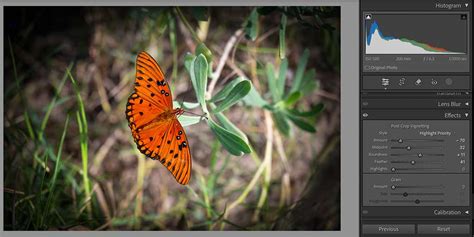
Vignetting, the darkening or lightening of the edges of an image, can be used to draw attention to the subject. Lightroom offers "Post-Crop Vignetting" in the Effects panel. While effective, its main drawback is that the effect is always centered. For more control, a Radial Filter can be employed. This allows you to create a localized vignette, precisely controlling its shape, size, and feathering, providing a more natural and adaptable effect for portraits.
Color Adjustments: HSL and Split Toning
The HSL (Hue, Saturation, Luminance) panel provides control over individual color ranges. This is invaluable for fine-tuning skin tones or adjusting specific elements in the background. For instance, if there's a distracting color in the background, you can selectively desaturate or alter its hue.
Split Toning is another powerful tool, particularly effective for adding depth and mood to color portraits. By applying different color tones to the highlights and shadows, you can create sophisticated color grading. A common approach is to apply a cool tone (like blue or teal) to the shadows and a warm tone (like orange or yellow) to the highlights, creating a pleasing contrast and enhancing the overall aesthetic.
The Tone Curve for Matte Looks
The Tone Curve panel offers precise control over the tonal range of an image. By manipulating the RGB curve, you can achieve various looks, including the popular "matte" effect. Lifting the left-hand side of the RGB curve, for example, can reduce contrast and create a softer, more subdued appearance, which can be very flattering for portraits.
Adjustment Brush Presets
For even more targeted editing, Lightroom allows you to create Adjustment Brush presets. These are particularly useful for repetitive retouching tasks, such as smoothing skin, enhancing eyes, or brightening teeth. By saving a specific set of brush adjustments as a preset, you can quickly apply these localized edits to multiple portraits, ensuring consistency in your retouching.
The Evolution of Editing: From Presets to AI
While Lightroom Develop Presets have been a revolutionary tool for photographers, offering speed and consistency, they are inherently static. They apply the same set of slider values to every photo, regardless of its unique characteristics. This "one-size-fits-all" approach can lead to issues, especially with portraits, where skin tones, lighting, and exposure can vary dramatically.
The Challenges with Generic Presets
The biggest hurdle with generic presets is their global application. A preset designed to enhance foliage might inadvertently alter skin tones, making a client look unnaturally green or magenta. Similarly, a preset created for a well-exposed image might look terrible on an underexposed shot, leading to a frustrating cycle of "fixing the fix." The market is also flooded with low-quality presets that look impressive on social media but fall apart when applied to professional RAW files.
AI as the Next Frontier
This is where Artificial Intelligence (AI) is poised to revolutionize photo editing. AI-powered tools, such as Imagen, offer a dynamic and adaptive alternative to static presets. Instead of applying a blind recipe, AI analyzes each photo individually, understanding its content and context before applying edits.
I Tested Every AI Image Editor. This is the Best
Imagen's Personal AI Profile is a prime example of this shift. By training the AI on thousands of your own edited photos, it learns your unique editing style, including how you handle skin tones across various lighting conditions. This results in edits that are not only consistent but also remarkably accurate and personalized, effectively creating a "one-size-fits-one" solution.
Imagen's Adaptive Workflow
Imagen's approach is fundamentally different from traditional presets. It's not about applying a fixed set of slider values; it's about intelligent analysis and adaptation. This means that your AI profile can evolve as your style does. By feeding new edits into the system, you can fine-tune your profile, ensuring it remains current with your evolving creative vision.
Furthermore, Imagen extends beyond basic color and tone adjustments. It incorporates AI tools for tasks like automatic straightening, subject masking, and even skin smoothing, further streamlining the editing process and allowing photographers to spend less time at the computer and more time behind the camera.
Integrating Presets and AI into Your Workflow
Despite the advancements in AI, traditional Lightroom presets still hold value. They serve as excellent starting points for experimentation, allowing photographers to explore new styles and develop their unique aesthetic. The key is to understand their limitations and use them strategically.
Workflow: Presets vs. AI Profiles
| Feature | Standard Lightroom Preset Workflow | Imagen AI Profile Workflow |
|---|---|---|
| Application | Manual, one-by-one or batch apply. | Automatic batch upload. |
| Logic | Static. Applies the same set of slider values to every photo. | Dynamic. AI analyzes each photo and applies a unique set of slider values based on your style. |
| Accuracy | Highly variable. Often requires heavy manual correction. | Highly consistent. Edits are based on learning from thousands of your own photos. |
| Skin Tones | A common problem. Global HSL changes often create unnatural skin. | A key strength. The AI learns how you treat skin tones in varied lighting with precision. |
| Adaptability | None. A preset is "frozen" in time. | High. Your profile evolves as your style does. |
| Speed | Speeds up initial application but adds time for manual tweaking. | Extremely fast. Edits thousands of photos in minutes. |
| Creation | Simple to create. | Requires initial training (3,000+ photos) or Lite Profile from one preset. |
Practical Application: Creating and Using Presets
When creating your own presets, remember to uncheck settings like White Balance and Exposure, as these are best adjusted individually for each image. For a more versatile preset, consider excluding Transform (Crop/Straighten) and Masks.
For applying presets, always aim to get the correct color temperature and exposure in your image first. Then, apply the preset as a starting point. The opacity slider, available for most presets, allows you to control the intensity of the applied effect, providing further flexibility.
Installing and Managing Presets
Installing downloaded presets into Lightroom is typically a simple process. After downloading a preset file (often in .XMP format), open Lightroom, navigate to the Presets panel, right-click on a folder, select "Import," and then choose the downloaded preset file. Organizing your presets into logical folders within the Presets panel is crucial for efficient workflow management.
The Future of Portrait Editing
Lightroom presets have undeniably transformed portrait photography by offering speed and style. However, for professional portrait work, their static nature presents significant limitations. The advent of AI-powered tools like Imagen marks a significant evolution, offering adaptive, personalized, and highly accurate editing solutions.
While presets remain a valuable tool for experimentation and learning, the future of efficient and consistent portrait editing lies in intelligent, adaptive technologies that understand and replicate individual artistic styles with unparalleled precision. The goal for any professional is to minimize time spent on repetitive editing tasks and maximize time dedicated to the creative process and client interaction. AI tools are making this goal more attainable than ever before.