The ubiquitous red-eye effect, a common photographic nuisance, can detract significantly from an otherwise perfect image. Fortunately, Adobe Lightroom Classic, the evolution of Adobe Photoshop Lightroom, offers a straightforward and effective solution to this problem. This tutorial will guide you through the process of eliminating red-eye and its canine counterpart, pet-eye, ensuring your portraits shine with natural-looking eyes.
Preparing Your Image for Correction
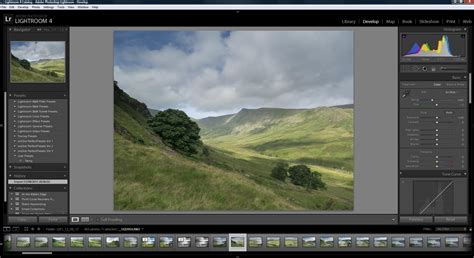
Before diving into the editing tools, it's essential to have your image ready within Lightroom Classic. If you're new to importing photos, there are numerous resources available to help you get your library organized. Once your photo is selected, navigate to the Develop module. This is where the magic of image enhancement happens.
To accurately assess and correct the red-eye effect, you'll need to zoom in on the subject's eyes. In the Navigator panel, located in the upper-left portion of the Develop module, you'll find zoom options. Clicking on either the 1:1 or 2:1 option will provide a sufficiently close view to work with precision. A 1:1 zoom displays the image at its actual pixel size, while 2:1 shows it at twice that size, both offering excellent detail for this task.
Understanding the Red Eye Tool
Lightroom Classic provides a dedicated tool for addressing this common issue. Within the Develop module, locate the Red Eye tool. This tool is designed to specifically target and correct the unnatural red or reddish-orange discoloration that often appears in eyes when a camera's flash reflects directly off the retina. The same tool also includes a Pet Eye option, which is specifically calibrated to correct the often greenish or yellowish reflections seen in the eyes of animals due to their tapetum lucidum, a reflective layer behind the retina.
To access the tool, simply click on either the Red Eye or Pet Eye option. The choice depends on whether you are correcting a human subject or an animal. For human subjects exhibiting the tell-tale red glow, the Red Eye setting is appropriate. For pets, the Pet Eye setting will yield more natural results.
Applying the Red Eye Correction
Once the Red Eye or Pet Eye tool is selected, your cursor will transform into a crosshair, indicating that the tool is active and ready for use. The process of correction involves defining an area around the affected eye.
For Red Eye Correction:
- Position Your Cursor: Place your cursor precisely in the center of one eye that exhibits the red-eye effect.
- Click and Drag: Click and drag your mouse outwards. As you drag, a circle will appear. The goal is to expand this circle until it covers the entire eye, including the pupil and iris, without encroaching too much on the surrounding skin.
- Adjust the Circle: After the initial drag, you can fine-tune the size of the correction area. Click and drag the edges of the circle to precisely match the boundaries of the eye. This ensures that only the red reflection is targeted, preserving the natural color and detail of the iris.
- Correct the Second Eye: Move your cursor over to the center of the other eye and click. Lightroom Classic is intelligent enough to automatically copy the size of the tool from the first eye to the second. This ensures consistency in your corrections. If the size isn't perfect, you can still adjust the circle on the second eye by dragging its edges, just as you did with the first.
For Pet Eye Correction:
The process for pet eyes is identical, but the tool's algorithm is optimized for the different reflective properties of animal eyes. The characteristic green or yellow glow is effectively neutralized. Again, ensure the circle encompasses the entire iris and pupil for the best results.
Understanding the Underlying Mechanism
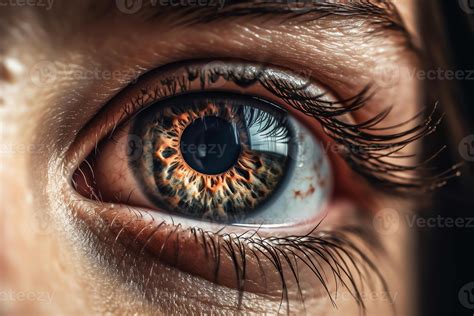
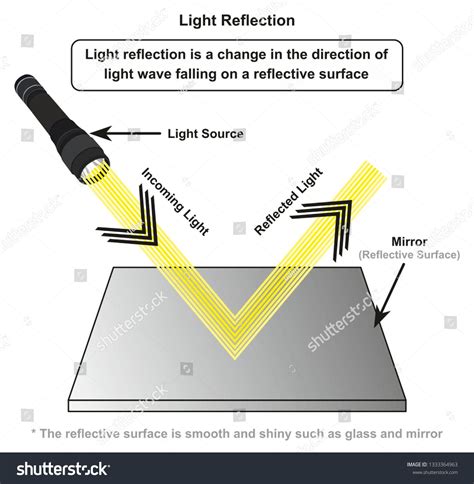
The red-eye effect occurs because the camera flash is very bright and close to the lens. When the flash fires, light enters the eye through the pupil and illuminates the blood vessels at the back of the retina. This blood-rich area reflects the light back towards the camera, and because the pupil is dilated in lower light conditions, the reflected light is easily captured, resulting in the red appearance.
The Red Eye tool in Lightroom Classic works by identifying the red pixels within the defined circular area and replacing them with a darker, more natural-looking color, typically a shade of grey or brown that matches the surrounding iris. It essentially "paints over" the red reflection with a more appropriate tone, making the eyes appear as they should. The Pet Eye tool functions similarly but is fine-tuned to address the specific wavelengths of light reflected by the tapetum lucidum.
Advanced Tips and Considerations
While the Red Eye tool is highly effective, there are a few nuances to keep in mind for optimal results:
- Zoom Level is Crucial: As mentioned, zooming in to at least 1:1 is vital. Trying to correct red-eye at a zoomed-out view will lead to imprecise selections and potentially unnatural-looking eyes.
- Subtlety is Key: Avoid making the correction circle excessively large, as this could inadvertently affect the iris color or surrounding skin. The aim is to cover the red reflection precisely.
- Multiple Flashes: In rare cases, especially with very strong reflections or unusual eye shapes, you might need to make slight adjustments to the circle's size on each eye independently.
- Non-Red Reflections: If you encounter other types of reflections (e.g., white or blue from glasses), the Red Eye tool may not be the most appropriate solution. In such cases, you might consider using the Adjustment Brush to manually paint over the reflection with a more suitable color.
- White Balance: Sometimes, persistent red-eye can be exacerbated by incorrect white balance settings. While the Red Eye tool directly corrects the reflection, ensuring your overall white balance is accurate before using the tool can sometimes lead to a more seamless overall result.
- Practice Makes Perfect: Like any editing tool, mastering the Red Eye removal in Lightroom Classic takes a little practice. Experiment with different photos and zoom levels to become comfortable with the tool's behavior.
Beyond Red Eye: Other Eye Enhancements
While the Red Eye tool is specifically for removing the red (or green/yellow) reflection, Lightroom Classic offers other powerful tools for enhancing eyes in general. Once the red-eye is gone, you might consider using:
- The Adjustment Brush: This versatile tool allows you to selectively apply various adjustments to specific areas of your image. You can use it to subtly brighten the eyes, enhance their color, sharpen the iris, or even add a touch of catchlight (a small highlight that brings life to the eyes). To do this, select the Adjustment Brush, set your desired effect (e.g., Exposure, Clarity, Saturation), and then paint over the iris and pupil.
- The Radial Filter: This filter can be used to create a vignette effect specifically around the eyes, drawing more attention to them. It can also be used to subtly brighten or enhance the eyes by applying the filter with a feathered edge around them.
Amazing Eye Technique in Lightroom and Photoshop
By understanding the nature of the red-eye effect and utilizing the dedicated tools within Adobe Lightroom Classic, you can confidently transform problematic photos into polished portraits with natural, captivating eyes. The simplicity and effectiveness of the Red Eye and Pet Eye tools make them indispensable for any photographer looking to refine their portrait work. Remember to zoom in, be precise with your selections, and practice to achieve the best possible results, ensuring your subjects' eyes are as striking as the moment itself.