Adobe Lightroom presets are powerful tools that can dramatically streamline the photo editing process for both photographers and graphic designers. They function as configuration files, capable of applying a specific suite of development settings to an image with remarkable efficiency. Whether you're aiming for a consistent aesthetic across a collection of photos or simply seeking to accelerate your workflow, understanding how to locate, manage, and utilize these presets is crucial. This guide delves into the intricacies of Lightroom preset management, exploring their storage locations across different versions, methods of import and export, and best practices for ensuring their longevity and accessibility.
Unpacking the Preset: What Exactly Is a Lightroom Preset?
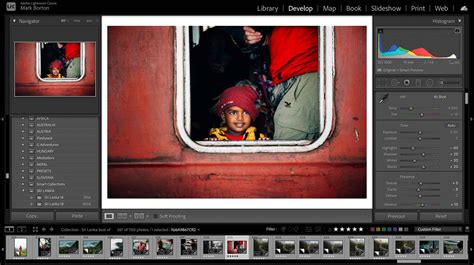
At its core, a Lightroom preset is a saved collection of editing adjustments. When you meticulously craft a particular look for a photograph - perhaps adjusting exposure, color balance, contrast, or applying specific stylistic effects - you have the option to save this entire set of modifications as a preset. This allows you to recall and reapply those exact settings to any other photograph with just a single click or tap. This capability is particularly invaluable for maintaining a cohesive visual style across a series of images, such as a wedding album or a brand's product photography.
The convenience of presets extends to their granular control. When saving a preset, users can often choose which specific editing categories to include. For instance, you might want to save a preset that only affects the 'Light' and 'Color' adjustments, leaving 'Detail' or 'Effects' settings untouched for individual fine-tuning. This flexibility ensures that presets can be tailored to various editing needs and workflows.
The Shifting Sands of Storage: Finding Your Presets
The location where Lightroom stores your precious presets has seen changes over different versions, which can be a source of confusion. It is essential to identify which version of Lightroom Classic you are using to navigate to the correct directory.
Locating Presets in Lightroom Classic
For users of Lightroom Classic, the location of preset folders has evolved.
Older Versions (Prior to Version 7.3): Presets were typically found within a
Develop Presetsfolder. On Windows, this was commonly located atC:\Users\[Username]\AppData\Roaming\Adobe\Lightroom\Develop Presets. On macOS, the path was generally within the user's Library folder, often in a structure like~/Library/Application Support/Adobe/Lightroom/Develop Presets.Newer Versions (Version 7.3 and later): Adobe introduced a change in how new presets are handled. For presets created or imported in these newer versions, the preferred storage location is within the
CameraRaw > Settingsfolder. This folder is also part of your Lightroom Classic installation's configuration. The precise path can vary slightly depending on your operating system and installation specifics, but it's generally found within your user profile's application data.
It is important to note that these preset folders may be hidden by default on your operating system. To access them, you will need to enable the display of hidden files and folders in your system's file explorer (Finder on macOS, File Explorer on Windows).
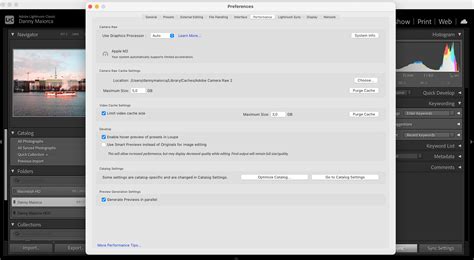
Within the Lightroom Classic Preferences, there is an option that allows you to "Store presets with this catalog." This setting, when enabled, instructs Lightroom to look for presets within a dedicated folder structure alongside your catalog file. While this can be beneficial for catalog portability, it can also lead to confusion if not managed carefully, as some users have reported presets disappearing after enabling this option. It is crucial to understand that this setting dictates where Lightroom looks for presets, not necessarily where they are physically stored by default.
Lightroom CC and Cloud-Based Storage
For users of Lightroom CC, which is a cloud-based application, the management of presets is inherently different. In Lightroom CC, presets are stored in the cloud and are synchronized across all devices logged into your Adobe Creative Cloud account. This means that once a preset is created or imported on one device, it becomes accessible on your desktop, tablet, and mobile phone, provided you are logged in with the same Adobe ID. This cloud synchronization offers a significant advantage in terms of accessibility and backup, as your presets are not tied to a specific local machine.
Managing Your Preset Arsenal: Import, Export, and Organization
Effective management of your Lightroom presets involves understanding how to add new ones, how to back them up, and how to keep them organized.
Importing Presets
Adding new presets to your Lightroom library is a straightforward process, though the exact steps can vary slightly between Lightroom Classic and Lightroom CC.
Lightroom Classic: In the Develop module, locate the Presets panel. Click the plus (+) icon at the upper-right corner of this panel and select "Import Presets" from the drop-down menu. An import dialog box will appear, allowing you to navigate to and select the preset files you wish to import. You can typically import individual
.lrtemplateor.xmpfiles, or a.zipfile containing multiple presets. Alternatively, you can right-click on a specific preset group in the Presets panel and choose "Import Presets" to add them to that group.Lightroom CC: The import process in Lightroom CC is generally integrated within the app's interface. You will typically find an option to import presets within the editing or preset management sections of the application.
It's important to be aware that not all presets are universally compatible. For instance, you cannot import XMP presets in Lightroom Classic versions 8.2 or earlier. Additionally, some presets might be partially compatible with a selected photo, meaning not all of their settings can be applied due to the nature of the adjustments or the file type being edited.
Exporting and Backing Up Presets
While Lightroom CC handles preset backups automatically through cloud synchronization, users of Lightroom Classic need to be more proactive.
Lightroom Classic: You cannot directly "export" the built-in Lightroom Classic presets or entire preset groups in a way that creates a distributable package of Adobe's original presets. However, you can manually back up your custom presets. This involves locating the preset folders (as described in the "Finding Your Presets" section) and copying the relevant files to an external hard drive, cloud storage service, or another secure location. This manual backup is crucial for protecting your work from data loss due to hardware failure, software issues, or accidental deletion.
Lightroom CC: As mentioned, presets in Lightroom CC are synced to the cloud. To ensure they are backed up, simply make sure you are logged into your Adobe Creative Cloud account with an active membership. If you uninstall the app, your presets should remain accessible once you log back in. However, if you clear app data without ensuring a proper sync or backup, there's a risk of losing unsynced assets.
Organizing Your Presets
As your collection of presets grows, organization becomes paramount. Lightroom Classic provides tools to manage your presets:
- Preset Groups: You can create custom groups to categorize your presets (e.g., "Portraits," "Landscapes," "Black and White," "Vintage"). This makes it much easier to find the specific preset you need.
- Favorites: Mark frequently used presets as "Favorites" for quick access.
- Show/Hide Groups: You can choose which preset groups are displayed in the Presets panel. This setting is specific to each computer or device.
- Single-Group Mode: In Lightroom Classic, you can enable "Single-Group Mode" to ensure that only one preset group is open at a time, which can simplify navigation.
Beyond Basic Edits: Export Presets and Plug-ins
Lightroom presets extend beyond just development settings. Export Presets are a specialized type of preset designed to streamline the process of exporting your finished images for specific uses. These presets can pre-configure a variety of export settings, such as file format (JPEG, DNG), color space (sRGB is common for web use), resolution, scaling, and quality.
For example, you might have an export preset that:
- Exports photos as JPEGs converted to and tagged as sRGB with maximum quality, no scaling, and a resolution of 240 pixels per inch, suitable for printing.
- Exports photos in DNG file format, preserving maximum editing flexibility.
- Exports photos to the hard drive as sRGB JPEG files with a maximum size of 640 pixels, medium quality, and a resolution of 72 pixels per inch, ideal for web sharing.
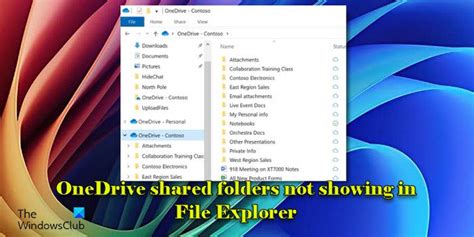
Upon completion of an export using a preset, Lightroom Classic can be configured to automatically show the exported photos in your system's file explorer (Windows Explorer or macOS Finder).
Furthermore, Lightroom Classic supports plug-ins from third parties that can add even more functionality to the Export dialog box. Depending on the plug-ins you have installed, additional options may become available, further customizing your export workflow. To add a plug-in, you would typically use an "Add" button within the Export dialog or a dedicated plug-in manager.
How to: Export Preset in Lightroom Classic
Troubleshooting Common Preset Issues
Despite the robust nature of Lightroom's preset system, users can occasionally encounter problems.
- Presets Not Showing After Import: This can happen for several reasons. Ensure you are looking in the correct directory for your version of Lightroom and operating system. If you are working with multiple catalogs and have selected the "Store presets with this catalog" option, presets might only be visible within the catalog they are associated with. Also, some presets might not be fully compatible with the selected photo, leading to certain adjustments not being applied.
- Presets Not Working with JPEGs: If a preset relies on specific color profiles or adjustments that are not fully supported or are processed differently in JPEGs compared to RAW files, it may not function as expected. Ensure the preset has a compatible JPEG profile associated with it.
- Missing Adjustment Brush Presets: The default adjustment brush presets can sometimes go missing. This might require a reinstallation of Lightroom or a specific troubleshooting step provided by Adobe.
- Lightroom Mobile Sync Issues: If you're experiencing missing presets or photos in Lightroom Mobile, ensure you are logged in with the correct Adobe ID associated with your active Creative Cloud membership. Check Lightroom on the web to see if your assets have synced. If assets were not synced before uninstalling the app, they might not be recoverable without a previous backup. It's important to remember that installed presets in Lightroom for mobile do not automatically sync to Lightroom Classic.
Presets for Every Workflow
Whether you're a beginner looking to quickly enhance your photos or a seasoned professional seeking consistency, Lightroom presets are an indispensable part of the editing toolkit. By understanding where your presets are stored, how to import and manage them, and how to leverage features like export presets and plug-ins, you can unlock a more efficient and creative editing workflow. Experimentation is key; the more you explore and utilize presets, the more intuitive their management will become, allowing you to focus on what truly matters: creating stunning images.