The digital realm often seeks to emulate the tangible, and in graphic design, the subtle nuances of paper textures can breathe life and character into otherwise flat digital creations. Whether aiming for a vintage aesthetic, a tactile feel, or simply adding depth and visual interest, understanding how to effectively incorporate paper textures in Adobe Photoshop is an invaluable skill. This guide will delve into the various methods and considerations for achieving realistic and compelling paper texture effects, from basic application to advanced techniques, making it accessible to both newcomers and seasoned professionals.
Understanding the Fundamentals of Texture Overlays
At its core, applying a paper texture to an image in Photoshop involves overlaying a separate texture image onto your primary artwork. This process gives your design a physical quality, transforming a smooth digital surface into something that appears worn with a grunge texture or possesses the rough, patterned appearance of a painter’s canvas. The key to success lies not just in applying the texture, but in controlling its integration with the underlying image.
To begin, you'll need a paper texture image. A great starting point is {{adobe-stock}}, where you can browse their selection of free, high-resolution texture images. Once you've found a suitable texture, open the Photoshop project you’d like to add your texture to, or start a new one by adding an image as a background layer.
The next step involves bringing your chosen texture into your project. Open the Libraries panel in Photoshop, select the texture overlay you downloaded, and then create a new layer. It's crucial to position this new layer above your background layer in the Layers panel. At this initial stage, your texture layer may appear to be hiding your background layer entirely. However, this is a temporary situation that will be resolved when you select an appropriate blending mode.
Applying and Blending Textures for Realistic Effects
Once the texture layer is in place, the magic happens through blending modes. Select the texture layer and navigate to the Blending Modes drop-down menu. A highly effective mode for achieving a natural paper texture is "Overlay." This mode allows the texture to interact with the colors and luminosity of the underlying layers, creating a unified and integrated appearance rather than a simple pasted-on effect. Experimenting with different blending modes, however, can yield a variety of distinct results. For instance, trying another blending mode can create a different style of photo overlay, offering a fresh perspective on how the texture interacts with your base image.
Blending Modes - Photoshop for Beginners | Lesson 5
The intensity of the texture can also be fine-tuned. After applying a blending mode, you might find that the grunge texture overlay is not as obvious as you'd like. In such cases, you can create another style of photo overlay or make adjustments to the existing texture layer. For the last couple of layers, you can further enhance the grunge texture overlay to make it more pronounced, leading to a more dramatic, aged effect.
Creating Custom Paper Textures from Scratch
While pre-made textures are convenient, creating your own paper textures in Photoshop offers unparalleled creative control. This process allows you to tailor the texture precisely to your needs, from subtle grain to pronounced imperfections.
To start creating a custom paper texture, create a new PSD file and set your preferred dimensions. Begin by filling this new document with a base color. Select Edit › Fill. In the Fill dialog box, choose the "Use" option and select "Color." When the color picker appears, opt for a yellowish or brownish color that mimics the look of vintage paper. This establishes the foundational hue of your paper.
Next, introduce imperfections and grain. From the Layers panel, click the New Layer icon to create a fresh layer. To add a sense of realism and the subtle grain found in real paper, apply a noise filter. Choose Filter › Noise › Add Noise. Within the Add Noise dialog, you can move the sliders left or right to adjust the amount of grain. More grain can simulate a rougher paper, while less can create a smoother, more refined look.
Adjusting the darkness or lightness of your texture is also key to achieving a convincing effect. Apply a gradient effect by selecting Layer, clicking the icon to create a new fill or adjustment layer, and then choosing "Gradient." This allows you to control the tonal range of your texture, adding depth and variation. There are, in fact, so many ways to achieve the look of paper, and tweaking these elements-color, grain, and tonal gradients-is essential.
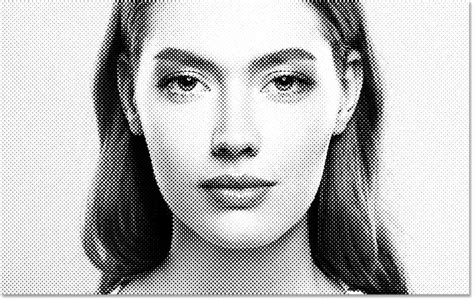
Leveraging Halftone Brushes for Comic and Retro Styles
For those aiming for a distinct comic book or retro aesthetic, halftone brushes are indispensable tools. Halftones are a powerful element in any retro artist's toolkit, capable of adding authentic color and shading that mimics the printing processes of yesteryear. The ColorLab Comic Color Kit, for instance, provides halftone brushes that make it easy to achieve this look.
If you're new to Photoshop, halftone brushes, or both, there's no need to worry. Many resources offer easy step-by-step guides on how to use them. These guides often use specific kits, like the ColorLab Comic Color Kit, to demonstrate the process. Halftone brushes are not a one-size-fits-all solution; they can be adapted to create unique effects tailored to your specific artistic vision. Learning how to get halftone brushes as unique as you are is a journey that involves understanding their application and customization.
When working with solid color palettes, as offered by tools like ColorLab, you can effectively map out your color choices before committing them to your halftone artwork. This allows you to try out several options, change individual colors, or use them for quick concepts before translating them into the final halftone application.
Advanced Techniques and Resources
Beyond basic overlays and filters, Photoshop offers advanced ways to integrate textures. For instance, when you have your artwork ready, you can select a pen tool and begin drawing, then adjust the texture depth. Crucially, any new layers you add should be placed below the paper and effects folder within the Layers panel. You can also select the "Adjust Texture" layer to fine-tune the texture depth and the "Adjust Ink" layer to modify ink effects, offering granular control over the final output.
For those who prefer visual learning, video tutorials are an excellent resource. Following a video can provide step-by-step instructions on how to use paper textures in Adobe Photoshop, making the process more intuitive.
When you want to save time while still achieving professional results, Photoshop background textures can be a lifesaver. Ready-to-use paper texture Photoshop sets are readily available from various online marketplaces.
Where to Find Professional Texture Overlays
For a wide array of professional-grade textures, Envato Elements offers unlimited Photoshop paper texture overlays with a subscription. This is an excellent option for designers who frequently use textures and want access to a vast library.
If subscriptions aren't your preference, GraphicRiver, part of Envato Market, provides professional Photoshop background textures that can be purchased individually. This offers flexibility for those who need specific textures for particular projects.
Here are a few examples of highly recommended texture packs:
- Grunge Texture Overlay Packs: These are essential for creating vintage effects. A pack of 30 dust and scratch textures can be a handy tool for achieving a faded or old look for your photos.
- Creative and Unusual Photo Overlays: For something more unique, explore packs that incorporate geometric and grunge elements, offering a fresh take on texture application.
- Paper Texture Overlay Photoshop Bundles: Some bundles contain a large number of textures within a single PSD template, streamlining the selection process significantly.
- Texture Packs for Text and Vectors: If you intend to apply overlays not only to photos but also to text and vector graphics, look for grunge texture overlay packs that include smart PSD templates.
- Soft Grunge Textures: For a subtler vintage photo overlay, a pack of ten soft grunge textures can be an ideal choice, providing a gentle aged effect.
- Comprehensive Paper Texture Collections: For a broad selection of paper textures suitable for various applications, specific collections of photo overlays are a great option.
By understanding these techniques and knowing where to find quality resources, you can effectively elevate your digital designs with the rich, tactile appeal of paper textures in Adobe Photoshop.