For anyone venturing into the realm of photo editing or digital art, Adobe Photoshop stands as the undisputed industry standard. For Mac users, the experience of wielding this powerful software is often enhanced by the inherent strengths of the macOS operating system. While Photoshop is renowned for its robust performance on both Windows and Mac platforms, many users find that its integration and fluidity on a Mac are particularly noteworthy. This comprehensive guide aims to demystify the process of using Photoshop on a Mac, from initial setup to mastering essential editing techniques, and even troubleshooting common issues.
Why Mac is a Prime Environment for Photoshop
The synergy between Photoshop and macOS is not accidental. macOS is meticulously engineered to support creative applications with exceptional efficiency, making it a natural fit for a demanding program like Photoshop. Several key factors contribute to this optimized experience:
- Robust Hardware and Optimized OS: Macs are built with powerful hardware and an operating system that is finely tuned for performance. This allows users to leverage the full spectrum of Photoshop's advanced features without encountering frustrating freezes or lags. The system's architecture is designed to handle resource-intensive tasks smoothly.
- Retina Displays for Precision: The hallmark of Mac screens, Retina displays, offer incredibly sharp color reproduction, meticulous detail rendering, and smooth line work. This visual fidelity is crucial for photo editing, enabling users to discern subtle nuances in color and tone, and to edit images with a heightened degree of accuracy.
- Enhanced Stability and Reliability: The tightly controlled ecosystem of macOS often translates to fewer application crashes. This inherent stability means that Photoshop tends to operate more reliably, reducing the chances of losing unsaved work or experiencing unexpected interruptions during critical editing sessions.
- Integrated System Tools: macOS provides a suite of built-in tools and utilities that can seamlessly complement Photoshop workflows. These can range from file management enhancements to system-level optimizations that benefit creative professionals.
- Seamless Integration with Other Mac Apps: The Apple ecosystem is known for its strong inter-app integration. Photoshop benefits from this by working harmoniously with other essential Mac applications, such as iMovie, GarageBand, and other Adobe Creative Cloud applications, facilitating a more cohesive and efficient creative workflow.
Installing Photoshop on Your Mac
Before diving into the creative process, ensuring your Mac is equipped to run Photoshop smoothly is paramount. Photoshop has specific hardware and software prerequisites. An underpowered or outdated Mac might lead to sluggish performance or frequent crashes.
System Requirements for Photoshop on Mac
While specific requirements can vary slightly with each Photoshop update, generally, you should ensure your Mac meets the following:
- Operating System Compatibility: Photoshop is optimized for certain versions of macOS. Always refer to the latest Adobe documentation for precise macOS version compatibility.
- Processor: A modern multi-core Intel processor or an Apple Silicon chip (M1, M2, M3, etc.) is recommended for optimal performance.
- RAM: Ample RAM is crucial. Adobe typically recommends 8GB of RAM as a minimum, but 16GB or more is highly advisable for complex projects and smoother multitasking.
- Storage: A fast Solid State Drive (SSD) is essential for quick application loading and efficient handling of scratch disk operations. Ensure you have sufficient free space for Photoshop and your project files.
- Graphics Card: A dedicated graphics card or an integrated GPU that supports Metal is beneficial for GPU-accelerated features.
The Installation Process
Installing Photoshop on a Mac is a straightforward process, primarily managed through the Adobe Creative Cloud application.
- Adobe ID and Plan Selection: You'll need an Adobe ID to download, install, and activate Photoshop. If you don't have one, you can create it on the Adobe website. Next, you'll need to choose a Photoshop subscription plan. Adobe offers a Photoshop-only plan for those who exclusively need this software, or the Photography Plan, which bundles Photoshop with Lightroom and cloud storage.
- Download and Install Creative Cloud: Download the Creative Cloud desktop app from the official Adobe website. Once downloaded, open the installer and follow the on-screen instructions.
- Install Photoshop: After installing Creative Cloud, open the app. You will see a list of available Adobe applications. Locate Photoshop in this list and click the "Install" button. Creative Cloud automatically detects your Mac's architecture and installs the native version optimized for Apple Silicon (M1, M2, M3 chips) if applicable.
- First Launch and Setup: Once the installation is complete, launch Photoshop from your Applications folder. The first launch might take a little longer as Photoshop configures its preferences and optimizes GPU settings. If prompted, always grant Photoshop permission to access files and folders, as this is necessary for its full functionality.
How to Install Adobe Creative Cloud on Macbook - KevinHowTo
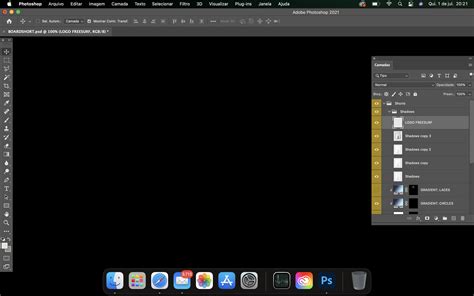
Navigating the Photoshop Interface on Mac
Understanding the Photoshop interface is the first step towards effective image manipulation. The workspace is designed to be intuitive, though it can seem overwhelming to new users.
Menu Bar: Located at the very top of your screen, the Menu Bar provides access to all of Photoshop's commands and options. Key menus include:
- File: For creating, opening, saving, exporting, and printing your projects.
- Edit: Contains essential commands like Undo, Redo, Cut, Copy, Paste, and various adjustment options.
- Image: Offers controls for image size, resolution, rotation, and color adjustments.
- Layer: Manages the layers within your document, including creating, duplicating, and blending modes.
- Type: Accesses all text-related tools and options.
- Select: Tools for making selections within your image.
- Filter: A vast collection of effects and artistic filters.
- 3D, View, Window, Help: Further options for working with 3D elements, controlling your view, managing panels, and accessing support.
Toolbar: Typically situated on the left side of the workspace, the Toolbar houses all the tools you'll use for editing, drawing, selecting, and manipulating images. Tools can often be grouped, and hovering over an icon reveals its name and keyboard shortcut.
Options Bar: Located just below the Menu Bar, the Options Bar is dynamic. It changes its content based on the currently selected tool from the Toolbar. For instance, when the Brush Tool is active, the Options Bar will display settings for brush size, hardness, opacity, and flow.
Panels: On the right side of your workspace, you'll find various Panels (like Layers, Adjustments, Properties, History). These can be floating windows or docked into a single column. Panels provide detailed controls and information for specific functions, with the Layers panel being particularly central to Photoshop's workflow.
Document Window: This is the central area where your image or project is displayed and edited.
Status Bar: Found at the very bottom of the workspace, the Status Bar provides information about your document, such as zoom level, document dimensions, and current tool tips.
Opening and Importing Files on Mac
Photoshop on Mac offers several flexible methods for opening and importing your images, catering to different file locations and workflows.
Open from Recent or Saved Files: The most direct method is to open an image already saved on your Mac. Navigate to
File > Openand select your image file from the dialog box. Photoshop also keeps a list of recently opened files for quick access.Importing from Devices: If you're working with images directly from a camera, memory card, or external drive, Photoshop can import them efficiently.
- Connect your device to your Mac using a USB cable or card reader.
- Open Photoshop.
- Go to
File > Import > Images from Device. - Select your connected device from the list that appears. Photoshop will then allow you to preview and import the images.
Drag-and-Drop from Finder: For a quick import of local files, you can use the drag-and-drop method.
- Open Finder and locate the image file you wish to edit.
- Drag the image file directly from the Finder window into the Photoshop document window or onto the Photoshop icon in the Dock.
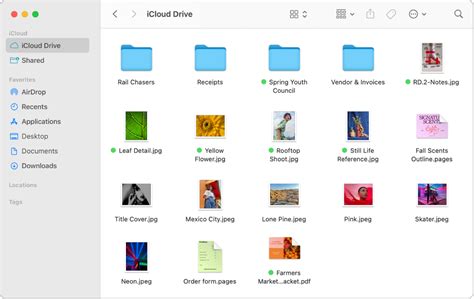
Importing from Cloud Storage: Photoshop seamlessly integrates with popular cloud storage services like iCloud Drive, Dropbox, Google Drive, and OneDrive.
- Open Finder and navigate to your cloud storage folder.
- Drag and drop the image file from your cloud folder directly into Photoshop.
- Ensure the file is fully downloaded to your Mac before attempting to edit it for the best performance.
Essential Basic Editing Techniques
Once your image is open, you can begin with fundamental editing techniques that form the bedrock of all creative work in Photoshop.
Adjusting Image Size and Resolution
Controlling the dimensions and resolution of your image is crucial for print or web use.
- Access Image Size: Go to
Image > Image Size. A dialog box will appear, offering options to adjust the width, height, and resolution (measured in pixels per inch or PPI). You can choose to resample the image (which changes the total number of pixels, affecting quality) or adjust dimensions and resolution without resampling. - Understanding Resolution: For web use, 72 PPI is generally sufficient. For printing, 300 PPI is the standard for high-quality output.
Cropping and Straightening Images
The cropping tool allows you to remove unwanted areas of an image, thereby improving its composition and focus.
- Using the Crop Tool: Select the Crop Tool (C) from the Toolbar. A bounding box will appear around your image. Drag the handles of this box to define the area you want to keep. Press Enter (Return) to apply the crop.
- Straightening with the Ruler Tool: If your image is tilted, you can straighten it easily.
- Select the Ruler Tool (often found nested under the Eyedropper Tool).
- Draw a line along a horizontal or vertical reference in your image (like a horizon or a building edge).
- Go to
Image > Image Rotation > Arbitrary. Photoshop will automatically straighten the image based on the line you drew.
Correcting Brightness, Contrast, and Color
Achieving the right tonal balance and color accuracy is fundamental to professional-looking images.
Basic Adjustments: Navigate to
Image > Adjustments. Here you'll find:- Brightness/Contrast: Offers simple sliders to tweak the overall lightness and darkness, and the difference between light and dark areas.
- Levels: Provides more precise control over the tonal range by adjusting the black point, white point, and midtones of your image.
- Curves: The most powerful tool for tonal and color adjustments, allowing you to individually manipulate the highlights, midtones, and shadows.
Color Balance: For color correction, you can use
Image > Adjustments > Color Balanceto shift the hues towards cyan/red, magenta/green, or yellow/blue in the shadows, midtones, or highlights.
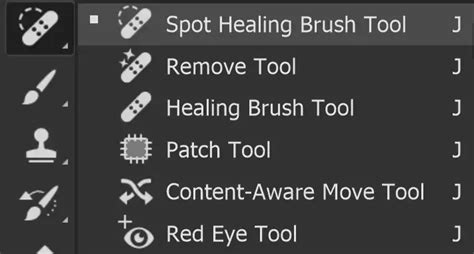
Retouching and Cleaning Up Images
Photoshop offers a suite of tools designed to remove imperfections and refine details.
- Spot Healing Brush Tool (J): Ideal for quickly removing small blemishes like dust spots, pimples, or minor distractions. Simply click on the imperfection, and Photoshopâs intelligent algorithms will sample surrounding pixels to blend it away seamlessly.
- Clone Stamp Tool (S): This tool allows you to manually copy pixels from one area of an image and paint them over another. To use it, hold down the Option (Alt) key, click on the source area you want to copy from, then paint over the target area you want to cover. This is excellent for removing larger objects or repairing textured areas.
- Patch Tool: This tool is particularly effective for larger or more complex retouching tasks. Select the imperfect area you want to fix, then drag the selection to a clean, similar area of the image. Photoshop will then blend the sampled texture and color into the selected area.
Saving and Exporting Your Work
Once your editing is complete, preserving your work correctly is essential. Photoshop offers distinct options for saving and exporting.
- Save As (Photoshop .PSD): To retain all your layers, masks, and editing capabilities for future modifications, always save your work in Photoshop's native format:
.PSD. Go toFile > Save Asand choose "Photoshop (*.PSD)" from the format dropdown. - Export As (for Web and Sharing): When you need to share your image online, in a presentation, or as a flattened image, use the Export As feature. Go to
File > Export > Export As. This dialog box allows you to choose formats like JPEG (for photos), PNG (for graphics with transparency), or GIF. You can also control compression levels, image dimensions, and color space, optimizing the file for its intended use.
Troubleshooting Common Photoshop Issues on Mac
While Macs are known for their stability, using demanding software like Photoshop can occasionally lead to software or hardware-related problems. Knowing how to troubleshoot these issues can save you time and frustration.
Slow Performance:
- Check RAM Usage: If Photoshop feels sluggish, go to
Photoshop > Preferences > Performance. Ensure that a sufficient amount of RAM is allocated to Photoshop. The more RAM available, the better Photoshop can perform. - Scratch Disks: Photoshop uses "scratch disks" as temporary storage when RAM is insufficient. If you have multiple drives, assign a fast SSD as your primary scratch disk in the same Preferences panel.
- Close Unnecessary Applications: Ensure no other resource-heavy applications are running in the background that might be consuming your Mac's resources.
- Check RAM Usage: If Photoshop feels sluggish, go to
Plugin Compatibility: If you use third-party plugins, ensure they are compatible with the latest version of Photoshop and, importantly, with Apple Silicon Macs if your Mac uses an M-series chip. Outdated plugins are a common source of instability.
Error Code 43: This error typically indicates an issue with file or folder operations. It can occur when Photoshop encounters problems moving, copying, renaming, or opening files. Ensure your file permissions are set correctly, and try saving your work to a different location or drive.
GPU Acceleration Issues: Photoshop utilizes your graphics processor (GPU) for many effects and features to speed up rendering.
- Go to
Photoshop > Preferences > Performance. - In the "Graphics Processor Settings" section, you can try enabling or disabling "Use Graphics Processor" to see if it resolves display or rendering issues.
- Go to
Missing Fonts: Photoshop will alert you if a document uses fonts that are not installed on your system. To resolve this, you can either install the missing fonts on your Mac or replace them with available fonts within Photoshop.
Unleashing Your Creativity with Interactive Learning
For those eager to dive deeper and explore the full potential of Photoshop on their Mac, interactive learning platforms offer a dynamic and engaging approach. Applications like "Interactive Tutorials for Photoshop" are designed to make learning simple and enjoyable. These apps provide a clear, concise, and interactive way to grasp each feature of Photoshop CC, demonstrating how to use them in detail.
With candid, jargon-free advice and step-by-step guidance, these tutorials cover everything from the core aspects of working with the software to advanced techniques for refined workflows and professional results. It's akin to having a personal tutor guiding you through the newest version of Photoshop. You'll learn how to use Photoshop to express yourself and fine-tune your images quickly and directly.
The scope of topics covered is extensive, including:
- Tools: Understanding the purpose and application of various tools.
- Masks and Layers: Mastering the fundamental concepts of non-destructive editing.
- Retouching: Techniques for cleaning up and enhancing images.
- Animation: Creating simple motion graphics.
- 3D: Working with three-dimensional elements.
- Video: Basic video editing within Photoshop.
- And much more: The app is brimming with content that can spark new ideas and inspire experimentation.
Whether you're curious about how movie posters are created, how magazine ads achieve their polished look, or how to transform a mundane photograph into something extraordinary, these interactive tutorials can provide the answers. They empower users to open up a whole new world of dazzling effects and achieve the "Hollywood treatment" for their images, or simply to perform really awesome stuff in Photoshop. Regardless of whether you identify as a designer, artist, or photographer, there's something valuable for everyone within these comprehensive learning resources. The interactive nature ensures that you're not just passively watching but actively engaging with the software, solidifying your understanding and building practical skills.