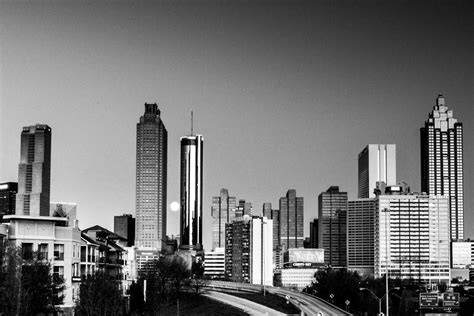
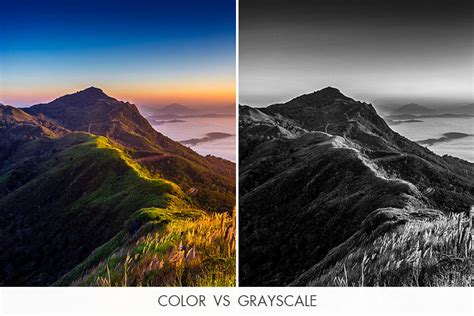
Vibrant colors enrich our lives, yet in the realm of photography, color can sometimes serve as a distraction. When the aim is to draw attention to the intrinsic qualities of an image - its lines, shapes, and textures - converting a photograph to black and white offers a powerful solution. This transformation strips away the chromatic noise, allowing the viewer to focus on the fundamental elements of composition and form. Black and white photography possesses a timeless appeal that continues to captivate audiences, even in our modern age of color-rich images. But what if you have a color photo that you want to convert to black and white? This comprehensive guide will explore numerous methods for transforming your photos into stunning black-and-white works of art using Adobe Photoshop.
The Art of Black and White: Why Convert?
The allure of black and white photography lies in its ability to evoke emotion and emphasize form. By removing the distraction of color, photographers are challenged to find beauty in simplicity, meaning in the mundane, and stories in silence. Black and white conversion removes the distraction of color from an image, helping to create evocative and dramatic images that concentrate on the forms and shapes of a subject as a whole. Whether approaching black and white from a stance of nostalgia or as a tool for visual storytelling, the digital tools available today, particularly within Photoshop, make this conversion process accessible and versatile.
Foundational Techniques: Simple Yet Often Limited
While Photoshop offers a plethora of sophisticated tools for black and white conversion, understanding the more basic methods is crucial, if only to recognize their limitations and know when to avoid them. These techniques, though straightforward, often provide minimal control over the final output and can be destructive to the original image data.
The "Grayscale" Mode: A Destructive Approach
One of the most direct methods is to convert the image to "Grayscale" mode. This is achieved by navigating to Image > Mode > Grayscale. However, this is a method to avoid at all costs for serious editing. The act of discarding all color information from your images is a destructive technique. This makes it difficult, if not impossible, to make changes later if you decide you don’t like the output. The data lost during this conversion is significant and irreversible.
The "Desaturate" Command: Losing Color, Not Data
Unlike the Grayscale mode, using the "Desaturate" command does not discard the color information from your image. This command can be found under Image > Adjustments > Desaturate. While it effectively removes color, it offers no control over how the colors are converted to shades of gray.
Hue/Saturation Adjustment Layer: A Non-Destructive Alternative
By using a Hue/Saturation adjustment layer, you can achieve similar results to the Desaturate method, but with a crucial advantage: it is non-destructive. To do this, create a new Hue/Saturation adjustment layer (Layer > New Adjustment Layer > Hue/Saturation). In the Properties panel, simply drag the "Saturation" slider all the way to the left (-100). This method allows you to easily and quickly convert your color photos to black and white with just a few clicks, and you can always go back and readjust the saturation slider if needed.
Solid Color Fill Layer: A Creative Blending Approach
Another straightforward method for converting an image to black and white involves creating a new layer filled with black or white and then setting its blending mode to "Color." With the empty layer selected, go to Edit > Fill (Shift+F5) and choose either black or white. Then, change the blending mode of this layer to "Color." This technique offers a quick way to desaturate an image, though it provides limited control over the tonal distribution.
Intermediate Techniques: Gaining More Control
The previous four techniques are very basic and offer very little control over the actual conversion of your image to black and white. Now that you’re aware of them, you know what to avoid if you want the best results. The following methods offer more nuanced control, allowing for greater creative input into the final monochrome image.
Channel Mixer: Manipulating Color Channels
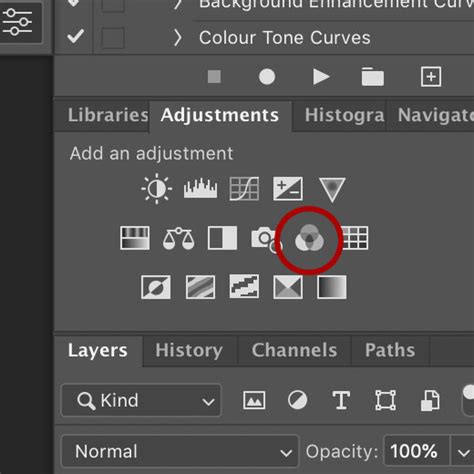
The Channel Mixer offers a more advanced way to control the black and white conversion. While it can be used destructively by directly applying it to the image layer, it is best utilized as an adjustment layer for non-destructive editing. To use it as an adjustment layer, navigate to Layer > New Adjustment Layer > Channel Mixer. In the dialog box that appears, click the "Monochrome" checkbox at the bottom. This enables the channel mixing sliders.
By adjusting the Red, Green, and Blue sliders, you can influence how the original colors are translated into grayscale tones. Moving these sliders to the right will brighten any tones associated with that color, while moving them to the left will darken those tones. For portraits, the most noticeable changes will often come from adjusting the red and yellow sliders. As with any adjustment layer, if you change your mind later, you only need to return to the properties tab and alter the sliders to your heart’s content. This method allows for significant control over the luminance of different color components, leading to more refined black and white results.
Black & White Adjustment Layer: Targeted Luminance Control
The Black & White adjustment layer is a powerful and intuitive tool for monochrome conversion. It’s a good starting point in many cases. Your image will be converted to black and white, and in the Properties tab, you will see an array of color sliders (Red, Yellow, Green, Cyan, Blue, Magenta). Moving these sliders to the right will brighten any tones associated with that color, and moving them to the left will darken those tones. This offers a direct and visual way to fine-tune the luminance of specific color ranges within your image, allowing you to emphasize or de-emphasize certain elements.
For portraits, the most noticeable changes will come from moving the red and yellow sliders, as these colors significantly influence skin tones. As with any adjustment layer, if you change your mind later, you only need to return to the properties tab and alter the sliders. This method provides excellent control over the tonal relationships, making it a favorite for many photographers.
The Secret To DRAMATIC Black & White Images In Photoshop
Advanced Techniques: Ultimate Control and Precision
For those seeking the utmost control over their black and white conversions, Photoshop offers sophisticated tools that allow for intricate manipulation of tonality and contrast.
Gradient Map: Unparalleled Tonal Control
The Gradient Map is arguably the most powerful of all the black and white conversion tools. It allows you to control virtually every aspect of the tonality of your image. Because of this extensive control, it’s also one of the more complicated tools to master.
To begin, ensure your foreground and background colors are set to black and white by pressing 'D' on your keyboard. Then, create a Gradient Map adjustment layer (Layer > New Adjustment Layer > Gradient Map). Make sure the gradient selected is a simple black to white gradient. If your image appears as a negative, it simply means your foreground and background colors are reversed.
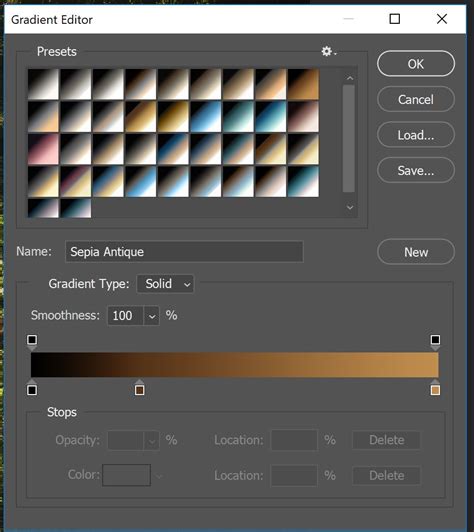
In the Properties tab, if you double-click the image of the gradient, the Gradient Editor will open. Towards the bottom of this screen, you will see a visual representation of your gradient. By moving the bottom sliders inward, you can increase the contrast in your image. Moving the black slider inward will deepen the shadows, while moving the white slider inward will brighten the highlights. This is an effective way to increase contrast in your image without leaving the conversion layer.
Furthermore, you can change the color of the sliders to precisely control the tonal range. Double-clicking on a slider will open the Color Picker. By selecting colors from the far left side of the palette and adjusting their position, you can precisely define the tones that will be mapped to your shadows, mid-tones, and highlights. You can add as many color stops as needed to fine-tune the gradient. While it may take practice to get accustomed to this tool, the level of control it offers is unparalleled.
Channel-Based Conversion: A Destructive but Effective Method
One of the less obvious, yet powerful, methods involves working directly with the image channels. This technique is destructive, so it is imperative to work on a duplicate of your original image. To access the Channels tab, ensure it is visible in your Layers palette. You will see sections labeled RGB, Red, Green, and Blue.
Choose the channel that yields the most pleasing effect on your image. This will vary depending on your subject matter and the range of colors present in your photos. Once you’ve made your choice, click on the desired channel to select it. The next step is to copy the selected channel and paste it into the other two channels. For instance, if you choose the Green channel, you would copy it and paste its contents into the Red and Blue channels. After this process, click on the RGB channel, and you should observe that your image has been converted to black and white. This method leverages the inherent luminance information within each color channel to construct the monochrome image.
Raw Processing: Pre-emptive Monochrome Conversion
The final method involves converting your image to black and white at the raw processing stage, typically within Adobe Camera Raw (ACR) or Lightroom. This approach doesn't grant absolute control over tonality in the same way as some Photoshop tools, but it is still a powerful possibility. Because you are working with a raw file, any changes made are non-destructive; the original file information remains untouched.
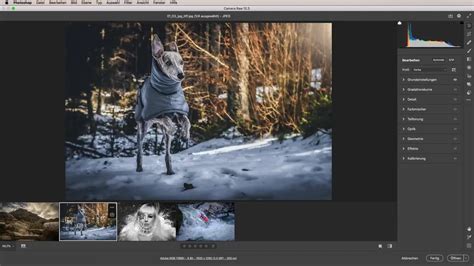
To start, open your raw image file in Photoshop, which will automatically launch Adobe Camera Raw. On the toolbar to the right, you will find a row of icons. Locate and click the "Convert to Grayscale" option. From here, you have access to a range of sliders that function similarly to those in Photoshop's Black & White adjustment layer. Additionally, by returning to the Basic panel in ACR, you retain access to all of the standard raw processing tools. This allows you to fine-tune exposure, contrast, highlights, shadows, and other parameters before even entering Photoshop, providing a solid foundation for your monochrome edits.
Embracing the Monochrome Aesthetic
In this comprehensive guide, we have explored numerous methods for converting images to black and white in Photoshop, ranging from the simplest to the most advanced. Each technique offers a unique approach to manipulating light, shadow, and tone. While some methods are more straightforward, others demand a deeper understanding of Photoshop's capabilities.
The choice of method often depends on the specific image and the desired outcome. For instance, the Black & White adjustment layer and the Gradient Map offer the most flexibility and control for complex edits. The Channel Mixer provides a unique way to influence tonal rendition based on color sources. Raw processing offers a non-destructive starting point.
Ultimately, the best tool for the job is the one that helps you achieve the results you are looking for. Black and white photography, with its emphasis on form, texture, and emotion, offers a profound way to explore visual storytelling. Experiment with these techniques, play with the sliders, and discover the captivating depth that monochrome imagery can bring to your photographs. The journey into black and white is an invitation to see the world through a different lens, appreciating the nuances of light and shadow that often go unnoticed in the colorful world around us.