Creating intricate textures like dragon scales in digital art can be a daunting and time-consuming task if approached with traditional drawing or painting methods. Fortunately, Adobe Photoshop offers powerful built-in tools that can automate much of this process, allowing artists to generate complex scaly patterns with remarkable realism without the need for manual rendering. This tutorial will guide you through a technique to achieve a convincing dragon, dinosaur, snake, or other reptile skin texture, leveraging Photoshop's filters and layer styles to produce a three-dimensional effect with highlights and shadows.
Setting the Foundation: Document and Background Colors
The first step in generating our scaly texture involves establishing the basic canvas and background. Begin by setting your background color. This color will appear in the gaps between the scales, providing depth and contrast. A dark, rich hue like #8f2a00 (a brick red) works effectively to make the scales stand out.
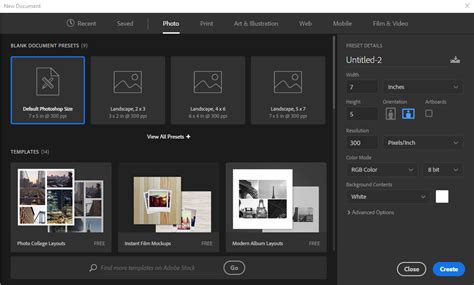
Next, create a new document in Photoshop. The dimensions are flexible; a 500 x 500 pixel canvas is a good starting point, but you can adjust this to suit your project's needs.
Layering for Scale Color and Gradient
With the document prepared, we'll create a new layer that will form the primary color of our scales. Click the "Create a new layer" button at the bottom of the Layers Palette.
Now, define your foreground and background colors for this new layer. For a vibrant scaly appearance, consider using #d5571a as the foreground color and #e98c1f as the background color. These warm, orangey-red tones can evoke the look of dragon hide.
Select the Gradient Tool. Perform a vertical swipe from the top to the bottom of your canvas. This action will create a smooth blend of the foreground and background colors across the layer, establishing a base for the scales.
Crafting the Scale Pattern with the Stained Glass Filter
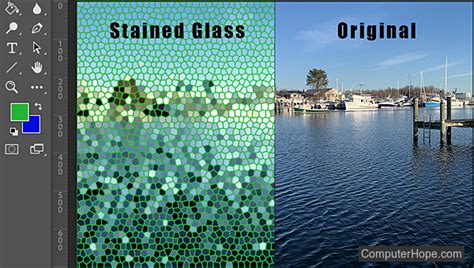
The core of our scale generation lies in utilizing Photoshop's Stained Glass filter. To prepare for this, navigate to the Channels Palette. Create a new alpha channel by clicking on the "Create new channel" icon.
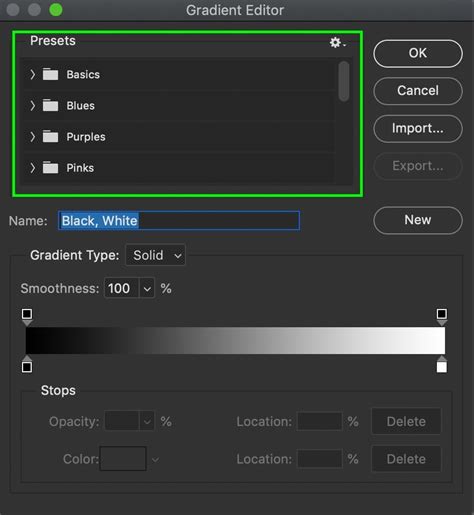
In the Tools Palette, click the "default colors" icon. This action sets your foreground color to white and your background color to black. These colors are crucial for the Stained Glass filter's operation.
Now, access the Stained Glass filter by going to Filter > Texture > Stained Glass. This will open a dialog box where you can adjust the filter settings. Experiment with the "Cell Size," "Border Grout," and "Distortion" sliders. For a convincing scale pattern, aim for settings that create distinct, somewhat irregular shapes. The "Cell Size" will dictate the overall size of your scales, while "Border Grout" controls the thickness of the lines between them. A slight "Distortion" can add organic variation.
Using the Alpha Channel as a Mask for Scale Definition
The alpha channel we created is instrumental in defining the individual scales. Load this alpha channel as a selection by clicking on its icon at the bottom of the Channels Palette. All the white areas within the alpha channel will now be "selected" pixels in your image.
Return to the Layers Palette and ensure that Layer 1 (the layer with your gradient) is highlighted. Perform an "Edit > Cut" operation, or use the keyboard shortcut Command-X (or Control-X on Windows). This action effectively deletes the pixels within the selected areas from Layer 1. The white areas in your alpha channel have acted as a mask, causing the corresponding pixels on your gradient layer to be removed.
This step is critical. By deleting the pixels between the scales, we create distinct boundaries. This is not just to allow the background color to show through; it's a strategic move that will enable Photoshop's layer styles to be applied to each individual scale.
Adding Depth and Realism with Layer Styles
With the basic scale shape defined, it's time to imbue them with a sense of three-dimensionality and realism. This is achieved through Photoshop's powerful layer styles. The reason we cut out the pixels between the scales becomes apparent here: layer styles, such as Drop Shadow and Bevel and Emboss, are applied to the edges of pixels within a layer. By having clearly defined individual scales, these effects will be applied to each scale's perimeter, creating highlights and shadows that mimic a real surface.
To simulate light coming from the upper left, start by adding a subtle Drop Shadow. This will darken the lower right edges of the scales, suggesting they are raised.
Next, select "Bevel and Emboss." This is where the magic of 3D effect happens. Adjust the settings carefully to create a pleasing highlight on the upper left edges and a shadow on the lower right edges of each scale. Experiment with the "Style," "Technique," "Depth," "Direction," "Size," and "Soften" parameters. The goal is to make each scale appear slightly curved and raised.
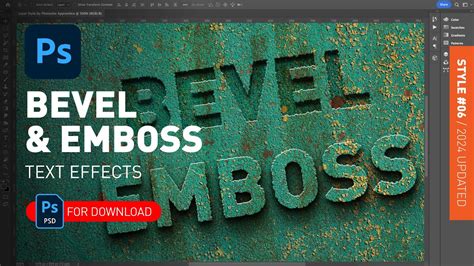
The combined effect of these layer styles, applied to each individual scale, creates a convincing illusion of depth and form. Without this method, manually painting highlights and shadows on every single scale would be an incredibly laborious undertaking.
Texturizing for Organic Variation
Real-world scales, whether on a dragon or a snake, rarely have a perfectly uniform color or surface. To replicate this organic inconsistency, we can introduce texture.
Add a "Texture" overlay to your layer styles. Within the texture options, you can select from Photoshop's built-in patterns. The "Light Marble" pattern can add a subtle, natural variation to the coloration of each scale. Explore other patterns to see how they influence the final look.

Randomizing Coloration with Pattern Overlay
To further enhance the natural look and break up any uniformity, a "Pattern Overlay" can be applied. This step helps to randomize the coloration and create smooth transitions.
Choose a pattern that lends itself to subtle color shifts. The "Molecular" pattern, for instance, with its blurry, organic appearance, can create nice, smooth color variations across the scales. This adds another layer of realism, making the texture appear less artificial and more like a naturally occurring biological surface.
Enhancing the Texture with Photoshop Brushes and Seamless Patterns
While the Stained Glass filter and layer styles provide a robust foundation for generating scaly textures, Photoshop's ecosystem offers additional resources for further refinement and variation. For artists looking for even more control or a different aesthetic, exploring Photoshop brushes and seamless patterns can be highly beneficial.
Numerous resources provide Scale Photoshop Brushes, which can be downloaded and used to paint or enhance existing scale textures. These brushes can introduce unique scale shapes, edge details, or even pre-made scale clusters. By using these brushes with a low opacity and varying flow, artists can add unique touches to their generated textures, making each creation distinct.
Furthermore, the availability of "Scale seamless patterns for Photoshop" offers another avenue for texture creation. These patterns, often provided in .pat format, can be loaded directly into Photoshop's Pattern Fill or Pattern Overlay options. This allows for the quick application of complex, repeating scale motifs across large areas or as a base for further manipulation. Some collections offer a significant number of unique patterns, often accompanied by high-resolution texture files, providing a wealth of options for diverse reptilian or draconic appearances.
How to Create a Reptile Texture Using Photoshop
The combination of the Stained Glass filter technique, carefully applied layer styles, and the judicious use of Photoshop brushes and seamless patterns allows for the creation of remarkably convincing and visually rich scaly skin textures. This approach significantly reduces the manual labor involved, empowering artists to focus on the creative aspects of their artwork rather than getting bogged down in repetitive detailing. The flexibility of these methods means that the same core technique can be adapted to create a wide array of scaly surfaces, from the iridescent shimmer of a serpent to the rugged hide of a dragon.