Creating compelling manga artwork often hinges on the right tools, and for digital artists using ibisPaint, brushes are paramount. ibisPaint offers a robust system for customizing and creating brushes, allowing artists to achieve unique textures, line weights, and artistic effects. This tutorial delves into the intricacies of brush creation and customization within ibisPaint, focusing on the core components that define a brush's behavior and appearance, particularly for manga styles.
Understanding the Building Blocks of a Brush
At its heart, a brush in ibisPaint is defined by several key settings that dictate how it interacts with the canvas. These settings are not merely decorative; they are fundamental to achieving specific artistic outcomes, from sharp, clean lines to textured shading.
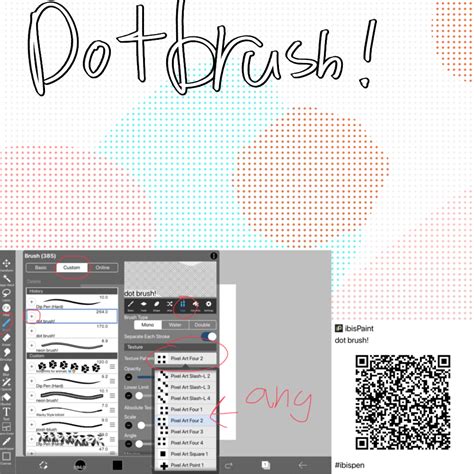
The Brush Pattern is the foundational element, determining the shape of the brush tip. This pattern is repeatedly applied along the stroke as you draw, creating the visual appearance of the line. This is configured in the [Shape] tab's [Brush Pattern] setting. Imagine drawing a dashed line; the dash itself is the brush pattern. For manga, this could be a simple dot, a complex shape, or even a custom texture.
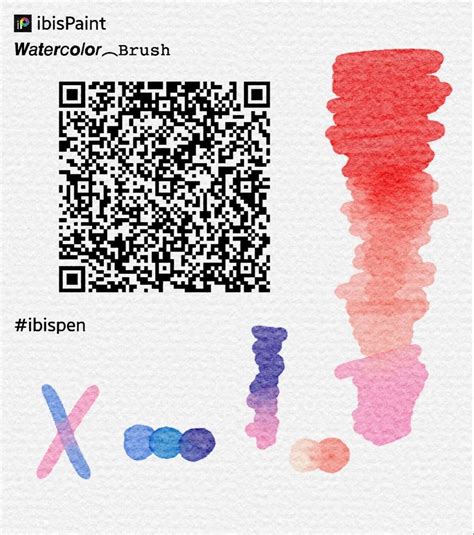
Beyond the shape, Texture plays a crucial role in adding depth and realism to your strokes. This setting, found in the [Type] tab's [Texture Pattern], applies a paper-like texture to the brush strokes. This is especially important for emulating traditional manga paper or adding subtle grain to digital linework, preventing a overly smooth, digital look.
Controlling how a brush fades at its edges is managed by the Blurring Shape. Within the [Fade] tab's [Blurring Shape] setting, this determines how the brush stroke tapers off. A sharp fade creates a crisp edge, while a gradual fade can produce softer, more organic lines, useful for rendering hair or atmospheric effects.
Exploring Brush Pattern Types and Creation
ibisPaint offers distinct ways to define your brush patterns, catering to different artistic needs. The [Type] setting within the brush creation menu is where you select the fundamental nature of your brush pattern.
One option is [Brush Pattern (Mono)]. This allows you to create an image that will serve as your brush pattern. Brushes created using this method are monochrome, meaning they will adopt the color you select for your stroke. This is ideal for creating standard linework brushes, where the shape is consistent regardless of the color used.
Alternatively, [Brush Pattern (Color)] enables the creation of patterns that can incorporate multiple colors. This opens up a world of possibilities for textured brushes, special effects, and unique shading tools. The initial settings of a brush created with this option will differ depending on the chosen template. ibisPaint provides various templates, and selecting one that closely matches your desired brush is a key step in the creation process. For artists aiming to create a brush that functions like a stamp, setting the type to [Brush Pattern (Color)] and the template to [Star] is a recommended starting point.
When you select ⑥[Edit Pattern], the canvas becomes your drawing board for creating the brush pattern itself. The content you draw directly on this canvas will become the repeating element of your brush. If, when creating a Brush Pattern (Mono) or Brush Pattern (Color), you find that your pattern shape isn't appearing in the test drawing and you only see a simple line, this often indicates an issue with either the brush Thickness being too thin or the Spacing being too small. The first step to rectify this is to try increasing the Thickness. The maximum brush thickness can be adjusted within the [Settings] menu under the Max Thickness setting.
Once your brush pattern is finalized, it needs to be saved. The brush pattern image is automatically uploaded to the server when you navigate to ⑭[Back to My Gallery]. Your newly created brush pattern will then be available for use. Upon selecting OK, the brush used for your test drawing will be added to the ⑯[Custom] tab within the Brush Window. It's important to be aware that there's a limit to the number of original brush patterns you can import from other users, so maximizing your own creations is a good strategy.
Customizing Existing Brushes vs. Creating from Scratch
Creating a brush pattern entirely from scratch can be a daunting task, especially for beginners. A more accessible approach is often to start by customizing a favorite existing brush to your specific needs and then registering it as a custom brush. This allows you to leverage the foundational settings of a pre-made brush while tailoring it to your artistic style.
Advanced Color Brush Patterns
For those venturing into the realm of color brush patterns, Brush Pattern (Color) offers the capability to create patterns with multiple hues. The magic of these color brushes lies in how the original ①[Color of Brush Pattern Image] is transformed based on the ②[Color Currently Selected] by the artist when they are actively using the brush.
A crucial element in this transformation is the ③[Base Color]. This base color can be set for your color brush pattern and is configured within Pattern Editing Mode via the ⑤[Base Color Button]. The base color is not just a visual cue; it significantly influences how the colors within your brush pattern will appear when applied to the canvas. The principle is straightforward: if your brush pattern predominantly features red elements, setting the base color to red will ensure that those elements retain their reddish hue when you select red as your brush color. Similarly, if the pattern is primarily blue, setting the base color to blue is recommended.
To establish the correct base color, it's best to first create a canvas specifically for the ⑥[Brush Pattern (Color)] type. Once in Pattern Editing Mode, the ⑧[Base Color] button becomes instrumental in setting the hue. A highly effective method for finding the right hue is to use the eyedropper tool to pick a representative color directly from your brush pattern design.
Let's consider an example: you've designed a brush pattern that looks like a sunflower. If you've used yellow for the petals and correctly set the base color to yellow (by sampling from the petal color), then when you test this brush and select yellow as your current brush color, you will successfully render a yellow sunflower. You've now created your sunflower brush.
The interplay between the base color and the selected brush color is where the true dynamism of color brushes emerges. Imagine changing the brush color from red (which you've set as the base color for your pattern) to green. The hue of the pattern will shift. This shift is based on a color wheel. For instance, changing a color from red to green might involve a hue shift of approximately 120 degrees on the color wheel. If you then change the brush color further to blue, the difference in hue between red and blue is approximately 240 degrees.
It's important to maintain a practical understanding of these color dynamics. The examples of red, green, and blue mentioned above all possess 100% brightness and saturation. A key limitation to remember when using a color brush pattern is that the image drawn on the canvas will never exhibit a more vivid or saturated appearance than the original brush pattern image itself. The color brush essentially recolors the pattern, it doesn't enhance its inherent color properties beyond what was initially designed. This means that if you want a vibrant output, your initial brush pattern design needs to be vibrant.
Practical Application for Manga Artists
For manga artists, these brush customization features are invaluable. Creating custom brushes allows for:
- Unique Linework: Develop brushes with specific line weights, edge softness, or subtle textures that define your personal art style. This can range from the crisp, clean lines favored in many shonen manga to the softer, more expressive lines found in shojo.
- Textured Shading: Design brushes that mimic traditional screentones or create unique hatching and cross-hatching effects for shading. This can significantly speed up the shading process compared to manual methods.
- Special Effects: Craft brushes for adding speed lines, impact effects, or even stylized hair textures.
- Efficient Workflow: Once created and saved, custom brushes can be quickly accessed, streamlining the drawing process and allowing artists to focus on creativity rather than repetitive tool setup.
HOW To Make ibisPaint Custom Brush?
By understanding and utilizing the brush pattern, texture, and color settings within ibisPaint, artists can unlock a new level of control and expressiveness in their digital manga creations. Experimentation is key, and the ability to refine and create brushes tailored to individual needs is a powerful asset for any digital artist.