The art of photo collage making has evolved from a simple craft into a powerful tool for visual storytelling, personal expression, and professional design. Whether you're aiming to create a cherished memory book, a striking marketing banner, or an engaging social media post, understanding the process and available tools is key. This guide delves into the multifaceted world of collage creation, offering insights from basic functionalities to advanced customization, ensuring you can produce stunning results regardless of your experience level.
Laying the Foundation: Understanding Collage Dimensions and Layouts
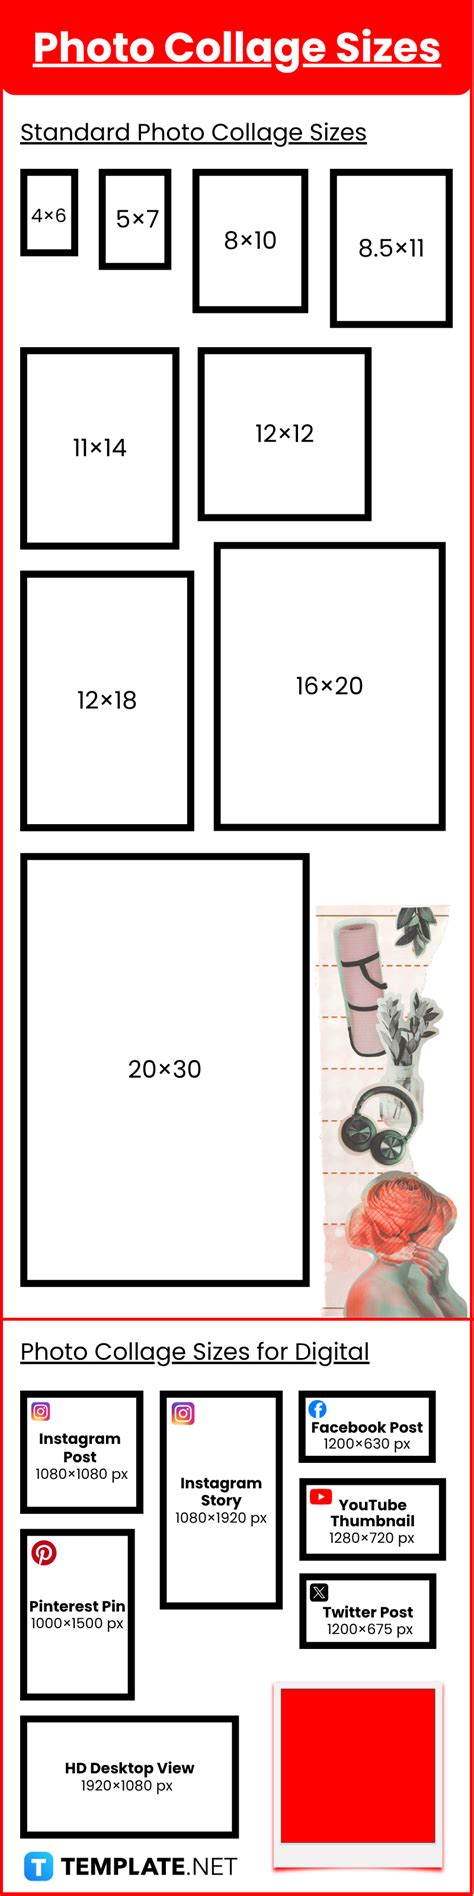
The initial step in any collage project involves defining its physical or digital dimensions. This is crucial for ensuring your final creation fits its intended purpose, whether it's a print for a standard photo frame or a digital asset for a specific social media platform.
Many collage makers offer a selection of pre-defined sizes, catering to common needs such as a 4x6 inch photo collage, an 8x10 inch photo collage, or an 11x14 inch photo collage. These standard options provide a convenient starting point. However, for more specific requirements, the ability to manage custom sizes is invaluable. This often involves specifying the width and height in various units like pixels, inches, millimeters, or centimeters. Furthermore, setting the resolution, typically measured in pixels per inch (PPI), is vital for print quality. A resolution of 300 PPI is generally recommended for high-quality prints, ensuring clarity and detail. Some advanced software, like TurboCollage, even permits custom sizes up to an impressive 24000 x 24000 pixels, accommodating nearly any conceivable project.
Beyond dimensions, the choice of layout dictates the arrangement of your images. Modern collage tools offer a diverse range of pre-made templates, from classic grids to more dynamic and asymmetrical arrangements. These layouts serve as a structural foundation, guiding the placement of your photos. You can select a layout that best suits the number of images you plan to use and the overall aesthetic you wish to achieve. It's important to note that most software allows for flexibility; you can often change your chosen layout later in the design process if your vision evolves. This adaptability ensures that you are not locked into an initial decision and can explore different compositions freely.
Populating Your Canvas: Adding and Arranging Images
Once your canvas is set and a layout is chosen, the next step is to fill the designated spaces, or "cells," with your chosen photographs or videos. The process typically involves either uploading your own images directly from your computer or utilizing built-in libraries or stock photo collections.
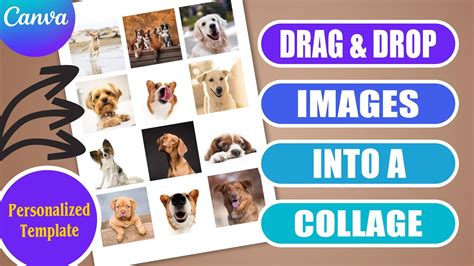
To upload your photos, you'll usually find an "Add Image" or similar button. This action opens a file browser, allowing you to select one or multiple images. Alternatively, many applications support a drag-and-drop functionality. You can open your computer's file explorer (like Finder on Mac or File Explorer on Windows), locate your desired images or folders, and simply drag them onto the collage editor. Some tools even allow you to import photos directly from applications like iPhoto or Aperture.
Once images are uploaded or selected from a library, they can be placed into the collage cells. This is often as simple as dragging an image from a preview panel into a specific cell. If you have many photos, some editors offer an "Autofill Cells" option, which randomly populates the layout with your uploaded images, providing a quick starting point.
After an image is placed within a cell, you gain control over its appearance within that specific space. You can adjust the size of the photo inside the cell using a slider, allowing you to crop or reveal more of the image. The "Position & Size" panel, often found on the right side of the window, allows for precise adjustments. You can also rotate the image, flip it horizontally or vertically, and fine-tune its placement. The ability to swap two photos within different cells is another common and useful feature, allowing for easy experimentation with different arrangements.
Enhancing Your Visuals: Editing and Customization Tools
Beyond basic placement, collage makers provide a rich set of tools to enhance individual photos and the overall collage. These features allow for detailed control over the aesthetic and mood of your creation.
Photo Adjustments: Most editors offer a suite of tools for image manipulation. You can adjust fundamental aspects of a photo's appearance, such as Saturation, Hue, Exposure, Contrast, and Brightness, often through intuitive sliders. These adjustments can help to unify the look of different photos within a collage or to correct minor imperfections. A "Reset" button is usually available to revert any changes made to a specific photo.
Effects and Filters: To further stylize your images, many collage makers provide a collection of popular photo effects or filters. These can range from vintage looks and black-and-white conversions to artistic filters that dramatically alter the image's tone. Applying these effects can quickly establish a consistent theme or mood across your collage.
Shadows and Borders: Adding subtle shadows can give your photos a sense of depth, making them appear to pop off the background. You can typically customize shadow settings, including color, blur radius, and opacity, to achieve the desired effect. Similarly, borders can be applied to individual photos. These can range from simple, thin lines to more elaborate frames. The color, width, and style of these borders can often be customized.

Frames and Masks: Some advanced tools offer the ability to apply frames to photos, which are distinct from simple borders and can be more decorative. Masks, on the other hand, allow you to shape the photo itself into non-rectangular forms, such as circles, stars, or custom shapes, adding a unique artistic flair to your collage.
Beyond the Photos: Backgrounds, Text, Shapes, and More
The collage creation process extends beyond manipulating individual photos. The background, text elements, and additional graphics play a crucial role in the overall composition and message.
Background Customization: The background of your collage can significantly impact its overall feel. Collage editors typically offer several options for background customization:
- Solid Colors: You can choose a specific color to fill the background, often using a color picker or pre-defined palettes.
- Patterns: A selection of tileable or stretchable patterns can be applied as a background, adding texture and visual interest.
- Images: You can also use your own images or stock photos as the background, which can be particularly effective for creating immersive or thematic collages.
Adding Text: Text is a powerful element for conveying information, adding captions, or simply enhancing the artistic message of your collage. Most collage makers include a text tool that allows you to add text boxes. Once added, you can typically customize the font, size, color, alignment, and even apply effects like shadows or outlines to your text.
Incorporating Shapes and Graphics: To further embellish your collage, you can often add pre-configured shapes or a library of clipart. These elements can be used to create visual dividers, add decorative accents, or reinforce the theme of your collage. Like photos and text, these elements can usually be resized, rotated, and repositioned.
Calendars and Special Elements: Some specialized collage makers, like TurboCollage, even include dedicated tools for adding elements like calendars directly into your collage, making them ideal for personalized gifts or organizational tools.
Refinement and Output: Spacing, Sizing, and Saving
The final stages of collage creation involve fine-tuning the arrangement and preparing the artwork for its intended use.
Adjusting Spacing and Borders: The space between individual photos, as well as the outer border of the entire collage, can be adjusted. Using a "Spacing" slider, you can control the gap between cells. Many tools offer a lock function for spacing, which ensures that the outer border resizes proportionally with the inner borders. Unlocking this feature allows for independent control of the outer border's size. Additionally, the "cell corners" can often be rounded, providing a softer aesthetic.
Resizing the Collage: As mentioned earlier, while you might start with a specific layout and dimension, the ability to resize your entire collage on the fly is a significant advantage. This is particularly useful if you decide to adapt your creation for different platforms or print sizes. Some advanced tools feature a "Smart Resize" function that can quickly reformat your collage to various pre-set sizes, such as those optimized for social media.
Saving and Exporting: Once you are satisfied with your collage, it's time to save your work. Most modern applications offer auto-save features or allow you to manually save your project in a proprietary format (e.g., a .clg file). This saved file typically retains all your editing information, allowing you to return and make further modifications later.
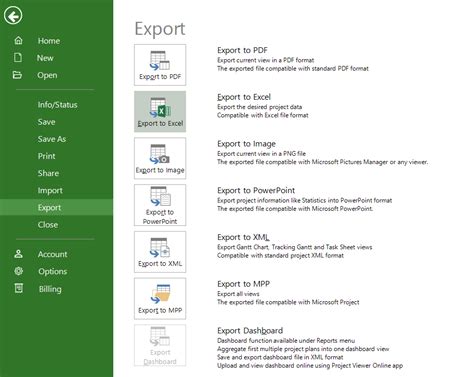
For sharing or printing, you will need to export your collage in a standard image format. Common export options include JPEG, PNG, and sometimes PDF (especially for professional use). The exported file will reflect the dimensions and resolution you set for your collage.
Privacy and Accessibility: Understanding Your Collage Editor
It's worth noting the increasing emphasis on user privacy and accessibility in online collage makers. Many platforms now operate directly within your web browser, meaning your photos never leave your device. This offers a significant privacy advantage, as your personal images are not uploaded to external servers. Furthermore, many of these browser-based editors are completely free to use and do not require registration or software installation, making them accessible to a wide audience. This ease of use, combined with powerful features, democratizes the creation of compelling visual content.
Advanced Considerations and Creative Applications
The potential applications of photo collages are vast and extend far beyond simple decorative purposes. They can serve as:
- Personalized Gifts: Wedding announcements, graduation announcements, new baby announcements, and birthday invitations can all be beautifully crafted as collages.
- Marketing and Branding: Business brochures, advertisements, and social media banners can be made more engaging with dynamic photo collages.
- Inspirational Tools: Vision boards and mood boards are powerful tools for visualizing goals and aspirations, and collages are the perfect medium for their creation.
- Storytelling: By carefully selecting and arranging images, you can use a collage to tell a story, convey a message, or evoke a specific emotion.
- Social Media Content: Creating visually appealing collages for platforms like Instagram, Pinterest, or Facebook can significantly boost engagement and help build a consistent brand aesthetic.
For those looking to push their creative boundaries, exploring tutorials on specific techniques, such as creating video collages, mirror images, or side-by-side photo arrangements, can unlock even more possibilities. The world of collage making is truly infinite, offering endless opportunities for creativity and expression.