In the pursuit of photographic perfection, capturing a fleeting moment can often be a delicate dance between ideal conditions and the realities of a moving subject or unsteady hands. When the lighting is less than optimal and a subject refuses to cooperate with a repeated pose, saving a potentially winning image can become a significant challenge. This is precisely where tools designed to combat image blur become invaluable. While the specifics of software evolve, understanding the principles and historical tools for shake reduction remains crucial for photographers seeking to salvage their shots.
The Genesis of the Shake Reduction Tool
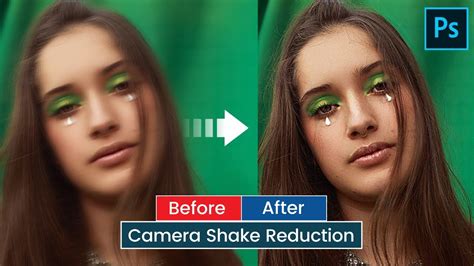
The evolution of digital imaging software has seen the introduction of increasingly sophisticated tools to address common photographic imperfections. Among these, the "Shake Reduction" feature, once a prominent element within Adobe Photoshop, was designed to intelligently counteract the blur introduced by camera movement during image capture. This feature aimed to analyze the subtle or pronounced motion that blurs pixels and then extrapolate corrections to restore sharpness. It was a direct response to the prevalence of images suffering from camera shake, a ubiquitous problem for photographers, especially those working in dynamic situations or with lower shutter speeds.
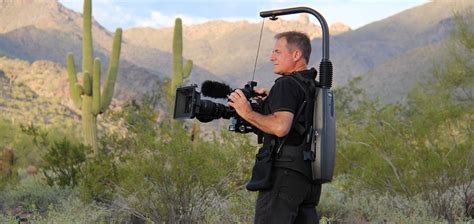
The necessity for such a tool became apparent as photographers encountered scenarios where capturing a sharp image was paramount, but the circumstances made it difficult. For instance, working at events like the Hummingbird Festival in Sedona, AZ, photographers might be tasked with capturing video clips for promotional purposes while simultaneously capturing stills of subjects, such as a new falcon on display at the International Raptor Falconry Center (IRFC) booth. In such settings, backlighting can be prevalent, and the use of flash might be impractical or undesirable. The handler of a falcon, Michelle Losee Ph.D., might attest that falcons do not pose on command with wings spread and eyes fixed on the lens. In these fast-paced environments, quickly moving the camera to capture a moment can easily lead to motion blur, even resulting in a slight double image.
Understanding Camera Shake: Types and Manifestations
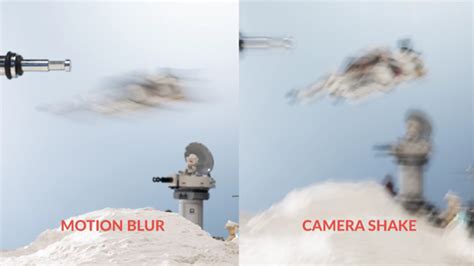
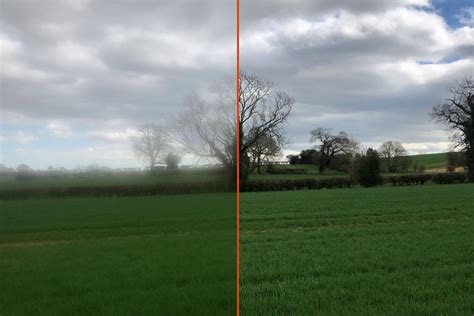
Camera shake is not a monolithic problem; it manifests in various ways, each influencing the pixels of a photograph differently. Understanding these variations is key to appreciating the capabilities and limitations of any shake reduction tool.
Linear Camera Shake
This is perhaps the most common form of camera shake. When the camera moves in a single, straight line during the exposure, the pixels of the subject are spread out along that line. This results in a distinct directional blur that can often be visually identified.
Circular Camera Shake
Less common, but certainly possible, is circular camera shake. This occurs when the camera movement is predominantly in a circular motion. The resulting blur pattern will reflect this circular path, spreading the pixels outwards in a radial fashion.
Arching Camera Shake
A variation of circular motion, arching camera shake involves a rotational movement that doesn't complete a full circle. The pixels will appear to be spread in an arc, indicating a partial rotation of the camera.
Zigzag Camera Shake
When a camera shakes in both horizontal and vertical directions, often in a rapid, erratic manner, a zigzag motion is imparted to the image. This results in a complex blur pattern where pixels are displaced in multiple directions, creating a jagged or "zigzag" effect.
It's important to note that while these extreme examples are useful for understanding the concept, the Shake Reduction feature in Photoshop might not be able to fully restore images subjected to severe degrees of shake to their original pixel perfection. However, for moderate blur, it can be remarkably effective.
The Mechanics of Photoshop's Shake Reduction
Photoshop's Shake Reduction feature operated on an intelligent mechanism designed to automatically detect and reduce blurring caused by camera motion. The process involved a multi-step analysis and correction approach.
Initiating the Shake Reduction Filter
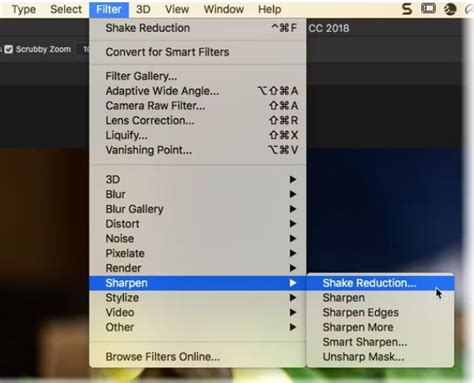
The first step to utilizing this tool was to access it through the Photoshop interface. This was typically done by navigating to the Filter menu, then selecting Sharpen, and finally choosing Shake Reduction.
Automatic Analysis and Correction
Upon invoking the filter, Photoshop would automatically analyze the image. It would identify the region of the image best suited for blur estimation, considering factors like edge contrast and detail. Based on this analysis, the software would determine the nature of the blur - its direction, extent, and type - and then extrapolate the appropriate corrections to the entire image. The goal was to effectively "undo" the motion that caused the blur.
The Detail Loupe and Previewing
A crucial element of the Shake Reduction dialog box was the Detail loupe. Located in the lower-right pane, this feature allowed users to closely examine a specific, magnified region of the image. This was essential for assessing the effectiveness of the applied corrections and for fine-tuning the process. Users could zoom in or out on image elements within this loupe to get a precise view of the sharpened areas.
Understanding and Manipulating Blur Traces
A "blur trace" represented the shape and extent of the blur that affected a selected region of the image. Different parts of an image could be subject to differently shaped blurs. The automatic shake reduction primarily worked with a default blur trace determined by Photoshop's algorithms as most suitable for estimation. However, users had the ability to override this automatic detection and manually define or modify blur traces for more precise control.

Advanced Controls for Fine-Tuning
The Advanced panel within the Shake Reduction dialog offered a suite of tools for more granular control:
- Creating and Modifying Blur Traces: For optimal results, it was recommended to create blur traces in regions with good edge contrast. Users could simply resize the boundaries of the region in focus to update the associated blur trace. The Add Suggested Blur Trace icon in the Advanced panel could help identify and add potential blur traces. Users could also draw selection rectangles anywhere on the image to define new regions for analysis.
- Enhance At Loupe Location: This function allowed users to move the focus of the main preview pane to the region currently highlighted in the Detail loupe, enabling a more direct comparison of adjustments.
- Multiple Blur Traces: The ability to use multiple blur traces was particularly helpful for sharpening different regions of an image that might exhibit distinct types of blur.
- Resizing and Changing Focus: Users could resize the blur trace boundaries and adjust the focus point to refine the area of analysis.
- Previewing Side-by-Side: The option to preview results with two blur traces simultaneously allowed for quick comparisons of adjustments to Smoothing and Artifact Suppression, and how these changes impacted the image.
- Duplicate Blur Traces: Creating duplicate blur traces was a practical way to quickly experiment with different Smoothing and Artifact Suppression settings and observe their effects.
- Save Blur Trace: This option allowed users to save specific blur trace configurations for later use or comparison.
- Blur Trace Bounds: This setting controlled the size of the area used to trace the blur, influencing the sensitivity of the analysis.
- Smoothing: This slider was designed to reduce high-frequency sharpening noise that could be introduced during the sharpening process. The default value was often 30%, but users could adjust it based on the image's noise characteristics.
- Artifact Suppression: When sharpening an image, noticeable noise artifacts could appear. The Artifact Suppression slider helped to mitigate these, with higher values leading to less noticeable blockiness or noise. When this was not sufficiently adjusted, Photoshop would generate coarser previews.
Best Practices for Effective Shake Reduction
To achieve the most satisfactory results with the Shake Reduction filter, certain conditions and approaches were recommended:
Image Quality Matters
Decently lit still camera images with low noise were ideal for working with the Shake Reduction filter. Images that were already noisy or poorly exposed presented a greater challenge for the algorithm to accurately distinguish between genuine blur and inherent image noise.
Zoom Level Considerations
A peculiar quirk of the Shake Reduction feature was its performance at different zoom levels. It was often observed that the tool did not work optimally if the image was already significantly zoomed in. In such cases, zooming back out to a more general view and then re-applying the shake reduction process could yield better results.
Working with Layer Copies and Masks
When the Shake Reduction filter introduced undesirable artifacts or sharpened areas that were not intended to be corrected, the use of layer masks became essential. By copying the image layer, applying the Shake Reduction to the duplicate, and then using a mask to selectively reveal the corrected areas, photographers could precisely control which parts of the image benefited from the filter's effect. This approach allowed for targeted application of the correction, ensuring that only the blurred regions were improved while preserving the integrity of other image elements.
Beyond Photoshop: Alternative Approaches to Image Sharpness
While Photoshop's Shake Reduction was a powerful tool, it's important to acknowledge that it has been removed from newer versions of Photoshop (as of version 23.3). This highlights the evolving nature of software and the continuous development of new technologies. However, the underlying principles of combating blur remain relevant, and several alternative strategies and tools exist:
Pre-emptive Measures: Capturing Sharp Images
The most effective way to combat blur is to prevent it in the first place. This involves understanding photographic fundamentals and employing techniques that promote sharpness:
- Shutter Speed: For handheld photography, especially with average focal lengths (around 35mm), shutter speeds slower than 1/60 second are likely to introduce blurring. To compensate, photographers can:
- Open up the aperture: A wider aperture (smaller f-number) allows more light into the lens, enabling a faster shutter speed.
- Increase ISO: The ISO setting determines the sensitivity of the camera's sensor to light. Increasing ISO allows for faster shutter speeds, but it comes at the cost of increased digital noise or grain.
- Tripods and Stabilization: For static subjects or situations requiring very slow shutter speeds (e.g., long exposures for sunsets or astrophotography), using a tripod is essential. Image stabilization in lenses or camera bodies can also significantly help reduce blur from minor camera movements.
- Proper Handholding Technique: Even when handholding, adopting a stable stance and a firm grip on the camera can minimize movement.
Modern Software Solutions
While Photoshop's native Shake Reduction is no longer available, other software solutions and plugins offer advanced image sharpening and blur reduction capabilities. These often employ sophisticated AI-driven algorithms to achieve impressive results. Examples include:
- Radiant Photo: This software is designed to deliver high-quality finished photos with excellent color rendition and speed, aiming to make photos "RADIANT."
- Mylio Photos: While primarily a photo management tool, Mylio Photos emphasizes accessing photos from anywhere without relying on the cloud, indirectly supporting the goal of having well-preserved and sharp images.
- Third-Party Plugins: Numerous plugins for Photoshop and other editing software specialize in noise reduction and sharpening, often with advanced AI features that can tackle blurriness effectively.
Professional Retouching Services
For photographers who consistently struggle with blurred images or require a high volume of professionally edited photos, outsourcing to image editing services is a viable option. These services often offer specialized camera shake reduction and high-end image manipulation within specified timeframes, sometimes with discounts for bulk orders.
The Enduring Value of Image Restoration
The journey to a perfectly sharp image can be fraught with challenges, from the subtle tremor of a hand to the unpredictable nature of a moving subject. While the specific tools within software may change, the fundamental desire for clear, impactful photographs remains constant. The principles behind Photoshop's Shake Reduction, and indeed the broader field of image restoration, underscore the importance of understanding both preventative measures and post-processing techniques. Whether through the now-retired but once-powerful Shake Reduction filter, modern AI-driven software, or meticulous manual adjustments, the goal is always to bring clarity to the captured moment, ensuring that the photographer's vision is not lost to the blur.