In the realm of digital artistry and photography, the ability to seamlessly merge two or more images into a single, cohesive picture is a fundamental skill. This technique, often referred to as creating a "composite," allows photographers and designers to overcome the limitations of a single shot, enhance storytelling, and unlock a wealth of creative possibilities. Whether you aim to combine the best elements from multiple group photos, blend different exposures for optimal detail, or simply inject a touch of artistic flair into your work, understanding how to merge photos in Photoshop is an invaluable asset. This guide will walk you through a clear, step-by-step methodology, empowering you to merge images cleanly and professionally, transforming ordinary photographs into extraordinary visual narratives.
The Genesis of a Composite: From Idea to Image
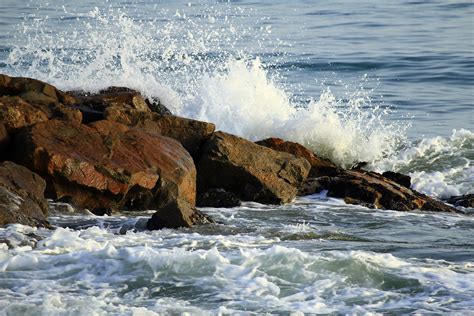
Every compelling merged image begins with a spark of an idea. This can be as straightforward as capturing two distinct moments in time and wishing to present them simultaneously, or as complex as weaving a narrative that transcends the boundaries of a single frame. For instance, imagine the dynamic energy of an ocean wave crashing against a rock. You might capture two separate instances of a powerful splash, intending to combine them for a more dramatic effect. The inherent challenge in such a scenario often lies in the practicalities of shooting - perhaps handheld, leading to slight misalignments that require skillful correction.
The concept of creating a composite extends far beyond simple image combination; it’s about carefully blending layered images to forge a harmonious and believable composition. This process demands attention to detail, as you must meticulously adjust and refine each element to ensure they integrate seamlessly. Once this merging technique is mastered, its application becomes remarkably versatile. Consider the common scenario of group photography: if one person blinks in every shot, merging the best facial expressions from multiple images can salvage an otherwise imperfect photograph. Similarly, you can stack more than two images, selectively masking out the desired portions from each to construct a perfect whole. This principle also applies to adding elements, such as birds, to a photograph and achieving a transparent background without complex selections.
The underlying philosophy behind merging photos is to leverage the strengths of multiple images to create something greater than the sum of its parts. This can involve juxtaposing elements to tell a story, as exemplified by the idea of students transitioning from education into university or the workplace, moving into a city to embark on the next chapter of their lives. By merging images that evoke this narrative, artists can craft unique pieces of art that resonate with a particular theme or message.
Preparing Your Images for Merging in Photoshop
Before embarking on the merging process, it's crucial to have your source images ready. The first step generally involves opening the photographs you intend to combine within Adobe Photoshop. While this guide focuses on Photoshop, it's worth noting that other image editing programs offer similar workflows for merging images.
Step 1: Isolating Elements by Removing Backgrounds
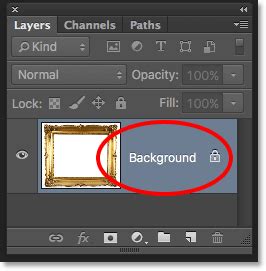
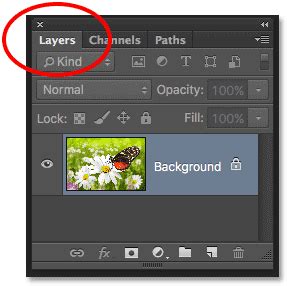
A common and often necessary precursor to merging is the removal of backgrounds from individual images, allowing for cleaner integration. To achieve this, open your primary image, which might contain the main subject you wish to isolate. The first action is typically to "unlock" the background layer, often by dragging the lock icon in the Layers panel to the trash bin, and then renaming this layer descriptively, for instance, "man."
Next, utilize Photoshop's selection tools to isolate your subject. The "Object Selection Tool" is a powerful starting point, allowing Photoshop to automatically detect and select prominent objects within your image. Once the subject is selected, it's often beneficial to invert this selection. This is done by navigating to Select > Inverse selection. With the background now selected, you can press the backspace key to delete it. Finally, deselect the area by pressing Ctrl/Cmd + D.
Step 2: Integrating and Positioning Subsequent Images
With your primary subject isolated, the next step is to bring in the second image you wish to merge. This can be achieved by simply dragging and dropping the second picture directly onto your existing Photoshop document. Upon dropping the image, it will appear as a new layer. Ensure this new layer is positioned above your initial subject layer in the Layers panel.
To control how this new layer interacts with the one below it, the concept of a "Clipping Mask" is essential. Right-click on the upper layer (the one you just dropped in) and select "Create Clipping Mask." This action constrains the pixels of the upper layer to only appear within the boundaries of the pixels in the layer directly beneath it.
Often, the newly added image might not be perfectly positioned or sized. To adjust this, select the Move Tool and reposition the layer as needed. For more precise scaling and rotation, press Ctrl/Cmd + T to enter "Free Transform" mode. You can then resize the layer to fit your composition and reposition it further. Understanding the nuances of layers is fundamental to mastering these techniques, and Photoshop offers extensive resources for learning more about their functionality.
Step 3: Refining the Blend with Layer Masks
Once an image is placed and clipped, it may require further refinement to blend seamlessly. This is where layer masks become indispensable. To begin refining the "river" layer (as in our example), add a mask to it.
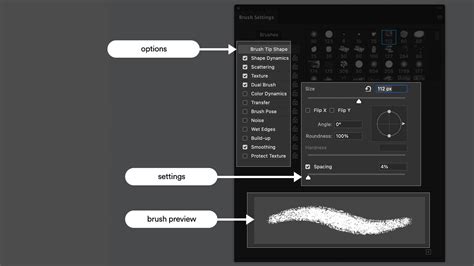
Select the Brush Tool. Choose black as your foreground color, as black on a mask hides pixels, while white reveals them. It's often beneficial to set the Opacity and Flow of your brush to a lower setting, around 40%, and ensure the brush hardness is set to 0% for a soft, gradual blend. Begin painting over the areas of the "river" image that you wish to make transparent or blend into the layer below. Adjusting the opacity and flow of the brush allows for subtle transitions.
After achieving a satisfactory blend with the brush, you might need to refine other parts of the layer. For instance, if you need to remove the sky from the "river" image, select the "river" layer (not its mask) and use the Quick Selection Tool to click on the sky. Then, access the "Select and Mask" workspace (or "Refine Edges" in older Photoshop versions). Within this workspace, adjust settings like "View Mode" to "Overlay" and fine-tune sliders like "Opacity" and "Shift Edge" to achieve a precise selection. Once you’re satisfied with the selection, you can output it as a "Selection" and then, with the mask of the "river" layer selected, use Shift + F5 or Edit > Fill to fill the selected area with black, effectively hiding it. Remember to deselect by pressing Ctrl/Cmd + D.
Expanding the Canvas and Integrating Further Elements
Step 4: Adding Space and Integrating Additional Layers
Sometimes, the existing canvas size isn't sufficient to accommodate all the elements you wish to incorporate. This is where the Crop Tool comes into play, but with a specific application. Select the Crop Tool. In the options bar, ensure "Delete Cropped Pixels" is unticked and "Content-Aware" is also deselected. You can clear any preset crop ratios by clicking the "Clear" button. Now, you can drag the handles of the crop box to extend the canvas. For example, to add space above a subject's head for another image, drag the top handle upwards.
To use this newly created space effectively, you might need to refine existing masks. Holding down the Ctrl/Cmd key and clicking on the mask of a layer (e.g., the "river" layer) will create a selection based on the visible (white) parts of that mask. You can then use tools like the Lasso Tool, holding Alt/Opt to subtract from the selection or Shift to add to it, to precisely define areas that need masking on other layers. For instance, you might need to mask out the top of a head to prepare for a new element.
Subsequently, select your primary subject layer ("man" layer in our example) and add a layer mask to it. Use the brush tool with black paint on this mask to hide any unwanted elements that might have remained. It's crucial to ensure you are actively working on the mask itself when making these refinements.
Step 5: Incorporating Complex Elements like Cityscapes
Integrating more complex elements, such as a cityscape, follows a similar pattern. Ensure no layers are currently selected by clicking in a blank area of the Layers panel. Drag and drop your "city skyline" image onto the canvas. As before, adjust its opacity temporarily (e.g., to 40%) to make it easier to position and scale. Double-check that this layer is at the top of the layer stack and is not clipped to any other layer.
With the "city skyline" layer selected, press Ctrl/Cmd + T for Free Transform to resize and reposition it as needed. Once positioned, you'll likely want to refine its integration. One effective method involves selecting the sky within the "city skyline" image. The Object Select Tool can be useful here, especially with the "Hard Edge" option ticked. After selecting the sky, you can add a layer mask to the "city skyline" layer. Then, with the mask selected, use Shift + F5 or Edit > Fill to fill the selection with black, hiding the sky. Deselect using Ctrl/Cmd + D.
Further refinement might involve using the brush tool with black and white paint on the mask to hide or reveal specific areas, or employing the Polygonal Lasso Tool to create precise selections for areas that require clean, straight edges, which can then be filled with black on the mask.
Advanced Techniques for Seamless Integration and Artistic Flair
Step 6: Applying Adjustment Layers and Revealing Details
To enhance the overall coherence and artistic impact of your composite, adjustment layers are indispensable. Grouping related layers, such as the "man," "river," and "city skyline," can streamline the application of global adjustments. Name this group descriptively, for example, "man, river, city."

A "Gradient Map" adjustment layer, placed above your grouped image layers, can introduce a unified color tone. Experiment with different Gradient Presets; a "Sepia" tone, for instance, can evoke a vintage feel. Following this, a "Curves" adjustment layer, positioned above the Gradient Map, allows for fine-tuning of contrast and brightness. Creating an "S" curve in the RGB channel is a classic method for enhancing contrast.
Sometimes, crucial details from underlying layers might be obscured. To reveal them, you can select the mask of a specific layer (e.g., the "river" image mask) and use the brush tool with a low opacity (around 20%) and a soft brush (hardness 0%) to gently paint over areas like eyes or ears, making them visible again. This selective revealing technique adds depth and realism to the composite. Learning about the advanced applications of curves in Photoshop can further elevate your editing capabilities.
Step 7: Harmonizing Tones and Enhancing Blending
Achieving a natural blend often requires subtle adjustments to color and contrast. You can duplicate your main subject layer ("man" layer) by holding Alt/Opt, clicking the layer, and dragging it above other groups. Change the Blend Mode of this duplicated layer to "Screen" and reduce its opacity significantly (e.g., to 30%). This can help to subtly bring back highlights and integrate the subject more smoothly.
Simultaneously, you might need to adjust the opacity of other layers, such as the "river" layer, to find the optimal balance. Reducing the contrast of elements like the "city skyline" can also contribute to a more harmonious look. This can be achieved by adding a "Curves" adjustment layer above the "city skyline" layer, clipping it to that layer, and then making subtle adjustments to the curve.

The strategic use of blend modes is a powerful tool for achieving impressive results when merging photos. Further refinements can be made by grouping the duplicated "man" layer, the Gradient Map, and the Curves adjustment layer, and naming this group "effects."
Finally, for an overarching color harmony or to add a subtle background tint, you can add a "Solid Color" fill layer. Choose a color that complements your composite. Then, select the mask of this color fill layer and use a soft brush with low opacity and flow to mask out areas, revealing the underlying image content where desired. This technique allows for precise control over color application and can effectively tie all the elements together.
Final Tips for Successful Photo Merging
The journey of merging photos in Photoshop is one of continuous learning and experimentation. The techniques explored-blend modes, layers, masking, and adjustment layers-form the bedrock of creating stunning composites. For those seeking a deeper dive into these powerful tools, dedicated Photoshop courses offer comprehensive instruction.
8-Step GUIDE: Blend Images and Create Composites Like a Pro with Photoshop ✅🔥
When beginning your merging process, pay close attention to the dimensions of your source images. Examining the "Document Dimensions" can help prevent resolution issues. A common practice is to place the larger image on top of the smaller one. When dragging and dropping, using the Shift key while releasing the mouse button can ensure the image is centered.
The process of selecting and refining subjects, particularly those with complex details like fur, often involves the "Select and Mask" workspace. Here, using a brush with black paint on the layer mask will hide parts of the layer, while white paint reveals them.
Color matching is critical for realism. Photoshop's "Match Color" feature can be instrumental. By selecting the source image and the target layer, you can sample colors from one to apply to another. The "Fade" slider then allows for fine-tuning the intensity of the color match.
Creating realistic shadows is another key element. While a "Drop Shadow" layer effect is a starting point, separating the shadow onto its own layer and then transforming it-using "Skew" to mimic perspective and applying a "Gaussian Blur" for softness-can yield more natural results. Reducing the shadow layer's opacity is also essential.
For advanced users, techniques like displacement maps can offer even more sophisticated blending options. However, for beginners, focusing on the fundamental layer and masking techniques, combined with careful color and shadow adjustments, provides a solid foundation for creating compelling photographic composites. The ability to combine images, as demonstrated by Colin Smith, a seasoned Photoshop professional with extensive experience in training and content creation, highlights the enduring power and versatility of this fundamental editing skill.
The core principle of merging images often starts with a clear understanding of layers. Beginning with two layers, you can then manipulate how they interact. Changing the blend mode from "Normal" to "Overlay" on a texture layer, for example, alters how its colors interact with the layer beneath. Adding a layer mask by clicking the "Add layer mask" icon at the bottom of the Layers panel introduces a white thumbnail linked to the layer. This mask acts as a stencil, where white areas allow the layer to be visible, and black areas conceal it. The Brush Tool is then used to paint on this mask, controlling which parts of the layer are seen and which are hidden. This fundamental workflow, applied with precision and creativity, unlocks the potential to merge images in Photoshop with professional results.