The visual representation of a firearm's discharge is a critical element in digital art and game development, providing crucial feedback to the player and enhancing the overall aesthetic. For projects involving futuristic or energy-based weaponry, the creation of a unique and compelling muzzle flash requires careful consideration of design, technical execution, and thematic coherence. This guide delves into the process of conceptualizing and creating electric muzzle flashes, drawing inspiration from comic book art and 3D modeling techniques.
Conceptualizing the Electric Discharge
When designing an electric muzzle flash, the primary goal is to convey the weapon's energy-based firing mechanism. The provided examples highlight a desire for light blue hues to signify the electricity emitted by the gun. The design should not only look visually striking but also be relevant to the imagined functionality of an electric weapon.
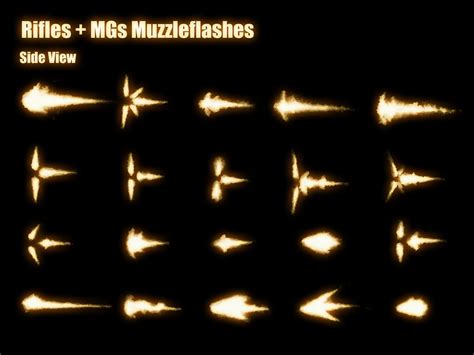
Two distinct design philosophies emerge from the user's research. The first involves a multi-stage, multi-component approach. This design features a charging phase, indicated by a small ball of energy, followed by the primary flash as the projectile leaves the barrel, and finally, a secondary effect of electricity generated by the barrel's rotation. This layered approach offers a more complex and dynamic visual.
The second design, considered potentially superior for its electric theme and lack of a "charged burst" feel, utilizes two simpler assets. The first is the main blast, and the second is a streak created by the projectile, which appears to drag some of the blast energy with it. This design is more streamlined, fitting the electric theme without the implication of a charged shot, which may or may not align with the specific weapon's lore. A third, even more basic design, also relies on a simple flash and a streak, proving reliable and fitting for the gun.
Design Considerations for Visual Feedback and Legal Compliance
Beyond aesthetics, several practical considerations are paramount. The muzzle flash must provide clear and visible feedback to the player, ensuring they understand how the weapon fires and what it's discharging. This visual clarity is essential for good gameplay. Furthermore, the size and intensity of the muzzle flash must be proportionate to the weapon itself; a small firearm shouldn't have an overwhelmingly large flash, nor should a large weapon have a minuscule one. This ensures visual harmony and believability within the game's world.
Crucially, creators must be mindful of legal considerations, particularly copyright. To avoid infringement, the muzzle flash design should be distinct from existing visual effects already in the public domain or protected by copyright. This involves developing a unique visual language for the electric discharge.
The Creation Process: From 2D Concepts to 3D Realization
The creation of these muzzle flashes begins in 2D software like Photoshop. The artist draws the core components: a bright streak for the projectile's passage and the flash at the barrel's end. For conventional firearms, this flash is due to combustion, but for electric weapons, it's a brief burst of light generated by the electrical discharge. The artist notes that getting the color balance right was the primary challenge during this stage.
The process then transitions to 3D software, such as Maya. Here, the 2D textures are applied to 3D geometry to create a more immersive effect. This typically involves constructing multiple planes, often five crossing each other, to give the illusion of a 3D flash when textures are applied. A final plane is used to represent the burst of light or energy emanating from the rear of the barrel, directly linked to the electrical discharge.
A Deeper Dive into Digital Art Workflow: A Comic Cover Masterclass
The creation of a comic book cover, as detailed by artist D'Israeli, offers a comprehensive look at a sophisticated digital art workflow that can inform muzzle flash creation. This process, while focused on character and environment illustration, provides valuable insights into layering, texturing, shading, and program integration.
The initial stages involve conceptualizing the scene, often through rough sketches to establish composition and character placement. Software like Manga Studio EX 4 is employed for its robust drawing and perspective tools. Artists utilize perspective rulers to guide their linework, even for curved architectural elements, ensuring a sense of depth and realism.
Rough pencils are then developed, blocking in figures and backgrounds. The artist must be mindful of scale, a common pitfall with digital drawing tablets. Manga Studio's feature where lines break into dots at excessive magnification serves as a crucial visual cue to maintain proper proportion.
The penciled artwork is then refined, and inked outlines are applied. The use of multiple layers for inks allows for separation of foreground and background elements, as well as distinct layers for different line weights or colors, such as the grey outlines of a character's suit.
Blacks are then added, often on separate layers to allow for different treatments - solid black for elements like a suit, and textured black for areas like hair. The process of "flatting" involves filling distinct areas with base colors on layers beneath the inks. Manga Studio's Paint Bucket tool is highlighted for its efficiency in this process, particularly its ability to ignore small gaps and automatically expand fills.
Digital Inking Tips From a DC Comic Artist
Detailing follows, including the addition of elements like bloodstains and reflections. Shading is then applied, often using grey masks on separate layers. The artist intentionally places characters in shadow to enhance the dramatic effect of light sources, such as muzzle flashes.
Texturing is a critical step, with specific areas designated for "grot" textures, implying grime or wear. This is achieved by creating mask layers and then applying textures that only adhere to the filled areas.
The workflow often involves transitioning between different software. In this case, the file is exported from Manga Studio to Photoshop. Resolution is a key consideration; exporting at a high DPI (e.g., 600dpi) and then downsampling to a manageable resolution (e.g., 400dpi) using specific resampling methods ("Nearest Neighbour") helps preserve hard edges for crisp printing.
In Photoshop, the process continues with applying textures, shading, and highlights. Layers are locked for transparency, and blend modes (like "Multiply") are used to integrate textures and shading seamlessly. The artist employs a combination of hard-edged drawing tools and pressure-sensitive brushes to achieve desired shading and highlight effects, mimicking traditional painting techniques.
Finally, elements like muzzle flashes and glows are added. A circular gradient around the muzzle flash enhances its visual impact. The final step typically involves converting the image to CMYK color mode and flattening it to a TIFF format for professional output.
3D Studio Max: Creating Animated Muzzle Flashes
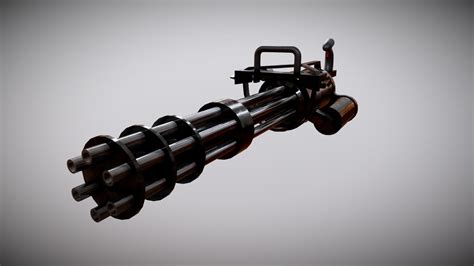
For those working in 3D environments, software like 3ds Max offers powerful tools for creating animated muzzle flashes. The process often begins with a basic model of the weapon, such as a minigun.
The muzzle flash itself can be constructed using multiple planes. These planes can be manipulated with modifiers like "Noise" and "FFD" (Free Form Deformation) to create organic, dynamic shapes. Animation is applied to these modifiers, allowing the muzzle flash to expand, contract, and flicker. The "Use Soft Selection" option helps to create smooth deformations, and adjusting "Falloff" values controls the extent of this influence.
Keyframing animation parameters, such as the "Scale" and "Strength" values within the Noise modifier, brings the flash to life. It's important to manage the interpolation of these keyframes, often by setting tangents to "Linear" to avoid overly curved or unnatural movements.
Materials and texturing are applied to the muzzle flash geometry. This involves setting up diffuse colors, emissive properties (to make the flash appear to glow), and potentially opacity maps to control its transparency and shape. Effects like "Glow" can be added in post-processing or within the 3D software's rendering engine to further enhance the visual intensity. Object IDs can be assigned to the muzzle flash mesh to control specific rendering effects.
For the weapon itself, textures are applied to create realism, such as an iron texture for a metallic gun. Lighting plays a crucial role; multiple Omni lights can be used to illuminate the scene and emphasize the muzzle flash. Animation can also be applied to weapon components, like rotating barrels, which can be linked to a "Dummy" object for easier control.
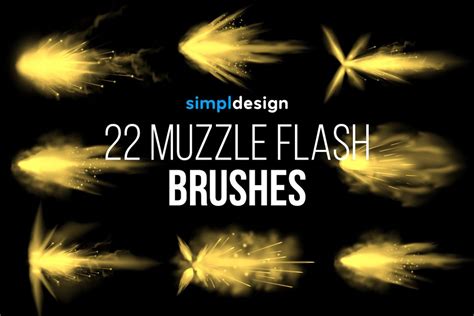
Leveraging Stock Assets for Muzzle Flashes and Related Effects
For projects where time or resources are limited, pre-made stock footage and assets can be invaluable. Numerous online libraries offer high-quality muzzle flash overlays, often pre-keyed with transparent backgrounds for easy integration into video editing or game development software. These assets cover a wide range of firearm types, from modern assault rifles to historical muskets.
Beyond muzzle flashes, related visual effects like bullet impacts, blood splatters, explosions, fire, smoke, fog, and atmospheric elements like rain and snow are also readily available as stock footage. These can significantly enhance the realism and impact of a scene. Many providers offer these assets for free, allowing creators to add professional-quality visual effects to their projects without significant cost. This can include 4K sky footage, bird VFX, and even lava or steam effects, providing a comprehensive toolkit for visual storytelling.
The use of stock footage, particularly pre-keyed elements, simplifies the workflow. These assets can be directly imported and layered into a project, saving considerable time and effort compared to creating them from scratch. This allows artists to focus on other aspects of their work, such as character animation, environment design, or narrative development.