Paint.NET, a powerful yet user-friendly image editing software, offers a robust foundation for digital artistry. However, its true potential for creative expression and efficient workflow often lies in its extensibility. This is where plugins come into play. These add-ons, developed by a passionate community, can significantly enhance the program's functionality, introducing a vast array of new tools, filters, and adjustments that go far beyond the software's native capabilities. For anyone looking to push the boundaries of what they can achieve with Paint.NET, understanding how to download and install these plugins is an essential skill.
This guide will meticulously walk you through the process, from initial discovery to the seamless integration of new functionalities into your Paint.NET environment. We will cover the entire journey, ensuring that whether you are a novice user or an experienced digital artist, you can confidently expand your toolkit.
Understanding the Role of Plugins in Paint.NET
Plugins are essentially small pieces of software that integrate with Paint.NET, augmenting its existing features or introducing entirely new ones. They are the lifeblood of customization for many users, allowing them to tailor the application to their specific needs and creative styles. Think of them as specialized tools that you can add to a general toolbox. For instance, if you frequently work with text in your images, a plugin might offer advanced text manipulation features not present in the default software. Similarly, if you're interested in applying complex artistic filters, a plugin could provide a whole new set of visual effects.
The beauty of the Paint.NET plugin ecosystem lies in its community-driven nature. Enthusiasts and developers alike contribute their creations, leading to a diverse and ever-growing collection of extensions. These plugins can range from simple color adjustment tools to sophisticated 3D rendering effects, catering to a wide spectrum of artistic and practical applications.
Step-by-Step Installation: A Detailed Walkthrough
The process of installing plugins for Paint.NET, while straightforward, requires attention to detail. Following these steps will ensure a smooth and successful integration of new functionalities.
Step 1: Accessing Plugin Resources Through Paint.NET
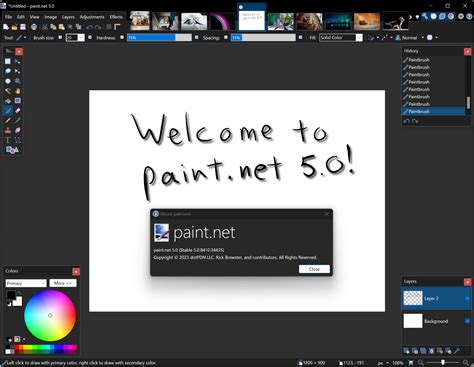
The initial step to discovering and acquiring plugins involves utilizing the built-in help system of Paint.NET. To begin, open the Paint.NET application if it is not already running. Once the program is open, navigate to the top menu bar and click on the "Help" option. Within the "Help" menu, you will find an entry related to plugins. This option is your gateway to the official or community-curated pages where plugins are typically hosted and available for download.
Step 2: Navigating to Plugin Download Pages
Upon selecting the plugin-related option from the "Help" menu, you will be directed to pages that list available extensions. These pages often provide a categorized view of plugins, allowing you to browse by type or function. You might encounter options such as "Plugin Packs" or specific categories like "Effects," "Adjustments," or "Tools." It is often recommended to start by exploring "Plugin Packs." These packs are curated collections that frequently bundle together multiple useful plugins, offering a broader range of functionalities in a single download. This can be an efficient way to discover several new tools at once.
Step 3: Selecting and Downloading a Plugin or Plugin Pack
Once you have identified a plugin or a plugin pack that interests you, the next action is to initiate the download. Click on the respective link provided for the plugin or pack. It is crucial to pay attention to the file type you are downloading. Most Paint.NET plugins are distributed in a compressed format, typically a ZIP file. Ensure that you are downloading the correct file, which will usually contain the necessary DLL (Dynamic Link Library) files.
Step 4: Understanding Plugin File Distribution (ZIP Files and DLLs)
Most Paint.NET plugins are distributed as DLL files, which are then bundled inside of a ZIP archive. This packaging method helps to keep the download size manageable and organizes the necessary files. When you click on a download link, you will typically be led to a page where you can save this ZIP file to your computer. Sometimes, you may be directed to a cloud storage service like Dropbox, from which you can then initiate the download. The core components of a plugin are these DLL files.

Step 5: Extracting the Plugin Files
After the ZIP file has finished downloading to your computer, the next essential step is to extract its contents. Locate the downloaded ZIP file, right-click on it, and select the "Extract All" option from the context menu. This action will create a new folder, usually with the same name as the ZIP file, containing the extracted files. Within this folder, you will find the DLL files that constitute the plugin. It is important to ensure that all files within the ZIP are extracted.
Step 6: Locating the Paint.NET Installation Directory
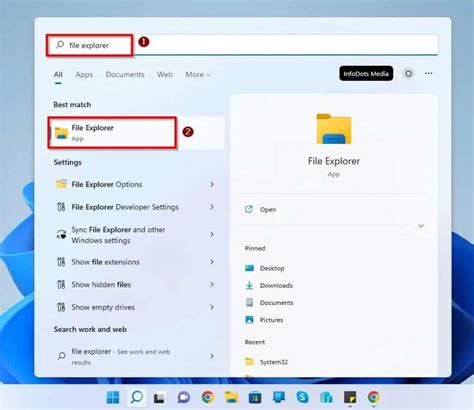
To install the plugin, you need to place its DLL files into the correct folder within your Paint.NET installation directory. The default location for Paint.NET is typically "C:\Program Files\Paint.NET" on Windows operating systems. However, this can vary depending on how and where you installed the software. You can usually find the installation folder by right-clicking on the Paint.NET shortcut, selecting "Properties," and then clicking "Open File Location."
Step 7: Identifying or Creating the "Effects" Folder
Within the main Paint.NET installation directory, there is a specific subfolder designated for plugins. This folder is usually named "Effects." If this "Effects" folder already exists, you will use it directly. However, in some cases, particularly with older versions of Paint.NET or certain plugin types, this folder might not be present. If you cannot find an "Effects" folder, you will need to create one yourself. Simply right-click within the Paint.NET installation directory, select "New," and then choose "Folder," naming it "Effects."
Step 8: Copying Plugin DLL Files into the "Effects" Folder
With both the extracted plugin files and the "Effects" folder identified, you can now proceed to move the plugin's DLL files. Open the folder where you extracted the ZIP file's contents. Select the DLL file(s) that belong to the plugin you wish to install. Then, drag and drop these DLL files into the "Effects" folder within your Paint.NET installation directory. Ensure you copy all the necessary files for the plugin to function correctly.
Step 9: Unlocking Plugin DLL Files (If Necessary)
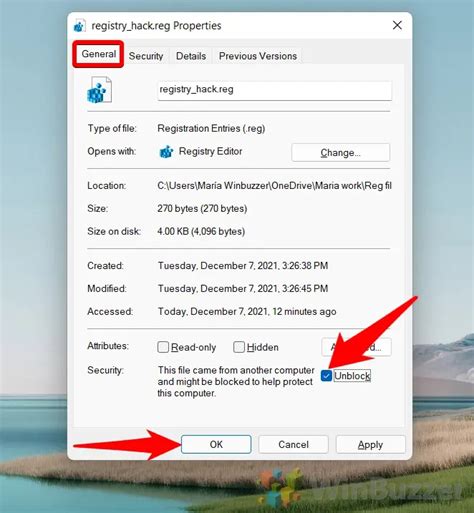
A crucial step that is sometimes overlooked involves unlocking the DLL files. Due to security measures in Windows, downloaded files, especially those from the internet, can sometimes be marked as blocked. To ensure the plugin can be recognized and used by Paint.NET, you may need to "unblock" these DLL files. To do this, right-click on each DLL file individually and select "Properties" from the context menu. In the "General" tab of the Properties window, look for a security notice at the bottom that says "This file came from another computer and might be blocked to help protect this computer." If this message appears, there will be an "Unlock" button. Click this button, and then click "Apply" to remove the block.
Step 10: Restarting Paint.NET
After you have successfully copied the DLL files into the "Effects" folder and, if necessary, unlocked them, you must restart the Paint.NET application. If Paint.NET was open during the installation process, close it completely. Then, reopen Paint.NET. The program will re-scan its plugin directory upon startup, and the newly installed plugins should now be recognized.
Step 11: Locating and Using Your New Plugins
Once Paint.NET has restarted, your new plugins should be accessible. Typically, newly installed effects plugins will appear in the "Effects" menu. However, some plugins might be integrated into submenus within the "Effects" menu, or occasionally under other menus like "View" or "Window," depending on their functionality. You may need to browse through these menus to find your new tools. Experiment with the new options to understand their capabilities and how they can enhance your image editing workflow.
How to Install Paint Net Plugins Pack & Effects FREE! | (Beginner's Tutorial)
Exploring the Capabilities of Paint.NET Plugins
The world of Paint.NET plugins is vast and diverse, offering solutions for a multitude of editing needs. Understanding the potential of these extensions can inspire new creative avenues and significantly streamline your workflow.
Optimizing Your Workflow with Specialized Tools
Many plugins are designed to automate complex tasks or provide more efficient ways to achieve specific results. For example, if you frequently perform color corrections, a plugin might offer advanced color grading tools that go beyond the standard adjustments. Similarly, plugins exist that can help with batch processing, allowing you to apply the same effect or set of adjustments to multiple images simultaneously, saving considerable time and effort.
Enhancing Creative Effects and Adjustments
The artistic potential unlocked by plugins is immense. You can find plugins that simulate traditional art mediums like oil painting or charcoal sketching, apply intricate textures, generate complex patterns, or create stunning lighting effects. For those interested in more technical adjustments, plugins can offer advanced noise reduction, sharpening algorithms, or sophisticated ways to manipulate layers and selections.
Plugins for Text and Graphic Design
While Paint.NET has basic text capabilities, plugins can elevate your text-based designs. Some plugins offer advanced typographic controls, allowing for more intricate text styling, special text effects, or even the ability to create text that follows a custom path. Graphic designers often seek out plugins that can generate complex shapes, seamless patterns, or specific visual styles that are difficult to achieve with the default tools.
Community and Support
The Paint.NET plugin community is a valuable resource. If you encounter issues during installation or have questions about a specific plugin's functionality, the official Paint.NET forums are an excellent place to seek help. Many plugin developers are active on these forums and are often willing to provide support and guidance.
Troubleshooting Common Plugin Installation Issues
While the installation process is generally smooth, occasional issues can arise. Understanding these common problems and their solutions can save you frustration.
Plugin Not Appearing in the Menu
If you have followed all the steps and your plugin is still not showing up in the Paint.NET menus, here are a few things to check:
- Correct Folder: Double-check that the DLL file(s) are indeed in the correct "Effects" folder within the Paint.NET installation directory. Typos in folder names or incorrect paths are common mistakes.
- Unblocking DLLs: Revisit Step 9. Ensure that all DLL files have been properly unblocked by right-clicking, selecting "Properties," and clicking "Unlock" on the "General" tab. This is a frequent culprit.
- Plugin Compatibility: Verify that the plugin is compatible with your version of Paint.NET. Older plugins may not work with newer versions, and vice-versa. Check the plugin's download page for compatibility information.
- Corrupted Download: The ZIP file might have been corrupted during download. Try downloading the plugin again.
- Multiple DLLs: Some plugins consist of multiple DLL files. Ensure all of them have been copied into the "Effects" folder.
Plugin Crashing Paint.NET
If Paint.NET crashes after installing a plugin, it often indicates a conflict or an issue with the plugin itself.
- Remove the Plugin: The first step is to remove the recently installed plugin's DLL file(s) from the "Effects" folder and restart Paint.NET. If the crashing stops, the plugin is likely the cause.
- Check for Updates: See if there's an updated version of the plugin available that might have fixed stability issues.
- Conflict with Other Plugins: In rare cases, a new plugin might conflict with an already installed plugin. Try removing other recently installed plugins to see if the issue resolves.
- Report the Issue: If you suspect a bug, report it to the plugin developer on the relevant forums.
The Importance of Plugin Management
As you accumulate more plugins, it's good practice to maintain an organized system. Keep track of where you downloaded plugins from and which ones you have installed. Periodically review your installed plugins to remove any that you no longer use, as an excessive number of plugins can sometimes slow down the application's startup time or lead to unforeseen conflicts.
By following these comprehensive steps and understanding the underlying principles, you can confidently expand the capabilities of your Paint.NET software, unlocking a universe of creative possibilities and enhancing your digital imaging workflow.