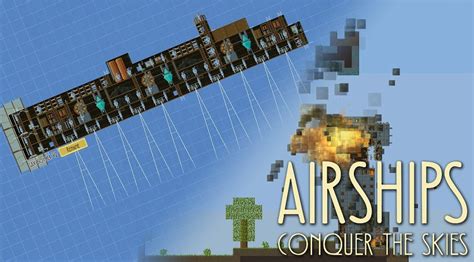
This tutorial will guide you through the process of creating normal maps for your custom sprites in the game Airships: Conquer the Skies, utilizing the capabilities of the Paint.NET image editor. A fundamental understanding of Paint.NET and the principles of creating functional mods for Airships is recommended. While Airships does not strictly enforce a specific color palette for sprite design, it does offer a default palette that aids in seamlessly integrating your custom assets with the game's existing graphical style.
To simplify the explanation, we will begin by using the small ammunition storage sprite from the vanilla game as our example.
Understanding the Base Sprite and Bump Map Purpose
It is crucial to maintain your original sprite sheets in an unmodified state. The purpose of the bump map is to define the surface's perceived depth and texture, not to add shading to the original sprite. As you may observe, the vanilla sprite is composed of solid colors, which are ideal for the subsequent application of various visual effects.
Setting Up Your Workspace in Paint.NET
Assuming you have Paint.NET installed and open, the first step is to create a new image. A canvas size of 1024x1024 pixels is recommended for optimal detail and flexibility. Save this new image with a name that clearly identifies it as your bump map, conventionally appending "_bump" to your spritesheet's name. It is vital to save this file in the .pdn format. This ensures that you retain an unflattened version of your image, allowing for easy modifications and adjustments to individual layers should you need to make changes later.
Deconstructing the Bump Map: Channels and Their Functions
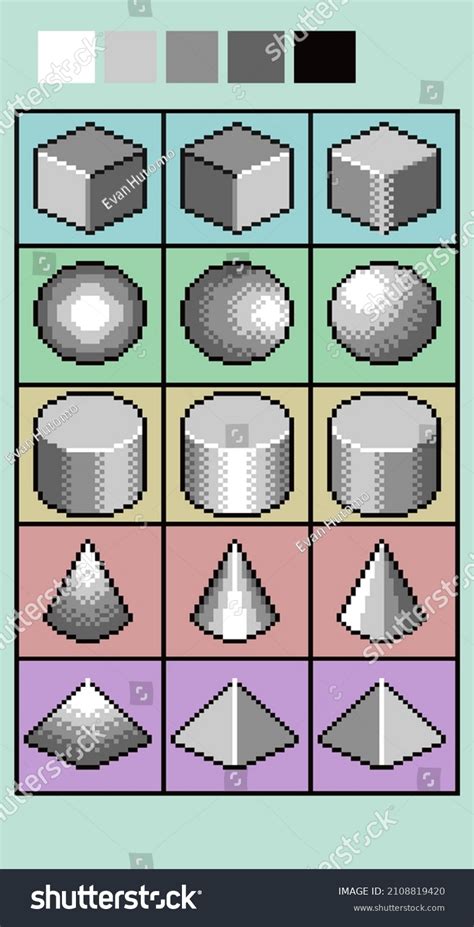
Now that the foundational elements are in place, let's delve into the technical aspects of what constitutes a bump map in Airships: Conquer the Skies. A bump map is ingeniously constructed from three distinct color channels, each serving a specific role in defining the visual characteristics of your sprite. For clarity and ease of workflow, we will name these layers according to their designated purpose:
- Vertical Layer (Red Channel): This layer dictates how light appears to interact with your sprite's surfaces when illuminated from a vertical angle. It simulates how light would fall on raised or recessed areas from above or below.
- Horizontal Layer (Green Channel): Complementing the vertical layer, this channel defines how light interacts with surfaces from a horizontal perspective, simulating illumination from the left or right.
- Reflection and Glow Layer (Blue Channel): This layer is responsible for defining the metallic or shiny properties of different parts of your sprite. It controls how light reflects off surfaces, influencing their perceived shininess and material type.
The backgrounds of these individual layers are filled with a specific, neutral color. This color is recognized by the game engine as a baseline, allowing the information within each channel to be interpreted correctly without interference from the background itself.
The Bump Map Color Palette: A Key to Surface Definition
Airships employs a specialized color palette to precisely control the intensity of light and reflection on each surface within the bump map. Understanding this palette is fundamental to effectively creating your bump maps.
| Orientation or Description | Color Code (Hex, 24-Bit) | Channel Association |
|---|---|---|
| Vertically straight up | 0xFF0000 | Red (Vertical) |
| Vertically slightly up | 0xC00000 | Red (Vertical) |
| Vertically neutral | 0x800000 | Red (Vertical) |
| Vertically slightly down | 0x400000 | Red (Vertical) |
| Horizontally straight left | 0x00FF00 | Green (Horizontal) |
| Horizontally slightly left | 0x00C000 | Green (Horizontal) |
| Horizontally slightly right | 0x004000 | Green (Horizontal) |
| Vertically straight down / Horizontally straight right | 0x000000 | Blue (Reflection/Glow) |
| Metallic surfaces | 0x000080 | Blue (Reflection/Glow) |
| Neutral reflection | 0x00005C | Blue (Reflection/Glow) |
| Dull or recessed surface | 0x000030 | Blue (Reflection/Glow) |
For practical application, you can download a visual representation of this color palette.

Shading Your Bump Map: Channel by Channel
With a solid grasp of what each color signifies within its respective channel, we can now proceed to the process of shading your bump map. It's crucial to carefully consider how you outline and shade the various sections of your bump map.
A helpful mental model, as suggested by the developers of Airships, is to visualize your two-dimensional sprite as a three-dimensional object and imagine how a red or green light source would cast shadows and highlights upon its surfaces.
Let's apply this to our ammunition sprite.
The Vertical Channel (Red)
To define the vertical aspects of our ammunition sprite's bump map, we will focus on the red channel. For instance, to indicate how the ammunition sprite would appear under vertical lighting, we might arrive at a result similar to this:

According to the palette, the brightest red highlights will signify areas that are slightly raised or catch light directly from a vertical source on the original sprite. To make this process more manageable, it is highly recommended to overlay your base sprite image onto the channel you are currently editing. This provides a clear visual reference for where to apply your shading. Ensure that all other channels are unchecked and hidden while you are working on a specific channel to avoid visual clutter and potential errors.
For comparison, here is the same image with the base sprite clearly overlaid on the vertical channel:
The Horizontal Channel (Green)
Following a similar methodology, we can proceed to shade the horizontal layer. If we apply the same technique to the horizontal channel, focusing on how light would interact from the sides, you might achieve an arrangement comparable to the following:
This process helps define the contours and edges of your sprite as if illuminated from the left or right.
The Reflection and Glow Channel (Blue)
With the more intricate vertical and horizontal layers addressed, we can now concentrate on the reflection and glow layer. This blue channel is paramount in determining which surfaces will appear shiny or dull when light interacts with them. It essentially defines the material properties of your sprite's components.
Assembling the Composite Bump Map
Having successfully created the three essential channels for our bump map - Vertical (Red), Horizontal (Green), and Reflection/Glow (Blue) - we are now ready to combine them into a single, functional bump map image.
It is critical to ensure that your channels are arranged in the correct order before proceeding:
- Vertical Layer (Red)
- Horizontal Layer (Green)
- Reflection and Glow Layer (Blue)
To ensure that these channels merge correctly and their effects are accurately represented, you will need to adjust the blend modes of the vertical and horizontal layers. Set both the Vertical and Horizontal layers to "Additive" blend mode within Paint.NET. This blending mode is crucial for achieving the desired visual outcome.
Paint.net Tutorial 2: Removing Backgrounds and Working with Layers
Once you have applied the additive blend mode to the appropriate layers, the resulting composite image, when viewed with only the bump map layers visible (ensure your base sprite is hidden at this stage, as it will interfere with the visual representation of the bump map itself), should appear something like this:
It is important to acknowledge that not all bump maps will possess an identical visual appearance. The specific way you choose to shade your work can differ significantly from that of other artists. The decision to use a vanilla texture as a reference in this guide was to ensure that the format and appearance closely resemble the actual in-game assets.
Finalizing and Exporting Your Bump Map
With the final composite image produced, you can now flatten the image. This process merges all visible layers into a single layer. Subsequently, save this flattened image in the Portable Network Graphics (.png) format. This .png file is what you will integrate into your Airships: Conquer the Skies mod.
Alternative Tools and Considerations
While this guide is specifically tailored for Paint.NET users, it's worth noting that other image editing software like GIMP 2 or Adobe Photoshop can also be used for creating normal maps. These programs offer distinct advantages, such as the ability to independently edit each color channel of a texture file, potentially streamlining the workflow and eliminating the need for separate files for each channel. Numerous tutorials exist for Photoshop and GIMP, given their long-standing popularity as leading 2D applications.
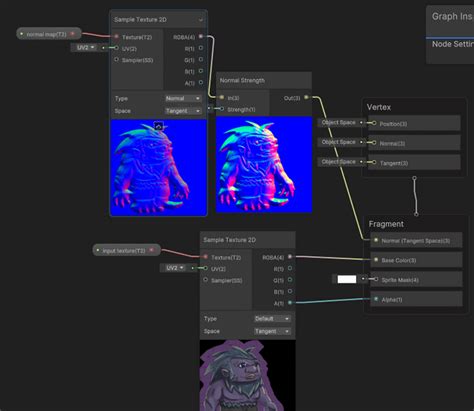
Working with Normal Maps in DDS Format
In some modding contexts, particularly when dealing with game assets that utilize the DirectDraw Surface (.dds) format, the process might involve different steps. A common method involves taking your base texture, adding an alpha channel, and then applying a normal map filter.
Paint.NET, while not having a native feature for direct alpha channel manipulation in the same way as some professional software, does offer methods to support alpha channels. The strength of the normal map effect is often controlled by sliders representing X, Y, and Z directions, allowing you to fine-tune the applied strength in each dimension.
When saving a texture in DDS format, typically via a plugin or external tool, you will encounter settings such as the compression type and the option to generate mipmaps. For normal maps, it is common to append a suffix, such as _N, to the filename to clearly identify its purpose.
The process of creating an alpha channel for a normal map can involve using a separate grayscale texture. This grayscale texture dictates the shininess of different parts of your normal map: lighter areas in the grayscale will appear more reflective, while darker areas will appear less so. This texture is then often applied to the alpha channel of the normal map using specialized tools like DXTBmp. After this, the combined normal map with its alpha channel can be saved in the DDS format.

By following these steps and understanding the underlying principles of bump map creation, you can significantly enhance the visual fidelity of your custom sprites within Airships: Conquer the Skies.