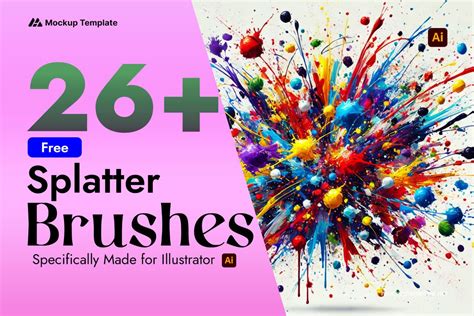
Adding a grunge vibe to your artwork can significantly enhance its visual appeal, and custom brushes are a powerful tool in achieving this. This tutorial delves into the process of creating two distinct types of splatter brushes in Adobe Illustrator: a "Flat Splatter Brush" and a "Dripping Splatter Brush." These custom tools will empower you to infuse posters, postcards, vector illustrations, clipart, and a myriad of other creative projects with a raw, energetic, and textured feel. We will also cover the essential steps for saving these brushes, ensuring their reusability for future design endeavors. To effectively showcase the impact of these brushes, we've utilized an amazing mug mockup for demonstration purposes.
Step 1: Document Setup and Grid Configuration
Before embarking on the creation of our splatter brushes, it's crucial to establish a well-configured document. This involves setting up the correct units and enabling the grid, which will serve as an invaluable guide throughout the creation process, particularly for maintaining a degree of precision and consistency.
Creating a New Document
Begin by creating a new document in Illustrator. For the purpose of brush creation, it is recommended to use Pixels as the unit of measurement. Set the Color Mode to RGB, which is standard for digital artwork. Crucially, set the Raster Effects to Screen (72 ppi). This resolution is suitable for screen-based designs and ensures that effects are rendered appropriately for digital display.
Setting Measurements and Enabling the Grid
Navigate to Illustrator > Preferences > Units. Within this panel, ensure that Pixels is selected for both the "General" and "Stroke" options. Once these settings are confirmed, click "OK."
Next, access the "View" menu. Ensure that "Show Grid" (keyboard shortcut: Cmd/Ctrl + ‘) and "Snap to Grid" (keyboard shortcut: Shift + Cmd/Ctrl + ‘) are enabled. The grid provides a visual framework, and snapping to it helps in aligning and positioning elements with greater accuracy. However, if you are confident in your ability to create shapes and place them intuitively without the aid of a grid, you may choose to skip this step. The grid and snapping can be particularly helpful when aiming for a symmetrical or precisely distributed splatter effect, but for a more organic and chaotic grunge look, they might be less essential.
Step 2: Crafting the Flat Splatter Brush
The first type of brush we will create is a "Flat Splatter Brush." This brush is characterized by a main splatter shape with several smaller, excess drops scattered around it, contributing to a more dynamic and dispersed appearance.
Building the Base Shape: A Deformed Circle
We will commence by constructing the foundational shape for our brush. This involves starting with a basic circle and then deforming its edges to create a more organic, blob-like form.
Adding a Circle for the Main Shape
Select the Ellipse Tool (L) from the left toolbar and click anywhere on your canvas. In the Ellipse dialog box, set the "Fill" to black and ensure the "Stroke" is set to "None." For the Width and Height, input a value of 300 px. Click "OK" to create the circle. This will serve as the central mass of our splatter.

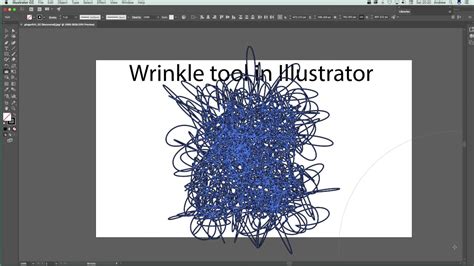
Deforming the Circle Edges for Realism
To move away from a perfect geometric shape and achieve a more natural, irregular form, we will employ the Wrinkle Tool. Double-click the Wrinkle Tool icon in the left toolbar to open its options panel. In the "Wrinkle Tool Options" dialog box, set the "Intensity" value to 30% and the "Horizontal Wrinkle Options" to 100%. Click "OK."
Now, use the Wrinkle Tool by clicking and dragging around the edges of the circle. Apply these strokes gently to deform the circle's perimeter, creating a less uniform, more blob-like shape that mimics the irregular edges of a real-world paint splatter. The intensity setting controls how pronounced the wrinkles are, while the horizontal option influences the direction of the distortion.
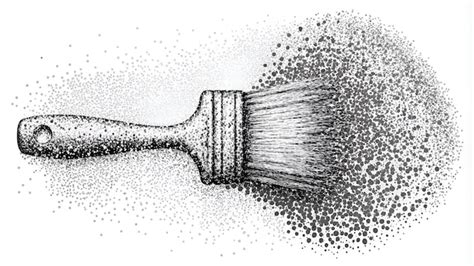
Incorporating Radiating Splatter Elements with Stipple Brushes
To enhance the "flat splatter" effect, we need to add smaller droplets radiating outwards from the main shape. This can be effectively achieved using stipple brushes, which create dotted or textured patterns. While Illustrator comes with some default stipple brushes, you can also create your own or download additional ones.
Accessing Stipple Brushes
If you haven't already, you'll need to open the stipple brushes library. Click on the "Brushes" dropdown menu located in the top menu bar. In the small menu that appears in the top-right corner of the Brushes panel, navigate to "Open Brush Library" > "Other Library." Browse to the location where your brushes are stored and select the desired stipple brush library.
Drawing the Radiating Splatters
With the stipple brushes loaded, select the Pen Tool (N). To make the stipple shapes more visible against your black blob, temporarily set the "Stroke" color to a contrasting color, such as grey, and ensure the "Fill" remains "None." Click and drag with the Pen Tool, applying the selected stipple brush to draw shapes that emanate from the edges of your deformed circle. Aim to create a scattering of smaller dots and lines that suggest paint being flung outwards. Vary the length and density of these strokes to achieve a more natural, unpredictable look. You can also use different stipple brushes to add variety to the texture of these radiating elements.
Consolidating into a Single Flat Splatter Shape
At this stage, we have a main blob and several stipple brush strokes. To create a cohesive brush, these elements need to be unified into a single vector shape.
Expanding the Stipple Brush Strokes
Before merging, the stipple brush strokes need to be converted into actual vector paths. With the stipple brush strokes selected, go to "Object" > "Expand Appearance." This process transforms the brush strokes into editable vector objects.
Adjusting Fill Color
Since we used a grey stroke for the stipple elements, their fill color will likely be grey. To ensure a uniform black splatter, select these expanded shapes and change their "Fill" color to black in the Swatches panel.
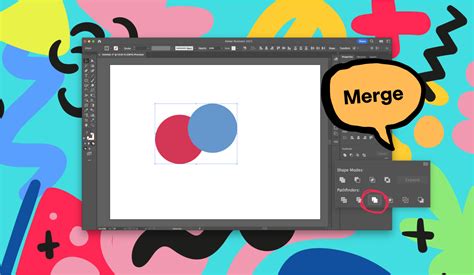
Merging All Individual Shapes
Now, select all the elements: the deformed circle and the expanded, black-filled stipple shapes. Open the "Pathfinder" panel (Window > Pathfinder). Click on the "Unite" option. This will merge all selected shapes into a single, unified vector object, forming the complete flat splatter shape.
Saving the Flat Splatter Shape as a Scatter Brush
With our unified flat splatter shape created, we can now save it as a Scatter Brush. Scatter brushes are ideal for dispersing instances of an object along a path, allowing for organic and varied placement.
Creating a New Scatter Brush
Select the completed flat splatter shape. Open the "Brushes" panel (Window > Brushes). Click on the small square with a plus sign (+) inside, located at the bottom of the panel, to create a new brush. In the "New Brush" pop-up window, choose "Scatter Brush" and click "OK."
Configuring Scatter Brush Options
A dialog box will appear where you can name your brush and define its behavior. For a dynamic and varied splatter effect, set the following values:
- Size: "Random" from 25% to 55%. This will vary the size of the individual splatters applied along a path.
- Spacing: "Random" from 15% to 40%. This controls the distance between the scattered elements.
- Scatter: "Random" from -10% to 10%. This will slightly offset the elements from the path, adding to the organic feel.
- Rotation: "Random" from -45% to 45%. This will rotate the splatters, preventing a uniform, repetitive look.
- Rotation relative to: "Page." This setting dictates how the rotation is calculated.
- Colorization Method: "Tints." This allows the brush to adopt the color of the stroke you apply it to.
Click "OK" to save your new Flat Splatter Brush. Its thumbnail will now appear in your Brushes panel, ready for use.
Step 3: Constructing the Dripping Splatter Brush
Our second brush will be a "Dripping Splatter Brush," designed to mimic the effect of paint or liquid dripping downwards from a central mass.
Creating the Base Circle
Similar to the previous brush, we begin by creating a circular base. Select the Ellipse Tool (L), click on the canvas, and set the "Fill" to black with "Stroke" set to "None." This time, input a "Width" and "Height" of 100 px. Click "OK."
Designing the Drip Shapes
The characteristic element of this brush is its drips. We will create these using the Pen Tool.
Crafting a Single Drip
Select the Pen Tool (P). Position your cursor at the bottom edge of the 100px circle and draw a teardrop or elongated shape extending downwards. This will be our initial drip. Once you have a basic shape, switch to the Direct Selection Tool (A). Use this tool to select and adjust the anchor points and handles of your drip shape, refining its curve and taper until you are satisfied with its appearance.
Duplicating and Varying Drips
To create a more convincing dripping effect, we need multiple drips of varying sizes and positions. Select the drip shape you just created and copy it (Cmd/Ctrl + C), then paste it (Cmd/Ctrl + V).
Adjust the size of the pasted drip using the Selection Tool (V) or by scaling it numerically. Reposition it around the base circle. You can also use the Direct Selection Tool (A) again to modify the shape of each copied drip, making them unique. Continue this process of copying, pasting, resizing, repositioning, and reshaping the drips until you have a cluster of them extending from the bottom of the circle, creating a visually interesting dripping mass.
Adding Organic Edge Details
To further enhance the realism and grunge aesthetic of the dripping splatter, we will add some organic, wavy details to the edges of the main shape and where the drips connect.
Disabling Grid Snapping
Before proceeding, it's recommended to turn off "Snap to Grid" (Shift + Cmd/Ctrl + ‘). The precise snapping of the grid can hinder the creation of fluid, organic lines needed for this step.
Drawing Wavy Paths and Small Drops
Select the Pencil Tool (N). Draw freehand, wavy lines around the main circular shape. These lines should create a more irregular and textured edge. Additionally, draw small, separate drop shapes around the bottom extremities of the larger drips, suggesting smaller splashes or trails of falling liquid. Experiment with the Pencil Tool's preferences (double-click the tool icon) to adjust its smoothness for different effects.
Unifying All Dripping Elements
Just as with the flat splatter, all the components of the dripping splatter need to be merged into a single shape.
Merging All Shapes
Select all the elements that constitute your dripping splatter: the circle, the drips, and the wavy edge details. Ensure they are all filled with black. Open the "Pathfinder" panel and click "Unite" to combine them into one cohesive vector object.
Fine-Tuning Drip Shapes
After merging, you might notice some areas that don't look quite right or require further refinement. Use the Direct Selection Tool (A) to select individual anchor points on the drips or the main body and adjust their positions and handles to achieve a more natural and visually appealing outcome. This step is crucial for ensuring the drips look authentic and integrated with the main splatter mass.
Saving the Dripping Splatter Shape as an Art Brush
Now, we will save our dripping splatter shape as an Art Brush. Art brushes are designed to stretch a shape evenly along the length of a path, making them suitable for creating flowing lines and decorative borders.
Creating a New Art Brush
Select the complete dripping splatter shape. Open the "Brushes" panel (Window > Brushes) and click the "+" icon to create a new brush. In the "New Brush" pop-up, choose "Art Brush" and click "OK."
Configuring Art Brush Options
Name your brush and set the following essential values:
- Width: "Fixed - 100%." This ensures the brush maintains its original width along the path.
- Stretch Between Guides: Check this box. This option is important for Art Brushes to ensure the artwork scales appropriately along the path. You may need to adjust the guides (the vertical lines that appear on the brush artwork) by dragging them to cover the entire width of your splatter shape to ensure it stretches correctly.
- Colorization Method: "Tints." This allows the brush to inherit the stroke color you apply.
Leave the remaining values as their defaults unless you have a specific reason to alter them. Click "OK" to save your Dripping Splatter Brush.
Step 4: Testing and Applying Your Custom Brushes
With both your Flat Splatter Brush and Dripping Splatter Brush created and saved, it's time to put them to the test and integrate them into your artwork.
Applying the Brushes to Paths
Your newly created brushes will now be visible in the Brushes panel. To use them, first create a path using any of Illustrator's drawing tools, such as the Pen Tool (P) or the Brush Tool (B). Once you have a path, simply select it and then click on the thumbnail of your desired splatter brush in the Brushes panel. The brush will be applied to the path, transforming its appearance.
Modifying Brush Settings
Illustrator offers flexibility in customizing brush behavior even after creation. If you wish to alter the settings of your brushes-perhaps adjusting the size range of the splatters or the spacing between them-you can do so easily. Double-click on the thumbnail of the brush in the Brushes panel. This will reopen the Brush Options dialog box, where you can modify any of the parameters you previously set. Click "OK" to apply the changes.
Controlling Splatter Color
The color of your splatter brushes is directly controlled by the stroke color you select in the Swatches panel. Ensure that the path you are applying the brush to has a stroke color selected. By choosing a different color from the Swatches panel, you can instantly change the color of the applied splatters. This makes it incredibly easy to match your splatter elements to your overall design palette.
Create Your Own Vector Brushes in Illustrator
You are now equipped to use your custom splatter brushes to add unique textures and grunge effects to your designs. Don't hesitate to experiment with different path shapes, sizes, colors, and brush settings to discover the full potential of these tools. The possibilities for creating dynamic and visually engaging artwork, from energetic posters to stylized vector illustrations, are virtually limitless.
For those interested in further expanding their brush-making repertoire, exploring tutorials on creating scatter brushes, watercolor brushes, and stipple brushes in Illustrator can provide even more creative avenues. The "dispersion effect," "splatter effect," or "shatter effect," as it's variously known, is a highly sought-after technique, particularly prevalent in photograph manipulation. This effect is frequently applied to images, especially those capturing a sense of motion. Given its popularity, a straightforward method for achieving this effect within Photoshop can be beneficial. While the underlying mechanics are not overly complex, selecting the most appropriate brushes and determining their optimal placement requires practice to yield professional-looking results. Therefore, if your initial attempts don't produce the desired outcome, persevere; consistent practice is key.
When initiating this process, it's advisable to select a photograph that lends itself well to such an effect; images depicting action or movement often yield the best results. For instance, a photograph of a model in motion can serve as an excellent starting point. The initial step involves meticulously cutting out the subject from its background and placing it onto its own separate layer. Following this, the area previously occupied by the object needs to be filled. A rough selection can be made using the Lasso Tool, after which pressing Shift+Delete (or Shift+Backspace on Windows) will open the Fill dialog box. Within this dialog, selecting "Content-Aware" is a common approach. For smaller or more intricate areas requiring refinement, these repair steps can be repeated as necessary. It's important to note that absolute perfection at this stage is not a prerequisite. The objective is to achieve a clean background with the subject isolated on its own layer.
Subsequently, to achieve the smudging effect on the bottom layer, a layer mask is created that will conceal the contents of that layer. This is accomplished by holding down the Alt (or Option on Mac) key simultaneously while clicking the "Add layer mask" button. A vast array of free Photoshop brushes can be discovered online through platforms such as DeviantArt or Brusheezy. When painting on the layer mask of the bottom (smudged) layer, the contents of that layer will gradually become visible. It is recommended to frequently change brushes and employ a dabbing motion rather than a dragging one. This approach will begin to reveal a result that may or may not align with your initial expectations.
This tutorial has focused on vector-based brush creation in Illustrator. However, similar effects are achievable in Photoshop. For instance, a blood effect in Photoshop can be created, encompassing three distinct types: a realistic blood splatter, a blood dripping effect, and potentially other variations. For those interested in a dripping paint effect in Photoshop, a tutorial might guide you through creating an artistic paint drip Photoshop action. Similarly, if the goal is to achieve a melting effect in Photoshop, a tutorial could detail the process of constructing a melting candle superimposed on a model's head, effectively demonstrating a liquid effect. For those seeking to create dripping text in Photoshop, specific techniques and resources are available.
For individuals who regularly require a diverse range of digital assets for their creative work, services like Elements offer a valuable resource. The primary advantage of such platforms is the ability to download an unlimited number of digital assets for a single, low monthly fee, irrespective of the frequency of downloads. Collections like the "Cool Drip Pictures Bundle" provide a substantial number of handmade ink drop textures, often in vector file and brush formats. Complementing this, other collections might feature watercolour paint dripping effects and paint splatter effects, available for immediate download. To enhance the visual dynamism of your designs, incorporating drip effect art textures, often created with authentic spray paint drips, can be highly effective. These textures are frequently provided in dark grey, allowing for easy color modification to suit any design.
Furthermore, curated collections of handmade, high-resolution ink splatter effects are perfect for adding texture and grunge elements to projects. Whether your aim is to create paint or blood splatter, such comprehensive collections, often including both textures and brushes, serve as excellent choices. If you are seeking to implement a splash effect in Photoshop, resources like "Paint Splash Effect Photo" can be particularly helpful. These effects are typically organized in layers, simplifying the user experience. For those who desire a paint splatter effect in Photoshop but lack the time to develop the skills from scratch, pre-made collections offer a convenient solution. These effects are often created with actual paint, lending an organic quality to the resulting splashes and drips, mirroring the natural process of painting.
The creation of liquid-infused designs in lettering can be a challenging endeavor, underscoring the importance of having access to pre-made effects when working on design projects. For those inquiring about how to achieve a dripping paint effect in Photoshop, specialized paint dripping effects can be ideal. The "Splatter and Dripping Effect in Photoshop" can introduce a striking visual element, often generating a vibrant layer that imbues your work with a sense of festivity. To create a paint splatter effect in Photoshop, handmade artistic spray paint leaks can be utilized to generate compelling backgrounds for posters, cards, and other creative endeavors. High-quality "Splatter & Dripping Effect PNGs" can be used to craft wonderfully artistic backgrounds.
"Splatter Brush Photoshop" may offer a vast library of high-resolution brushes, providing numerous options for creating drip pictures or splash effect photos. For projects requiring text with a blood splatter appearance, specific resources like "Halloween Blood Splatter Photoshop" might be beneficial. The "Black Light Liquid Photoshop Action and Brushes" can enable you to create a captivating effect yourself. The "Cool Drip Pictures" collection is often sufficient for generating a melting graffiti text effect in Photoshop with minimal effort. If you are exploring ways to incorporate a splash effect in Photoshop, specialized Photoshop brushes can provide the necessary tools. The "Ink Splash Dripping Effect PNG Action" is a notable example of such a resource. When you aim to produce a professional and artistic effect brimming with splashes, drops, and spray elements, the "Paint Dripping Effect Action" is a valuable tool. For those looking to add authentic paint splatters to their work, an "awesome brush set" might be the perfect solution.
If you are seeking to achieve a liquid-like text effect, you are in luck. The "Splat, Spray and Splash Effect" collection, featuring a substantial number of professional, handcrafted brushes, can be employed to generate a wide array of effects within your projects. Rather than expending time and energy figuring out how to create a dripping effect in Photoshop, utilizing a pre-made "Paint Dripping Effect Action" can be a highly efficient approach. For those in search of vibrant and riotous color splash effects, specific collections may offer a high-resolution brush selection. Another effective method for creating a liquid appearance from any text involves utilizing specialized tools or actions designed for this purpose.