Storyboards serve as the visual backbone of the filmmaking and creative process, offering a clear roadmap for what will be captured on set. Understanding your shots and ensuring your entire crew is on the same page can dramatically streamline production, making it more efficient and effective. This tutorial will guide you through the creation of a versatile storyboard template in Photoshop, empowering you to hit the ground running for your next project, whether it's for film, animation, advertising, or educational content.
What Exactly is a Storyboard?
At its core, a storyboard is a series of visuals, akin to a comic strip, that illustrate the sequence of shots planned for a film or video. Each panel represents a specific moment or action, providing a visual representation of the narrative as it unfolds. Beyond the drawings, storyboards often include accompanying text that details crucial camera information such as framing, camera movement, and how the camera will be held (e.g., handheld, steadicam). This detailed annotation ensures that every element of coverage is considered and executed as intended, preventing crucial details from being overlooked amidst the potential chaos of a production set.

The Power of Visualizing Your Narrative
A storyboard is instrumental in visualizing the scenes you intend to shoot. Attempting to film a scene without a pre-defined plan can be challenging. Production sets can become hectic environments, and in the midst of it all, it's easy to miss an important aspect of the shot composition or narrative flow. By creating a storyboard, you transform abstract ideas into a tangible, visual plan. This clarity is especially beneficial in collaborative settings. When stakeholders can clearly visualize a project or story, they are more likely to invest in and support the idea. Whether you are producing an animation, pitching an advertising concept, or structuring an educational video, a storyboard brings essential clarity to the project.
Building Your Photoshop Storyboard Template: A Step-by-Step Approach
Creating a storyboard template in Photoshop offers significant advantages, particularly for those who enjoy digital drawing and want to integrate the illustration process directly into their template creation. The process begins with setting up a new project with presets that accurately reflect the aspect ratio of your intended final output.
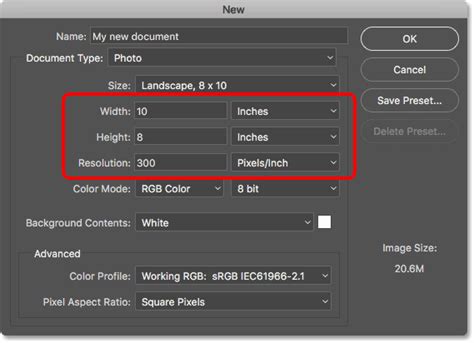
Initial Setup: Canvas and Resolution
To begin, you'll start with a plain canvas. While a 20x20 inch document is a common starting point, you can choose any dimensions that suit your project. Navigate to File > New (or press Ctrl+N). Here, you'll set your desired width and height. Crucially, adjust the resolution: set it to 300 pixels per inch (PPI) if your storyboard is intended for printing, or 72 PPI if it will primarily be used digitally, such as for a blog. Ensure the "Background Contents" are set to white.
Incorporating Print Guides (Optional but Recommended)
If you are creating a template destined for printing, it's wise to add quarter-inch guides. These guides act as a safety margin, ensuring that no critical elements of your artwork are inadvertently cut off during the printing process.
Designing the Panel Framework
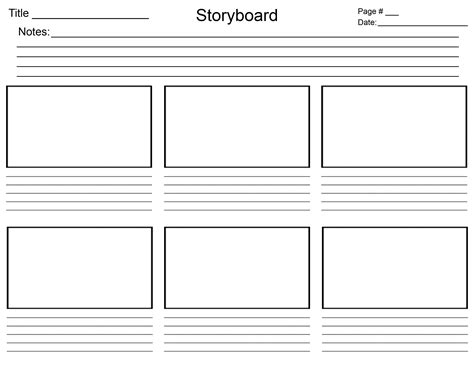
The next step involves creating the shapes that will house your images. The possibilities here are virtually endless. You can incorporate as many or as few panels as your project requires, and their dimensions can be customized to your preference, as long as they fit within your overall canvas.
A common and effective layout is the nine-panel grid. To achieve this, go to File > New again, following the same initial steps. This time, create a smaller square, for instance, 6x6 inches, with its background content set to black. Once created, copy and paste this black square onto your main template canvas.
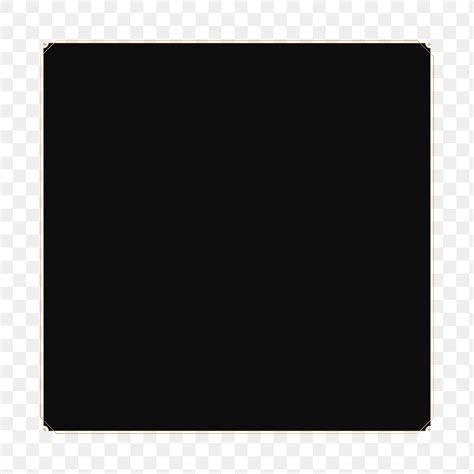
To create a nine-panel layout, duplicate this black square layer eight times (Ctrl+J). Arrange these duplicated squares evenly across your template canvas until you achieve the desired spacing and alignment.
Adding Your Visuals: The Fun Part
Now comes the exciting phase: populating your template with your chosen images. For example, if you're creating a personal storyboard, like one for a baby's room, you might select photos of your child. Copy and paste your desired image onto the template.
Precision Placement with Clipping Masks
To ensure your image fits perfectly within a specific panel without encroaching on other areas, the clipping mask is an indispensable tool. With your image layer selected, create a clipping mask by going to Layer > Create Clipping Mask (or using the shortcut Alt+Ctrl+G). This will confine the visibility of your image to the boundaries of the layer directly beneath it (in this case, your black square panel).
Adjusting Images with Transform
Often, a pasted image won't perfectly fit the panel dimensions. To rectify this, use the Transform tool. Select your image layer, then go to Edit > Transform (or Ctrl+T). You can then drag the corners of the image to scale it down (or up) until it fits neatly within the designated panel. Repeat this process for all your images, ensuring each one is precisely placed within its respective panel.

Enhancing with Color and Text
You can further customize your storyboard template by changing the colors of specific panels. For instance, to alter the color of two remaining squares, select the top-middle layer. Add a new blank layer directly above it (Shift+Ctrl+N). Then, go to Edit > Fill and choose your desired color. A practical approach is to use the eyedropper tool to sample a color from an existing image on your template, creating a cohesive color palette.
Adding text to these colored squares can provide additional context or labels. Select the Type Tool, choose your desired font color (white often provides good contrast on darker backgrounds), and type your text within the colored boxes.
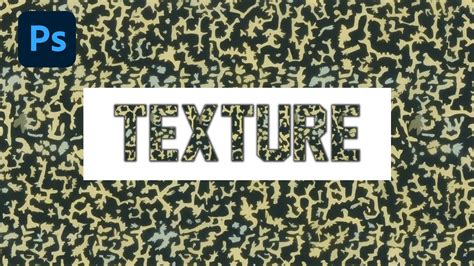
Creative Textures with Clipping Masks
Clipping masks aren't just for images; they work wonders with textures and digital papers too. To apply a texture to your text, find a suitable texture or digital paper from your collection. Copy and paste it onto your template, then drag this texture layer above your text layer. Right-click on the texture layer and select "Create Clipping Mask." This will apply the texture only to the text beneath it. You can then transform the texture layer (Ctrl+T) to adjust the scale of the pattern, ensuring it displays effectively. For example, a red paper with white polka dots can be scaled down to make the polka dots more prominent.
Alternative Approaches: Beyond Photoshop
While Photoshop provides a powerful and flexible environment for creating custom storyboard templates, it's worth noting that other methods and tools exist, catering to different needs and preferences.
Word Processors for Simplicity
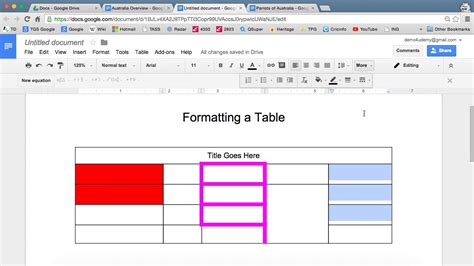
For a more straightforward approach, storyboarding can be effectively done using word processors like Google Docs or Microsoft Word. The primary step here is to create the panels, which can be achieved by inserting a table. Decide on the number of rows and columns required, ensuring ample space for your drawings. Adjust the row heights to create a visually balanced layout.
If you intend to include descriptive text beneath each panel, you can modify the table structure by making alternate rows slightly thinner to serve as text boxes. This method offers a quick and accessible way to build a basic storyboard template, especially for projects that don't require intricate visual detail within the template itself.
Aspect Ratio Considerations
A critical aspect to consider, regardless of the software used, is matching the panel's aspect ratio to the aspect ratio of the footage you plan to shoot. If your storyboard panels are designed for a 4:3 aspect ratio but you're shooting in 16:9, your storyboard will not be an accurate representation of the final framing, rendering it less helpful. Ensuring this alignment is key to a functional storyboard.
Specialized Storyboarding Software
For professionals and those who prioritize efficiency, dedicated storyboarding software offers a streamlined experience. These applications are specifically designed for the task, often providing pre-built templates, drag-and-drop functionality, and collaborative features. While they might offer less granular customization than Photoshop, they allow creators to focus on the core task of illustrating scenes without the overhead of template design. Some platforms even offer customizable templates within their software, striking a balance between ease of use and project-specific needs.
How to storyboard like a pro!
Free Downloadable Templates
For those who prefer a ready-made solution or want to experiment with different formats, numerous free printable and downloadable storyboard templates are available online. These often come in various layouts, offering different numbers of panels per sheet and supporting formats like Word, Illustrator, Photoshop, and PDF. This can be an excellent starting point, especially for quick projects or when exploring different organizational structures for your narrative.
The Essential Elements of a Functional Storyboard
Regardless of the tool or method chosen, a well-constructed storyboard should incorporate several key elements to maximize its utility:
Panel Composition
Each panel should represent a distinct shot or a significant moment in the narrative. The visual within the panel should clearly convey the action, setting, and characters involved.
Shot Numbers
Numbering each panel sequentially is crucial for organization and easy reference during production. This ensures that shots are captured and assembled in the correct order.
Dialogue or Narration
Including script lines or voiceover text directly below each visual helps to synchronize the audio with the visuals and provides context for the scene.
Extra Technical Details
For a truly production-ready storyboard, incorporating additional technical notes is invaluable. This can include details about camera angles, lens choices, lighting cues, character blocking, or specific sound effects. These details empower the crew to execute the director's vision with precision.
Storyboards: A Universal Tool for Visual Storytelling
The application of storyboards extends far beyond traditional filmmaking. Teachers utilize editable storyboard templates to guide students in structuring narratives and developing their storytelling skills. Whether employing a printable PDF or a digital PowerPoint template, the step-by-step mapping of a project is facilitated. For video production, the process typically begins with a script, which is then broken down into scenes. A video storyboard template then serves to match each scene with a corresponding visual.
Many teams find PowerPoint to be a flexible tool for creating storyboards due to its adaptable slide layouts. A fundamental rule in storyboarding is to include every shot, no matter how brief. Each shot should be captured in its own frame or panel to prevent any narrative gaps.
Ultimately, creating a storyboard is about turning ideas into something concrete and visually communicable. Itâs a process that brings clarity to any project, from animations and ad pitches to educational content. By providing a clear visual representation, stakeholders can more easily grasp and buy into a project's vision. The act of storyboarding itself is often iterative; storyboards are frequently treated as first drafts, so don't be discouraged if the initial iterations appear unpolished. The goal is clarity and communication, not necessarily artistic perfection at this stage.
How to storyboard like a pro!
The flexibility of digital tools like Adobe's collection of online services allows for seamless conversion and editing of files, such as PDFs, whenever and wherever needed. Utilizing a free PDF converter, for instance, can help in preparing or refining storyboard assets. The process of storyboarding is a fundamental step in visual storytelling, and mastering the creation of effective templates, whether in Photoshop or other mediums, is a valuable skill for any creator.
tags: #photoshop #storyboard #template