Clip Studio Paint (CSP) is a powerful and adaptable digital art application, offering a vast array of brushes and tools that can significantly enhance your creative process. While the software provides a robust selection of pre-installed brushes, and allows for extensive customization of their properties, there are times when you might desire something entirely unique. For those instances, creating a completely custom brush in Clip Studio Paint becomes an essential skill. This tutorial will guide you through the process of developing a personalized pencil brush, from conceptualizing its form to fine-tuning its behavior, ensuring it aligns perfectly with your artistic style and workflow.
Understanding the Foundation: Brush Tips as Materials
At the core of creating a custom brush in Clip Studio Paint lies the concept of brush tips as materials. Essentially, you are defining the shape and texture that your brush will "stamp" onto the canvas as you draw. These materials can range from simple geometric shapes to complex, scanned textures.
To begin the process of creating a custom brush, you'll first need to prepare an image that will serve as your brush tip. This image should be created on a new canvas. When you initiate this process, click on "File," then select "New." In the subsequent window, you will be prompted to adjust the size of your canvas. It is highly recommended to opt for a large canvas for this step, with a size within the thousands being a good starting point. For the "Basic Expression Color," choose "Gray." While this might seem counterintuitive for a typical painting, it's crucial for a brush tip. Using gray tones ensures that your brush can be used for any color once created, as these tones will represent the opacity of your brush.
Now, with your new canvas prepared, you can begin to create your brush tip. This is where your artistic vision comes into play. You can draw, paint, or even import textures to define the unique shape and character of your brush. If your brush tip design involves multiple layers, it's imperative to merge them together before proceeding. Select all layers that are relevant to your brush design.
Saving Your Brush Tip as a Material
Once your brush tip design is complete, the next critical step is to save it as a material within Clip Studio Paint. This action makes the brush tip available for assignment to a new or existing brush. After merging your layers if necessary, ensure that all relevant layers are selected. You will then proceed to save this selection as a material. This material will serve as the visual stamp for your custom brush.
Assigning Your Material to a Custom Brush
With your brush tip material successfully saved, the next phase involves assigning it to a brush. The most straightforward method for this is to create a copy of an existing brush. To do this, right-click on any brush within the Sub Tool palette. The specific brush you choose at this stage is inconsequential, as you will be fundamentally altering its characteristics. For ease of use, many artists utilize a convenient gesture, such as Astropad Studio's magic gesture, to perform the right-click action.
Upon right-clicking, a small settings window will appear for the duplicated brush tool. It is highly advisable to name your duplicated brush something recognizable and descriptive. This naming convention will be invaluable when you are applying your custom material.
Next, navigate to the "Tool Property" tab and click on the wrench icon located at the bottom of this tab. Within the "Tool Property" settings, locate and click on "Brush tip," and then select "Material." This action will open a material selection window, where you can find and choose the brush tip material you previously saved. Click "OK" to assign this material to your newly created brush. You are now ready to unleash your custom brush in your next creative endeavor.
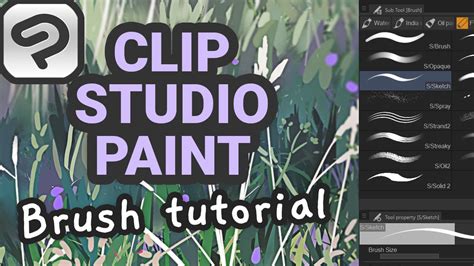
Tutorial: How To Make Custom Brushes (In Clip Studio Paint!)
Exploring the Landscape of Clip Studio Paint Brushes
Clip Studio Paint's strength lies not only in its custom brush creation capabilities but also in its extensive library of pre-installed and downloadable brushes. Concept art production, a field that demands a significant amount of drawing, painting, and meticulous adjustments, necessitates finding brushes that resonate with your personal workflow. Many seasoned concept artists dedicate time to customizing their digital brushes to perfectly complement their unique work styles, natural pen pressure responses, and preferred brush textures. However, for newcomers to digital art, navigating this vast landscape can initially feel overwhelming.
Clip Studio Paint comes equipped with a diverse range of default brushes, encompassing everything from hard and soft painting brushes with variable pressure sensitivity to specialized tools. If the default offerings don't quite hit the mark, you can explore over 40,000 drawing materials available on Clip Studio Assets. By utilizing specific keywords, you can efficiently search for brushes that align with your needs. Once a brush is downloaded from Clip Studio Assets, it is automatically integrated into your application. Adding it to your sub tool palette is as simple as dragging and dropping.
Furthermore, Clip Studio Paint offers the flexibility to import brushes created for other software, such as Photoshop's .ABR brush files. When downloading brushes from external sources, you can incorporate them into Clip Studio Paint by dragging and dropping them directly from your device's file management system.
Notable Default and Downloadable Brushes
To provide a starting point and illustrate the variety available, here are some popular and useful brushes:
Hoarse Oil: This is a straightforward yet remarkably versatile brush, making it an excellent choice for beginners in digital painting. It dynamically responds to pen pressure, allowing for the creation of both soft and hard edges. A light touch will result in blending with existing colors, while firm pressure will produce a distinct, hard edge. This brush can even serve as a sketching pencil by simply reducing its size.
Thick Paints Brush Set: This collection features a set of four painting brushes, two smudge brushes, and one texture spray. These brushes are particularly well-suited for creating thick painting styles with a noticeable canvas texture, adding a tactile quality to your digital artwork.
Suzumori Nishiki’s Fluffy Pen: A highly adaptable brush, this tool enables you to achieve either a watercolor or a thick paint aesthetic, depending on how you layer your colors. Each stroke you make deepens the intensity of the ink's color, offering a nuanced control over your application.
Leaf Shape Brush Set: This brush set is specifically designed to aid in the rapid sketching of bushes and tree foliage. The brush tip itself is shaped like a leaf, allowing you to layer it in various colors to quickly establish a sense of depth and volume within your natural scenes.
Water Pattern Texture: This is a specialized texture that can be used to simulate the effect of light reflecting on water, adding a dynamic and realistic element to water-based scenes.
Wood Grain Textures: This set, featuring wood grain textures and wooden flooring patterns, is invaluable for efficiently adding intricate details to wooden furniture or interior sketches, saving you considerable time in the rendering process.
Gradient Materials for Sky: This set of 24 gradient materials is ideal for laying down foundational sky elements, effectively setting the mood and atmosphere at the beginning of your drawing process.
Beyond Brushes: Essential Tools for Concept Artists
While brushes are fundamental, Clip Studio Paint offers a broader ecosystem of tools that significantly contribute to efficient concept art creation:
Gradient Maps: These powerful tools apply the colors of a chosen gradient to your image based on the darkness of the existing colors. A gradient map can dramatically alter the color palette of your painting when used at high opacity, or subtly unify the colors when applied with a lighter touch. You have the freedom to use any gradient or even create your own, with a real-time preview to fine-tune the effect to your precise specifications.
3D Materials: Despite Clip Studio Paint's primary focus on 2D painting, it supports the import and editing of 3D materials directly on your canvas. This feature is invaluable for concept artists. You can utilize 3D drawing dolls as accurate size references for architectural elements or machinery in concept art, or as base models for costume design. Complex 3D models, such as train stations, castles, and entire city streets, serve as excellent guidelines for environmental concept art. You can also leverage simple 3D primitives like cubes and cylinders to establish references for environmental art concepts.
Perspective Rulers: Specialized rulers, particularly the perspective ruler for one-point, two-point, or three-point perspective, are indispensable for accurately rendering locations with reliable perspective. These tools ensure that your architectural and environmental designs maintain a consistent and believable sense of depth and scale.
Copy Stamp Tool: Also known as the clone tool, this is a frequently employed instrument in photobashing techniques. The Copy Stamp tool samples a portion of an image and replicates it wherever you draw, allowing for efficient reuse of existing visual elements.
Optimizing Your Workspace for Efficiency
Before diving into the artistic process, establishing a comfortable and efficient workspace is paramount. A clean and organized digital environment can provide a significant boost to your productivity and creative flow.
A common starting point for many digital artists is a comfortable workspace. Having all necessary tools and resources readily accessible contributes to a more seamless workflow. For sketching, a popular choice is the Mechanical Pencil brush, a default tool within Clip Studio Paint. To enhance visual comfort and reduce eye strain, many artists opt to change the background color of their canvas to a neutral gray, as a stark white background can be fatiguing over extended periods. This can be achieved by using the fill tool on a separate layer or by adjusting the main background layer.
The principle of using basic shapes as building blocks for any drawing can greatly simplify the artistic process. By breaking down complex forms into fundamental geometric shapes, you can systematically construct your artwork. Little by little, by following these foundational steps, you will find yourself progressing towards the completion of your art. While the journey might seem incremental, the direct approach of utilizing basic shapes and understanding fundamental drawing principles, combined with the selection of a preferred sketch brush, is a highly effective method. Consistent practice and enjoyment of the digital art process are key to improvement.
The Art of Sketching: Finding Your Ideal Pencil Brush
When embarking on your digital art journey, selecting the perfect brush for sketching, line art, or coloring can feel like a daunting task. The digital art market is flooded with options, and you can find them on online stores, creator blogs, and official asset libraries like Clip Studio Assets. This article aims to introduce some of the most popular and effective brushes for sketching and painting within Clip Studio Paint. Many of these can be downloaded directly to the app for free from Clip Studio Assets, alongside tips for importing or creating your own unique brushes.
Drawing applications such as Clip Studio Paint come pre-loaded with a variety of default brushes, ranging from fine pens and pencils to rich oil and delicate watercolor brushes.
Popular Sketching and Drawing Brushes
SU Cream Pencil: This highly acclaimed sketching pencil boasts over 700,000 downloads. It features a subtle texture that becomes more pronounced as you increase the brush size, offering a nuanced control over your line weight and appearance.
Set of B Sketching Pencils and Charcoal: This collection effectively mimics the feel and behavior of traditional B sketching pencils and charcoal, providing a familiar tactile experience for artists transitioning to digital media.
Nong Pen: A soft and fluid pen, the Nong Pen is remarkably versatile, suitable for both creating clean lines and applying painterly strokes, depending on the brush size. When drawing with light pressure, the stroke becomes fainter, creating a gentle and subtle effect.
Pen Pen: This textured pen dynamically responds to stylus pressure, allowing for the creation of lines that vary in thickness, from delicate to bold. It's an excellent choice for sketches that require a strong sense of dynamism and energy.
Inking Pen: Designed for bold inking lines and hatching, this pen possesses a dense texture that renders beautifully in pure black, making it ideal for creating strong outlines and expressive shading.
Thick Paints Brush Set: This set comprises textured heavy painting brushes that introduce subtle color jitter with each stroke. This feature results in natural color variation, adding depth and organic feel to your painted surfaces.
Textured Brushes for Dry and Wet Paint: This comprehensive set of 30 textured brushes is suitable for a range of mediums, including dry and wet oil paint, pastels, and rough hatching. In addition to brushes for painting, it also includes heavily textured brushes perfect for adding final details and finishing touches to your artwork.
ARTIST21 Brush Pack: For those unsure where to begin, ARTIST21 offers a comprehensive brush pack that includes sketching pencils, watercolor brushes, and markers. It also features custom blending brushes and erasers, enabling you to achieve a cohesive and polished look in your paintings.
To discover additional brushes on Clip Studio Assets, you can leverage keywords for efficient filtering based on your specific needs.
Importing Brushes from Other Software
Clip Studio Paint's compatibility extends to brushes from other popular art software. You can import brushes in .SUT (Clip Studio Paint's native format) or .ABR (Photoshop's brush format) from external websites. This interoperability allows you to expand your brush library significantly by incorporating tools you may already own or discover elsewhere.
The Philosophy of Brush Creation: Observation and Experimentation
Creating a brush inspired by a real-world tool hinges on detailed observation and the use of references. You can utilize textures from other sources or those you have previously created. It is highly recommended to emphasize the paper texture as much as possible within your brush tip design. This attention to detail will prevent the texture from becoming lost during the painting process.
When your image is in color format, registering it as a material for your brush will preserve the colors you've used. Remember to also register any paper textures you've incorporated.
Once your brush tip material is created and your custom brush is selected, navigate to the "TOOL PROPERTY" window and click on the wrench icon at the bottom. This is where the intuitive and observational part of brush creation truly begins.
Consider the behavior of a real pencil: as you press harder, the stroke it generates becomes thicker. However, the change in thickness is not always drastic. When making a stroke with a real pencil, it doesn't deposit its pigment uniformly. This observation might lead you to set an "OPACITY" of around 90% for your digital brush and configure it so that "OPACITY" responds to "PEN PRESSURE." This mirrors the real-world effect where very light pressure results in a barely visible line.
In the "BLENDING MODE" settings, choosing "MULTIPLY" can often yield desirable results for pencil-like brushes.
The subsequent settings involve fine-tuning smaller details. "ANTI-ALIASING" determines how blurry the edges of your brush will appear. This is where scanning a paper texture becomes particularly useful, as a real pencil interacts with the texture of the paper. You will also adjust the "TEXTURE DENSITY." Just as pressing harder with a real pencil causes it to mark the paper texture more, you can replicate this by adjusting the texture density in relation to pen pressure.
It is crucial to perform tests throughout the creation process. Experimentation is key to achieving the desired outcome. While other setting tabs exist, they may not significantly impact the core creation of a basic pencil brush. However, exploring them independently can lead to further customization and unique brush behaviors.
Refining for Continuous Lines and Texture
To achieve continuous lines with your custom pencil brush, some small adjustments might be necessary. For example, you might tweak settings related to brush spacing or the jitter of the brush tip to ensure smooth transitions between strokes.
The power of custom brushes lies in their infinite possibilities. By understanding the basics and experimenting with the settings, you can create an endless array of unique tools that perfectly suit your artistic vision. Sharing your creations and learning from others can further accelerate your growth as a digital artist.
The Nuances of Digital Sketching and Line Art
The standard Clip Studio Paint Pencil tool, for instance, often produces a hard line without the inherent ability to sketch softer or create feathered edges. Some artists argue that transitioning from traditional art to digital art can feel like a step backward if the tools don't replicate the nuances of physical media. This perspective highlights the importance of brushes that offer greater control over line weight and edge softness.
Key considerations for an effective digital sketching brush include:
- Convenient Brush Size Adjustment: The ability to rapidly decrease and increase brush size is essential for efficient sketching and line work.
- Pressure Sensitivity: Brushes that respond accurately to pen pressure allow for natural variations in line weight, mimicking traditional drawing tools.
- Edge Softness Control: The capacity to create both hard and soft edges is crucial for defining form and adding depth.
- Texture and Feel: The tactile quality of a brush, whether it feels smooth, textured, or gritty, significantly impacts the drawing experience and the final aesthetic.
The perception that digital sketching tools might be too precise is a valid point. It can feel counterintuitive to "sketch" - a process of searching for forms - with an instrument that is inherently sharp and precise. This is where custom brushes, designed to emulate the softer, more forgiving nature of traditional pencils or charcoal, become invaluable.
Applying Custom Brushes in Practice: A Workflow Example
When drawing features like eyes, understanding subtle anatomical details can make a significant difference. For example, the concept of "aegyo sal" (the puffy part under the eye), often overlooked, can add a touch of realism and character. When drawing an eye outline and eyebrows, you might decrease the brush size to achieve finer detail. It’s important to avoid reducing the brush to an impossibly thin setting unless you specifically desire very thin strokes. If you find your strokes are too thick, the "Transparent Color" button can be used to carefully erase unwanted areas and redraw them with a more appropriate thickness.
Drawing noses can be a challenge for many artists due to the requirement for a soft touch and subtle rendering. Similarly, beginners often struggle with lips, tending to use hard lines where a softer approach is more appropriate.
When detailing fine hair, or rendering clothing like white shirts and dark coats, the interplay of sharp and soft edges becomes critical. A sharp edge on a white collar, contrasted with the soft edge on shoulders, creates visual interest and defines form. By adopting a strategy of "always starting soft," artists can strategically decide where to place the eye's focus, guiding the viewer's attention through the artwork.
A common pitfall in digital art is the "flip horizontal" horror, where an artwork appears unbalanced when viewed from the opposite side. Tools like "Liquify" can be employed to correct asymmetrical features. It is generally advisable to perform "flip horizontal" checks early in the art creation process to identify and rectify such imbalances before investing too much time in further detail.
By embracing the flexibility of Clip Studio Paint, experimenting with custom brushes, and understanding the fundamental principles of drawing, artists can elevate their digital art to new levels of sophistication and personal expression. The journey of digital art is one of continuous learning and discovery, and the ability to craft your own tools is a powerful aspect of that progression.