Photoshop, a powerhouse for image manipulation and design, offers a robust system for rectifying mistakes and refining creative decisions. The ability to seamlessly undo actions is not just a convenience; it's a fundamental aspect of an efficient and forgiving workflow. This guide delves into the various methods of undoing changes in Photoshop, from the simplest keystroke to advanced non-destructive techniques, ensuring that every user, regardless of their experience level, can navigate their editing journey with confidence.
The Indispensable Undo Command
At its core, the Undo command is a digital safety net, allowing users to backtrack and correct almost any action taken within the software. This is particularly crucial for beginners who are still developing their skills and exploring Photoshop's extensive capabilities.
Retracing Your Steps: Undo and Step Backward
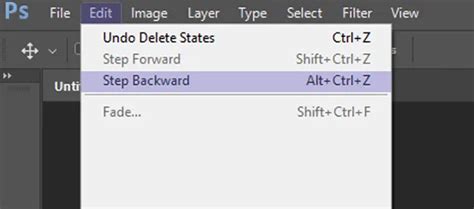
The most immediate way to reverse an action is through the Edit → Undo command, accessible via the keyboard shortcut ⌘-Z (on Mac) or Ctrl+Z (on Windows). This command meticulously undoes the very last edit performed.
For instances where multiple steps need to be reversed, Photoshop provides the Step Backward command. Accessed via Edit → Step Backward or the shortcut Option-⌘-Z (Alt+Ctrl+Z on Windows), this function allows users to undo a sequence of previous edits, one at a time. By default, Photoshop is configured to remember and allow undoing of up to 50 steps. However, this number is not fixed and can be significantly increased through Photoshop's preferences, a topic explored further in the next section. The ability to step forward through your editing history is also available, using Edit → Step Forward or Shift-⌘-Z (Shift+Ctrl+Z).
It is important to note that Photoshop's undo functionality is tied to the current editing session of an open document. Changes made before a document was opened or after it has been closed cannot be undone.
Customizing Your Undo History Depth
For users who anticipate needing to revisit a more extensive editing history than the default 50 steps, Photoshop offers the flexibility to increase this limit. This is achieved by adjusting the program's preferences.
Adjusting History States
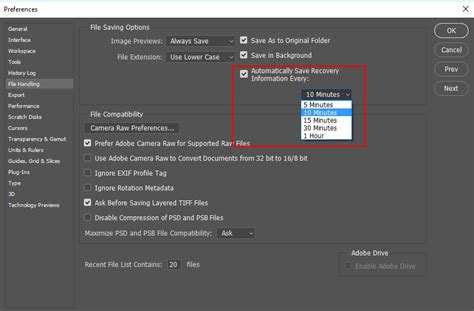
To modify the number of steps Photoshop remembers, navigate to Photoshop → Preferences → Performance (or Edit → Preferences → Performance on a PC). Within the Preferences dialog box, locate the "History States" field. Here, users can select a desired number of steps, ranging from 1 up to a maximum of 1,000. This setting directly influences how far back in your editing process you can backtrack.
It is worth noting that increasing the "History States" count can have an impact on your computer's performance, particularly on older or less powerful machines. This is because each history state consumes system memory. Therefore, a balance may need to be struck between the desired undo depth and overall application responsiveness.
Beyond Simple Undoing: Advanced History Management
While the basic Undo and Step Backward commands are powerful, Photoshop offers more sophisticated tools for managing your editing history, providing greater control and flexibility.
The History Panel: A Visual Timeline of Your Edits
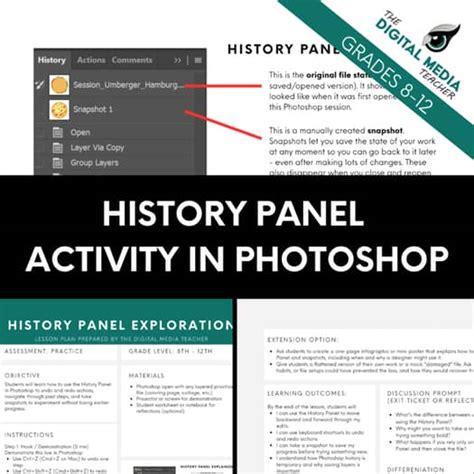
The History Panel, accessible through Window → History, serves as a chronological record of every editing step performed on an image. This panel presents a clear list of "history states," allowing you to revert your image to any previous point with a single click. This is significantly more efficient than repeatedly using the Undo command, especially when needing to undo numerous actions.
Beyond simply undoing, the History Panel offers additional valuable features. It allows you to set a specific history state for the History Brush tool and to create "snapshots." A snapshot acts as a bookmark in your editing timeline, allowing you to quickly return to a particular point without losing subsequent edits. Creating snapshots before embarking on complex or multi-step changes can be an invaluable safety net, enabling swift reversion if the results are not as desired. Multiple snapshots can be created, facilitating easy comparison and evaluation of different editing approaches.
However, it is crucial to understand that history states and snapshots are stored in Photoshop's working memory and are not saved with the document itself. Once Photoshop is closed or the image is saved and reopened, these temporary states are lost. This underscores the importance of non-destructive editing techniques.
The History Brush: Selective Undoing
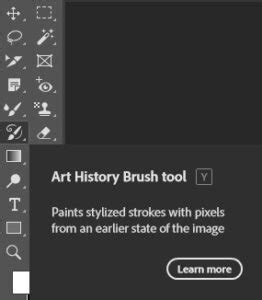
The History Brush tool provides a unique capability: undoing changes to specific areas of an image. For instance, if an adjustment like brightness has been applied globally, but you wish to revert it only in a particular section, such as the sky, the History Brush can achieve this.
To utilize the History Brush, you first select the desired history state to revert to by clicking the box to the left of that state in the History Panel. A brush icon will then appear, indicating the target state. Subsequently, select the History Brush tool from the toolbar and paint over the areas of the image you want to revert. The brush's size, opacity, hardness, and blending mode can all be adjusted to fine-tune the effect. This method, while effective, is still considered a form of destructive editing as it directly alters pixels.
The Power of Non-Destructive Editing
The inherent limitation of the Undo command and the History Panel is their linear nature. To undo an earlier mistake, all subsequent actions must also be undone. This can be time-consuming and frustrating, especially if the mistake is only discovered much later in the editing process. Moreover, the inability to undo actions after closing a document highlights the need for a more permanent and flexible approach. This is where non-destructive editing becomes paramount.
Non-destructive editing involves making changes to an image in a way that preserves the original data, allowing for edits to be undone, modified, or even removed at any later stage. This is primarily achieved through the strategic use of layers, adjustment layers, and layer masks.
Leveraging Layers for Flexibility
The fundamental principle of non-destructive editing lies in working on separate layers. Instead of directly modifying the background image, all significant changes should be performed on new layers. This approach isolates edits, making them independently adjustable, reducible in opacity, or even entirely deletable without affecting other elements of the image.
A best practice is to always duplicate the background layer upon opening an image. This ensures you always have a pristine original to return to. For specific tools like the Clone Stamp or Healing Brush, working on a dedicated layer is essential for easy undoing, redoing, or masking of those operations.
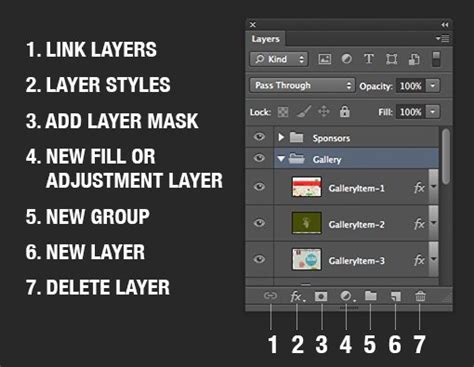
The visibility of layers can be toggled using the "eye" icon next to each layer in the Layers panel. This allows for a visual comparison of changes, similar to the "Toggle Last State" command but with greater control, as you can hide or reveal any combination of layers.
Adjustment Layers: Dynamic Image Enhancements
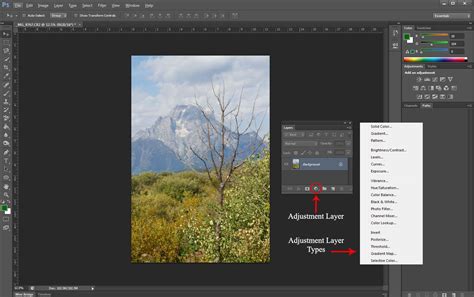
Photoshop's Image → Adjustments menu offers powerful tools for image enhancement. However, applying these directly to an image results in destructive edits. The non-destructive alternative is to use Adjustment Layers, found within the Adjustment Layer Panel (accessible via Window → Adjustment Layers).
Adjustment layers allow you to apply the same image adjustments (such as brightness, contrast, saturation, levels, and curves) on a separate layer. Crucially, adjustment layers can be masked, their opacity adjusted, or the adjustment itself modified at any point in the future, even after subsequent edits have been made. This provides unparalleled flexibility and control over your image's appearance.
Layer Masks: Precision Control Over Edits
Layer masks are indispensable tools for non-destructive editing, enabling you to selectively hide or reveal adjustments or edits applied to a specific layer. Every adjustment layer comes with an empty layer mask by default.
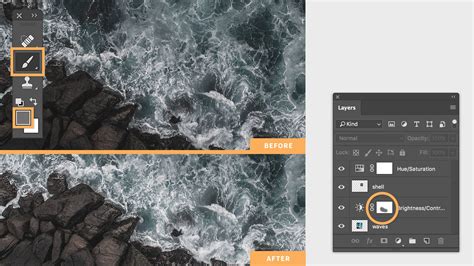
For example, if you want to brighten an image but not affect the sky, instead of using the destructive History Brush method, you would create an adjustment layer to brighten the image and then use a layer mask to "paint out" the sky, effectively concealing the brightening effect in that area. The advantage of layer masks over the History Brush is their editability. You can refine the mask at any time, making it a truly flexible and non-destructive solution.
Legacy Undo Options and Workflow Customization
For users accustomed to older versions of Photoshop or those who prefer a different undo behavior, Photoshop offers a "Legacy Undo Mode." Prior to Photoshop CC version 20.0, the Ctrl/Command + Z shortcut functioned as a "Toggle Last State" command, switching between the last two states. The ability to step backward through multiple states was a separate command.
Enabling Legacy Undo Shortcuts
To re-enable this older behavior, navigate to Edit → Keyboard Shortcuts, select "Use Legacy Undo Shortcuts," and restart Photoshop. With legacy shortcuts enabled, Ctrl/Command + Z will toggle the last change, while Alt + Ctrl + Z (Windows) or Command + Option + Z (Mac) will function as the "Step Backward" command.
Keyboard Shortcut Customization
Beyond legacy options, Photoshop allows extensive customization of keyboard shortcuts. This can be done via Edit → Keyboard Shortcuts. For instance, some users find it beneficial to map "Step Backward" to Command-Z and "Step Forward" to Command-Shift-Z for a more traditional undo/redo workflow, similar to other software applications. However, it's important to be aware that layer selection can sometimes be undone with these shortcuts, a behavior that can be a source of frustration for some.
TourBox: Enhancing Workflow Efficiency
Tools like TourBox are designed to integrate with Photoshop and other creative software to significantly enhance workflow efficiency. By assigning commands like Undo, Redo, and Revert to dedicated physical controls, users can execute these operations more rapidly and intuitively, freeing up mental bandwidth for creative tasks. TourBox can also be configured to control various aspects of Photoshop's undo functionality, streamlining complex editing sequences.
Undo & Redo Shortcut in Photoshop
The Universal Undo: F12 Revert Command
In some contexts, a command can instantly revert an entire document to its last saved state. This powerful "Revert" function is often assigned to the F12 key. While this is a drastic measure, it can be a lifesaver when a project has gone significantly off track and a complete reset to the last saved point is desired.
Conclusion: A Multifaceted Approach to Undoing
Photoshop's undo capabilities are multifaceted, catering to a wide range of user needs and workflows. From the simple Ctrl+Z for immediate corrections to the robust History Panel for extensive backtracking, and the indispensable non-destructive techniques involving layers, adjustment layers, and layer masks for long-term flexibility, Photoshop provides a comprehensive toolkit for managing edits. Understanding and utilizing these various methods empowers users to work more efficiently, experiment more freely, and ultimately achieve superior creative results with confidence.