Removing the background from an image is a fundamental skill in digital image editing, offering unparalleled creative freedom. Whether you aim to isolate a product for e-commerce, composite a subject into a new scene, or simply clean up an image, mastering background removal techniques in Adobe Photoshop Elements is invaluable. This guide delves into various methods, from straightforward tools for solid backgrounds to more nuanced approaches for complex images, ensuring you can achieve professional-looking results.
Understanding the Fundamentals: Layers and Transparency
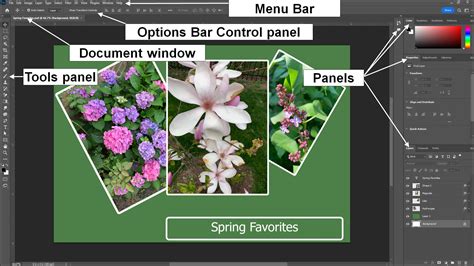
Before diving into specific tools, it's crucial to grasp the concept of layers and transparency in Photoshop Elements. Most images, when first opened, exist as a single "Background" layer. This layer has certain limitations, such as not supporting transparency. To effectively remove a background and allow for transparency, you'll typically need to convert this "Background" layer into a standard layer. This is easily done by double-clicking the layer in the "Layers" panel (usually found on the right side of the workspace) and clicking "OK" in the subsequent dialog box. The layer will then be renamed, often to "Layer 0," and will support transparency. Transparency is visually represented by a checkerboard pattern, indicating areas where no pixels are present.
The Background Eraser Tool: Precision for Edges
The Background Eraser Tool is specifically designed to remove background pixels while preserving the details of your foreground subject. This tool operates by sampling a color at the center of your brush, known as the "hot spot," and then erasing that color wherever it appears within the brush's radius. Crucially, it also performs color extraction at the edges of foreground objects, preventing unsightly color halos when the subject is later placed on a new background.
To utilize the Background Eraser Tool:
Select the Layer: Ensure the layer containing the background you wish to erase is selected in the "Layers" panel.
Choose the Tool: Locate and select the Background Eraser Tool from the Toolbox (often found on the left side of the screen, it resembles an eraser).
Configure Tool Options: In the "Tool Options Bar" (typically at the top of the screen), you can fine-tune the tool's behavior.
- Brush Settings: Click the "Brush Settings" button to adjust the brush tip's size and shape. You can also use the square bracket keys
[and]to adjust brush size on the fly. A hard brush with hardness set near 100% is often recommended for cleaner edges. - Limits: The "Limits" option determines how the tool samples colors. "Discontiguous" erases the sampled color anywhere it appears within the brush. "Contiguous" erases only adjacent pixels of the sampled color. "Find Edges" is particularly useful for intelligently detecting and preserving object edges.
- Tolerance: The "Tolerance" setting controls the range of colors the tool will erase. A lower number (e.g., 20-30%) limits erasure to pixels very similar to the sampled color, preserving more detail. A higher number erases a broader range of similar colors, which can be faster for solid backgrounds but risks erasing parts of your subject. If the tool erases too much of your subject, lower the tolerance; if it doesn't erase enough of the background, increase it.
- Sampling: The "Sampling" option (often found as "Continuous," "Once," or "Background Swatch") dictates how the tool samples color. "Continuous" samples as you drag, "Once" samples at the initial click, and "Background Swatch" uses a color defined in the color picker. For detailed work, "Once" can offer more control.
- Brush Settings: Click the "Brush Settings" button to adjust the brush tip's size and shape. You can also use the square bracket keys
Erase the Background: Click and drag your mouse over the background area you want to remove. Be mindful of the crosshairs within the brush; try to keep them on the background and away from your subject. Short, controlled strokes are often better than long, sweeping ones, allowing for easier undoing of mistakes.
Refine Edges: After removing the bulk of the background, you may notice stray pixels or remnants around the edges of your subject. You can reduce the brush size of the Background Eraser Tool or switch to the regular Eraser Tool for precise cleanup of these areas.

The Magic Eraser Tool: Swift Removal for Solid Backgrounds
For images with a solid or near-solid colored background, the Magic Eraser Tool offers a remarkably quick solution. This tool functions much like the Magic Wand selection tool but directly erases pixels to transparency.
To use the Magic Eraser Tool:
- Select the Tool: Choose the Magic Eraser Tool from the Toolbox.
- Set Tolerance: In the Tool Options Bar, adjust the "Tolerance" setting. A tolerance between 20-30 is a good starting point. As with the Background Eraser, a lower tolerance erases fewer colors, while a higher tolerance erases a wider range.
- Click the Background: Simply click on the background color you want to remove. If the background is a uniform color, a single click might erase the entire background. If it has variations, you may need to click different areas.
- Undo Mistakes: If the Magic Eraser erases more than intended, use
Ctrl + Z(Windows) orCommand + Z(macOS) to undo the action. The History panel can be used to step back through multiple actions.
The Magic Eraser is ideal for situations where the subject and background have a clear color distinction, making it a go-to for simple product shots or graphics with plain backgrounds.
Selection Tools for Complex Backgrounds: Polygonal Lasso and Magnetic Lasso
When dealing with more intricate backgrounds or subjects with complex edges, selection tools become indispensable. These tools allow you to meticulously outline your subject, creating a precise selection that can then be used to isolate it from the background.
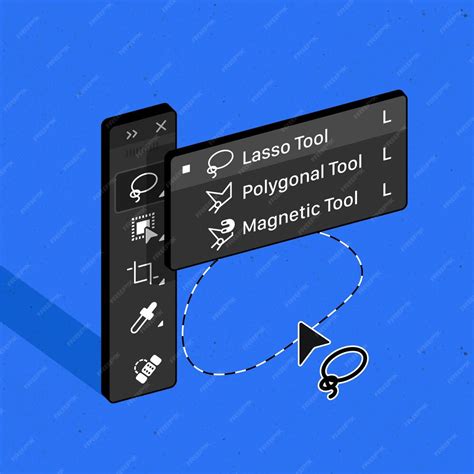
Polygonal Lasso Tool: This tool allows you to draw straight-edged selections. You click to create anchor points, and the tool connects them with straight lines. This is useful for subjects with many straight lines or geometric shapes. To complete the selection, click back on your starting point. For curved areas, you'll need to place more anchor points closer together to approximate the curve.
Magnetic Lasso Tool: This tool attempts to automatically snap to the edges of your subject as you trace around it. It's a good option when the contrast between your subject and the background is high, as it uses color and contrast information to detect edges. You still need to guide it by moving your cursor, and you can click to place anchor points to refine its path.
Once you have created a selection using either lasso tool:
- Refine the Selection: After completing the outline, you can add to or subtract from the selection. To add, select the tool again and click the "Add to selection" icon (two joined squares). To subtract, click the "Subtract from selection" icon (a square cut out of another square).
- Invert and Delete: With your subject selected, you'll want to delete the background. To do this, go to "Select" > "Inverse" to select the background instead of your subject. Then, press the "Delete" key.
- Alternative: Copy and Paste: Alternatively, after selecting your subject, you can copy it (
Ctrl + CorCommand + C) and paste it into a new layer or a different image (Ctrl + VorCommand + V). To fully isolate it, you can then turn off the visibility of the original background layer by clicking the eye icon next to it in the Layers panel.
Leveraging Modern AI Tools: Remove Tool and Object Selection
Photoshop Elements, like its professional counterpart, has incorporated powerful Artificial Intelligence (AI) features to streamline background removal. These tools offer remarkable speed and often impressive accuracy with minimal user input.
Remove Tool: Introduced in more recent versions, the Remove Tool is designed for one-click background removal. You can "paint" over the background area, and the AI intelligently identifies and removes it. This tool is also effective for removing unwanted objects from an image.
Object Selection Tool: New to Photoshop 2022 and refined since, the Object Selection Tool allows you to quickly select subjects. Simply hover your cursor over a subject, and it will often highlight blue, indicating it has identified an object. Clicking on it creates a selection. You can also draw a rectangle or lasso around an area, and the tool will attempt to find objects within that area. To remove the background, you can then invert the selection and delete, or use the "Remove Background" quick action.
Photoshop Elements 2026 Is Here! (Generative AI Changes Everything)
Quick Actions: The Fastest Route
For ultimate speed, Photoshop Elements offers "Quick Actions," including a dedicated "Remove Background" option. This is typically found in the "Properties" panel when an image layer is selected. Clicking this button initiates an AI-powered process that attempts to automatically remove the background. While incredibly fast, the results may sometimes require manual refinement, especially with complex images.
To refine the results of Quick Actions:
- Access Properties Panel: If not visible, go to "Window" > "Properties."
- Use Mask Options: After the initial removal, you'll often see options to "Subtract from Mask" or "Add to Mask." These allow you to manually refine the edges of your selection, painting away any remaining background or adding back parts of your subject that might have been inadvertently removed.
The Pen Tool: Unrivaled Control for Precision
For situations demanding the absolute highest level of precision, the Pen Tool remains the gold standard. It allows you to create vector paths with anchor points, offering complete control over every curve and line. While it is the most time-consuming method, the results are often unparalleled, especially for intricate subjects or when perfect edges are critical.
Using the Pen Tool:
- Duplicate Layer: As with other methods, it's wise to duplicate your background layer first.
- Select Pen Tool: Choose the Pen Tool from the Toolbox.
- Create Path: Click to set anchor points around your subject. For curves, click and drag to create bezier handles that control the curve's shape.
- Complete and Save Path: Close the path by clicking on your starting point. Then, open the "Paths" panel ("Window" > "Paths"), save your path, and give it a descriptive name.
- Make Selection: Right-click on your saved path in the Paths panel and choose "Make Selection." Leave the default settings in the dialog box.
- Invert and Delete: Go to "Select" > "Inverse" to select the background, then press "Delete."
Even with the Pen Tool, you might find minor imperfections. Combining it with other tools, such as the Eraser Tool for touch-ups or layer masks for non-destructive editing, can yield the most polished outcome.
Saving Your Transparent Image
Once you have successfully removed the background and are satisfied with your subject's isolation, it's crucial to save your image in a format that supports transparency. The most common formats for this purpose are:
- PNG (.png): This is a widely supported format that preserves transparency and offers good image quality. It's ideal for web graphics, logos, and images where transparency is essential.
- GIF (.gif): While it also supports transparency, GIF is limited to 256 colors and is best suited for simple graphics or animations.
- PSD (.psd): Photoshop Elements' native format will preserve all layers and transparency, allowing you to re-edit the image later.
Saving as a JPEG (.jpg) will not preserve transparency; the transparent areas will be filled with a solid color, typically white. Therefore, always choose a format that supports transparency when saving images with a removed background.
tags: #photoshop #elements #remove #background