Adobe Photoshop, a powerhouse in digital imaging, offers a versatile and accessible platform for textile designers, fashion CAD artists, and aspiring entrepreneurs to bring their creative visions to life. While the market boasts numerous specialized textile design programs, their often prohibitive costs can be a barrier for individuals and small businesses. Photoshop, on the other hand, provides a powerful and more budget-friendly alternative, democratizing the creation of unique and professional-grade textile prints. This tutorial delves into the core techniques and workflows within Photoshop that enable the transformation of simple photographs into intricate, repeatable fabric designs, suitable for a wide range of applications from fashion apparel to home decor and quilting.
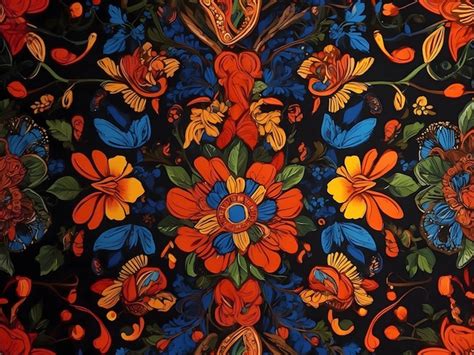
Understanding the Fundamentals of Textile Pattern Creation
The journey into textile design with Photoshop begins with understanding the fundamental principles of creating a repeatable pattern. This involves selecting appropriate source material, preparing it for repetition, and utilizing Photoshop's tools to achieve a seamless effect. The goal is to produce a "tile" - a small section of the design that, when duplicated and placed side-by-side, creates an illusion of an endless, unbroken pattern.
Selecting and Preparing Your Source Imagery
The foundation of any compelling textile design lies in the initial image or artwork. For those looking to emulate the distinctive style of artists like Leah Rama, a classical portrait can serve as an excellent starting point. The process of isolating the desired elements from a photograph is crucial. Photoshop's Quick Selection tool is invaluable here. By simply dragging this tool over the area of the image you wish to isolate, Photoshop intelligently identifies and selects contiguous pixels of similar color and tone.
Once a preliminary selection is made, the Select > Refine Edge command becomes your best friend. This feature offers a suite of controls that allow for meticulous cleanup of the selection's edges. Adjusting parameters within Refine Edge helps to soften or sharpen the selection, ensuring that intricate details, such as hair or delicate fabric textures, are captured accurately and without jagged artifacts. This step is paramount in achieving a professional finish, especially when dealing with complex photographic elements.
Exploring Creative Filters and Effects
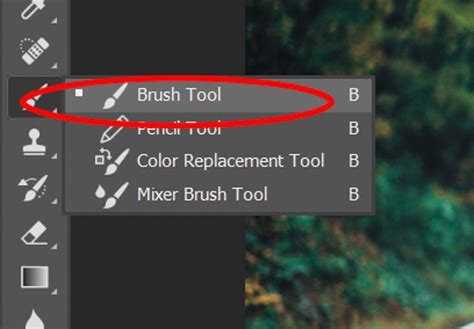
Beyond basic selection and refinement, Photoshop offers a rich array of filters that can dramatically alter the appearance of your source imagery, opening up avenues for unique textile aesthetics. For instance, the Filter > Pixelate > Mosaic filter can be employed to achieve a distinctive pixelated look. This effect is particularly useful for creating stylized, graphic patterns.
A common technique, employed by designers like Leah Rama, involves duplicating the image layer before applying such filters. This preserves the original, high-resolution image as a backup or as a layer for further manipulation, while the duplicated layer can be transformed through filters. By strategically layering and blending these modified and original elements, designers can achieve complex and nuanced visual effects that might otherwise be difficult to attain.
Textile Pattern | How to Make Crystallize Mosaic Background in Photoshop.
Building Seamless Repeat Patterns in Photoshop
The true essence of textile design lies in the creation of patterns that can be tiled infinitely without visible seams. Photoshop provides several methods and tools to achieve this, from manual arrangement to leveraging its library features.
Utilizing Creative Cloud Libraries for Pattern Management
For efficient workflow and easy access to reusable design elements, Adobe's Creative Cloud Libraries are indispensable. To manage your pattern tiles, navigate to Window > Library. Once your individual pattern tile is prepared on its own layer or group of layers, you can select all visible layers within your Layers panel and then click Add Graphic within the Libraries panel. This saves your tile to your chosen library, making it accessible across different Photoshop documents and even other Adobe applications.
To recreate specific pattern types, such as the "Pixel pattern library" mentioned, you can often find pre-made assets or create your own and save them. This ensures consistency and speeds up the design process, especially when working on multiple projects or collections.
The Power of Illustrator for Pattern Creation (with Photoshop Integration)
While Photoshop is excellent for image manipulation and preparing individual pattern elements, Adobe Illustrator excels at vector-based pattern creation and precise tiling. A common workflow involves preparing your tile in Photoshop and then bringing it into Illustrator to finalize the seamless repeat.
To do this, launch Illustrator and create a new document with the same specifications as your Photoshop tile - for example, a 4x4 inch dimension at 300 pixels per inch (ppi). This ensures consistency in scale and resolution. You can then access your saved graphics by going to Window > Libraries and selecting the library where you saved your Photoshop tile. Drag the tile onto your Illustrator artboard.
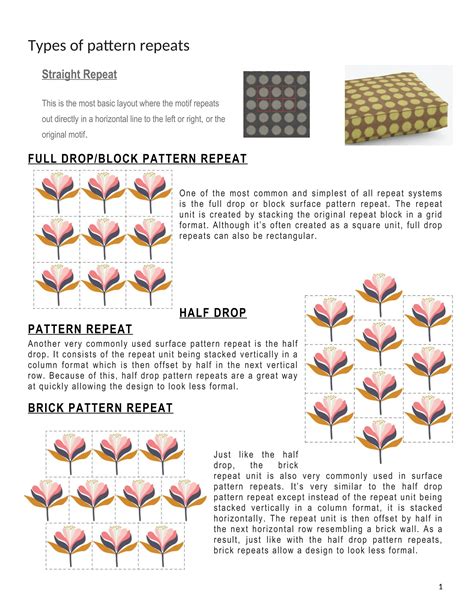
Once your tile is in place, you can use Illustrator's powerful Object > Pattern > Make command. This feature allows you to visualize your pattern repeat in real-time. By adjusting the Overlap settings, you can experiment with different tiling methods, such as grid, brick, or drop repeats, and observe how the pattern elements interact and connect. The ability to see the effect of changes live on screen dramatically speeds up the iteration process. When you are satisfied with the tile and its repeat, you can click "Done" to save the pattern swatch.
Applying Your Textile Designs to Fashion Sketches
Once a seamless textile pattern is created, the next logical step is to visualize it applied to a fashion context. This is where Photoshop and Illustrator can work in tandem to bring your designs to life on a fashion sketch or croquis.
Integrating Patterns with Fashion Croquis
Start by creating a new artboard in Illustrator, placing it on your canvas a reasonable distance from your pattern tile. You can add a new artboard by clicking New Artboard in the Control panel. Then, access your Graphics section within the Libraries panel. Select the thumbnail of your fashion croquis, hold down the Option key (or Alt key on Windows), and drag it onto the new artboard. This duplicates the croquis onto your working canvas.
After placing the croquis, click in an open space on the artboard to deselect the entire figure. Then, specifically click on the garment area of the croquis that you intend to apply your textile pattern to. This isolates the garment, allowing you to precisely apply your fabric design.
From the Libraries panel, you can now select your created textile pattern. You can then drag this pattern onto the selected garment area of the croquis. Photoshop and Illustrator offer various methods for applying patterns, including using them as fills for shapes or as clipping masks, ensuring the pattern conforms perfectly to the garment's silhouette. Experiment with scaling and positioning the pattern within the garment to achieve the most aesthetically pleasing result.
Textile Pattern | How to Make Crystallize Mosaic Background in Photoshop.
Beyond Basic Repeats: Advanced Techniques and Considerations
The world of textile design is vast, and Photoshop offers a multitude of tools and techniques to explore beyond fundamental repeat patterns. These can include creating woven effects, managing color palettes, and preparing files for professional printing.
Simulating Woven Effects
Achieving a realistic woven effect in Photoshop can add a tactile dimension to your digital designs. This often involves understanding how threads interlace in actual woven fabrics. Techniques can include:
- Creating custom brushes: Designing brushes that mimic the look of individual threads or warp and weft structures.
- Using layer styles: Applying effects like Bevel and Emboss, or Drop Shadow, to create depth and the illusion of threads overlapping.
- Manual manipulation: Carefully drawing or placing lines to simulate the interlacing of threads, often using a grid as a guide.
- Applying textures: Overlaying subtle fabric textures to enhance the realism.
These methods, when combined, can transform a flat digital pattern into something that appears to have the texture and depth of real woven cloth.
Color Management and Indexing
For textile printing, especially for certain types of digital printing or screen printing, managing and reducing the color palette of a design is crucial. Photoshop's Image > Mode > Indexed Color feature is powerful for this. It allows you to reduce the number of colors in an image to a specific, limited palette. This is essential for:
- Reducing file size: Fewer colors mean smaller file sizes, which are easier to manage and transmit.
- Ensuring accurate printing: Many printing processes have limitations on the number of colors they can reproduce accurately. Indexing ensures the design can be printed faithfully.
- Creating specific colorways: By indexing to different palettes, you can quickly generate multiple color variations of the same design.
The ability to color reduce a design down to index color in a matter of minutes, using tools like the Color Table within the Indexed Color dialog, is a significant time-saver for designers.
Preparing Files for Professional Printing
When your design is complete and you intend to have it printed as actual textile, meticulous preparation is key. The resolution and dimensions of your tile are critical. A standard recommendation for textile printing is to set the Resolution to 300 pixels/inch. This ensures sufficient detail for high-quality printing. The dimensions of your tile should be manageable; a common starting point is a square tile, such as 4 x 4 inches. This size is easily repeatable and provides a good balance between detail and file size.
It is also important to understand the requirements of your chosen printing service. Some may require specific file formats (like TIFF or high-resolution JPEG), color modes (CMYK is often preferred for print), or may have specific guidelines regarding bleed or file structure. If using specialized plugins or software like Adobe Textile Designer (discussed below), ensure you export your files in the format required by that software.
Exploring Specialized Tools and Resources
While Photoshop is a robust standalone tool, its capabilities for textile design can be further enhanced by specialized plugins and extensions, as well as external resources.
Adobe Textile Designer Extension
Adobe Textile Designer was a powerful extension for Photoshop designed to streamline the creation of seamless pattern repeats. Although it was discontinued in November 2020, its upcoming re-release by Aquario promises to bring back its advanced functionalities. When available, this extension typically offers features such as:
- Automated repeat creation: Simplifying the process of generating seamless patterns.
- Live preview: Allowing designers to see their pattern repeat in real-time as they work.
- Multiple repeat styles: Support for grid, horizontal brick, and vertical drop repeats.
- Edge filling: Tools to automatically extend and wrap elements across the edges of the tile for a seamless result without manual calculations.
- Previewing patterns in situ: Visualizing how the pattern looks when applied to a garment or product.
- Colorway generation: Tools for creating and managing different color variations of a design.
- Separations and mill sheet creation: Features to prepare files for professional printing, including generating specifications for manufacturers.
This extension, when active, transforms Photoshop into a more specialized textile design environment, saving designers significant time and effort. Learning to use such extensions is becoming "essential knowledge" in the trade for both novices and experienced professionals.
Alternative Software: GIMP
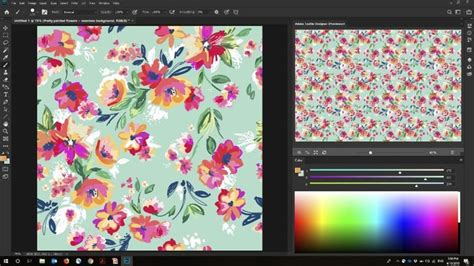
For designers seeking a free and open-source alternative to Photoshop, GIMP (The GNU Image Manipulation Program) is a viable option. While it may have a different user interface and a learning curve, GIMP offers a comprehensive suite of image editing tools that can be used for textile design. Many fundamental techniques, such as selection, layer manipulation, and applying filters, are available in GIMP. For those on a tight budget or exploring textile design as a hobby, GIMP provides a powerful entry point without the cost of commercial software.
Educational Resources and Courses
Numerous online courses and tutorials are available to guide individuals through the process of textile design using Photoshop. These resources often cover:
- Step-by-step instructions: Detailed guidance from image selection to final pattern output.
- Creative techniques: Exploring various methods for generating motifs, creating textures, and developing unique designs.
- Color theory and application: Understanding how to effectively use color in textile design.
- Applying designs to mockups: Visualizing finished patterns on products.
- Preparing files for print: Ensuring designs meet professional printing standards.
Some courses are designed for beginners with no prior experience in Photoshop or design, while others cater to professionals looking to enhance their skills. Resources like "Adobe Photoshop for Textile Design" by Frederick Chipkin, or various online e-courses, offer structured learning paths. These often include practice images, charts for color matching, and spiral-bound tutorials for ease of use. The availability of such comprehensive learning systems makes textile design more accessible than ever before.
Textile Pattern | How to Make Crystallize Mosaic Background in Photoshop.
The Evolving Landscape of Digital Textile Design
The digital realm has revolutionized textile design, offering unprecedented creative freedom and efficiency. Photoshop, as a leading digital imaging tool, plays a central role in this transformation. Its accessibility, combined with specialized extensions and a wealth of educational resources, empowers a new generation of designers to create unique, high-quality fabric prints. Whether you are a seasoned professional looking to refine your workflow or a budding designer embarking on a new career path, mastering Photoshop for textile design opens up a world of creative possibilities. The ability to transform personal photographs into unique fabric designs for quilting, sewing, art, posters, and more, democratizes creativity and allows for truly personalized expression in the world of textiles.