The Move tool in Adobe Photoshop, while appearing deceptively simple at first glance, is a cornerstone of efficient image manipulation, offering a surprising depth of functionality that extends far beyond basic object repositioning. Its utility is amplified by a suite of features designed to streamline workflows, enhance precision, and even leverage advanced capabilities like content-aware transformations and 3D object manipulation. Understanding the full scope of the Move tool's power can significantly elevate your Photoshop experience, making complex tasks feel more intuitive and time-consuming operations remarkably swift.

The Fundamental Power of the Move Tool
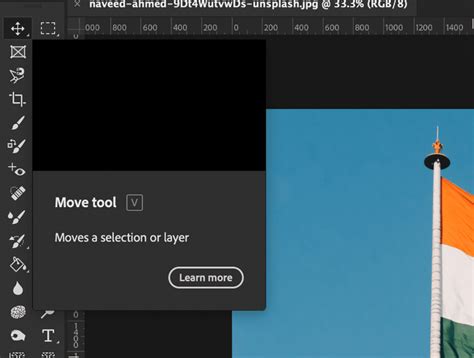
At its core, the Move tool is designed to do exactly what its name suggests: move elements within your Photoshop document. However, the conditions under which it operates and the ways it interacts with your layers are crucial to its effectiveness. For the Move tool to function, there must be an element present within the image that is capable of being moved. This typically means the image must consist of more than one layer, and these layers must be in an unlocked state. If a layer is locked, it cannot be moved. To unlock a layer, you need to activate it in the Layers panel. Once an item has been clicked and activated, the tool also allows you to determine the location using the arrow keys on the keyboard, offering a level of granular control that can be invaluable for precise alignment.
The Move tool is also uniquely capable of being activated even when it is not explicitly selected in the toolbar. By simply holding down the CTRL key on a PC or the COMMAND key on a Mac, you can instantly activate the Move tool, regardless of which tool is currently active. This temporary activation is a powerful shortcut that allows for rapid repositioning without interrupting your current workflow.
Advanced Selection and Transformation Capabilities
You don't always need the Marquee or Lasso tools to select items in Photoshop when using the Move tool. Using a simple keyboard command, you can instantly transform your Move tool so that it automatically selects any objects in its path. When the Move tool is selected, wherever you place your mouse cursor, it activates the top layer automatically and moves it. This can be particularly useful when you have a great number of layers in an image, as it allows for quick selection and manipulation of the uppermost element.
Furthermore, the Move tool supports multiple layer selection. Once multiple layers are selected, you have an alternative to show transform controls. When this feature is turned on, Photoshop will unveil a bounding box around the chosen objects, allowing for simultaneous transformation. This is incredibly useful for manipulating groups of elements as a cohesive unit. The Group/Layer option in the Move tool's options bar further refines this, allowing you to select between moving an individual layer or an entire group of layers. Photoshop will automatically select the whole group of layers if the group is selected and individual layers if the layer is selected. Selecting a layer as an option will be particularly useful for files that have few layers, offering a more targeted approach.
Leveraging the Move Tool for Precision and Efficiency
Shortcuts are instrumental in saving time in Photoshop, and knowing them makes your job significantly easier. Holding the ALT key (or OPTION on a Mac) and then clicking on an image will help you drag out a duplicate of your current selection or layer. This feature can save a considerable amount of time, especially when creating multiple instances of an object or element.
For those requiring even more precise control, the Move tool offers an alternative to relying solely on a mouse or tablet. Once an item has been clicked and activated, the tool allows you to determine its exact location using the arrow keys on the keyboard. This enables pixel-perfect adjustments, ensuring that your elements are positioned exactly where you intend them to be.
Centering and Alignment
The Move tool is also a powerful ally for achieving perfect composition. If you want to center a layer within a document, with the Move tool chosen, you can select > All, and then click the Align vertical centers and Align horizontal centers icons in the options bar. This is also a fine option to find the center of the contents on a layer, providing a quick way to ensure symmetrical placement.
Repositioning Guides
Beyond manipulating image content, the Move tool can be used to reposition guide lines. By positioning the Move tool directly on top of a guide, you can click and drag to reposition it once the icon changes to a double-headed arrow. This offers a dynamic way to adjust your layout and alignment guides as needed during the design process.
How to Add Ruler Guides in Photoshop
Exploring Advanced Functionality: Content-Aware Move and 3D Objects
Recent versions of Photoshop have integrated content-aware functionality into the Move tool, transforming its capabilities. Normally, when you move a selection to another location, it leaves behind a vacant space in the object’s original location, much like tearing out a part of your wall and leaving a hole behind. However, with the content-aware move tool, you can move parts of an image to a new location easily, and Photoshop intelligently fills the vacated space with surrounding content, creating a seamless transition. For example, if you're editing a photo of a baseball game and need to reposition a player, the content-aware move can remove them from their original spot and fill in the background realistically.
The Move tool is also designed to interact with 3D objects. If you want Photoshop to understand what kind of movement you want to execute, you can either click one of the 3D mode icons in the options bar and then drag within the 3D space, or click the object itself to mobilize the 3D axis HUD. This allows for intuitive manipulation and positioning of three-dimensional elements within your compositions.
Linking Layers
For more complex workflows, especially when working with 3D objects, the ability to link layers is invaluable. Click on Ctrl/Cmd and then do a right-click on any of the layers and choose "Link Layers" to link two layers together. This ensures that when one linked layer is moved, the others move in tandem, maintaining their relative positions.
The Versatile Move Tool in Action
The Move tool, therefore, can be used to move any part of your image according to your requirements, as long as it has more than one layer and those layers are unlocked. Its ability to create layer groups, duplicate them, and move them around further enhances its utility. The feature where Photoshop shows drag blocks around the image when a transform control is on allows you to balance the size of your image by dragging these blocks, offering a visual cue for scaling and resizing operations.
In essence, the Move tool may seem simple, but it delivers an impressive amount of power and flexibility. From basic repositioning to advanced content-aware transformations and 3D object manipulation, it remains an indispensable tool for any Photoshop user seeking to refine their images with precision and efficiency.