Photoshop is an indispensable tool for digital artists and designers, offering a vast array of tools and brushes that empower users to achieve precise visual outcomes. The software's capabilities extend to seamlessly blending foreground and background elements, or even merging distinct colors, with intuitive tools like the Smudge tool. For those seeking a more painterly approach, the Mixer Brush tool allows for color mixing directly on the digital canvas, mimicking traditional artistic methods. Understanding and utilizing these blending features can elevate your image manipulation and creative projects to a professional level.
The Art of the Smudge Tool: Creating Realistic Blurs and Color Transitions
The Smudge tool in Photoshop is designed to mimic the effect of dragging a finger through wet paint, allowing for the creation of soft transitions and realistic blurs. To begin using this tool, locate and select it from the main toolbar. If the Smudge tool is not immediately visible, it resides within a group that also includes the Blur tool. Clicking and holding the Blur tool will reveal its related tools, from which you can then select the Smudge tool.
A key feature for advanced blending with the Smudge tool is the "Sample All Layers" option. When this is activated in the options bar, the tool will draw color information from all visible layers in your document. This is crucial for complex compositions where you need to blend elements from multiple sources without flattening the image. Conversely, the "Finger Painting" option in the options bar allows the smudge effect to begin with the foreground color. This means that each new stroke will initiate with the color currently selected as your foreground, providing a consistent starting point for your smudging actions. Effectively using these options allows for nuanced control over how colors interact and blend across your image.
The Mixer Brush: Mimicking Traditional Painting Techniques
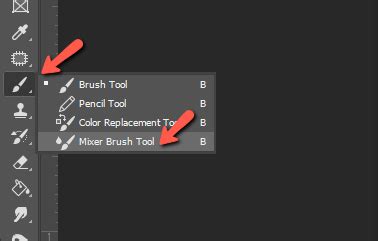
The Mixer Brush tool in Photoshop offers a sophisticated way to blend colors, closely replicating the experience of mixing paints on a physical palette. This tool features a unique "reservoir" and a "pickup" mechanism. The reservoir acts as a holding area for the paint that is applied to the canvas, while the pickup selectively draws paint directly from the canvas itself. The interaction between the reservoir and the canvas colors is a continuous mixing process, allowing for dynamic and organic color blending.
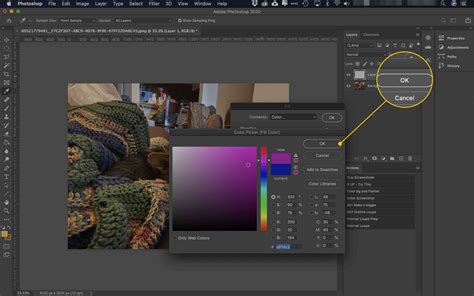
To load paint into the Mixer Brush's reservoir, a simple yet effective shortcut is employed: Alt-click (on Windows) or Option-click (on macOS) anywhere on the canvas. The brush tip will then visually reflect any color variations present in the area you sampled. For users who prefer a uniform starting color for their strokes, the "Load Solid Colors Only" option, available within the "Current Brush Load" pop-up menu in the Options bar, can be selected. This ensures that the brush is loaded with a consistent hue, free from the subtle variations of a sampled area.
Once the brush is loaded, further customization is available through the Brush options in the Options bar. Here, you can precisely define how much paint the brush should hold and control the "paint wetness," which dictates how much paint the brush picks up from the canvas with each stroke. This level of control is essential for achieving a wide range of painterly effects, from subtle washes to thick impasto textures. To apply the paint, you can simply drag the brush across your image. For creating perfectly straight lines, a common technique involves clicking at a starting point, holding down the Shift key, and then clicking at the desired ending point.
Understanding Photoshop Blend Modes: The Science Behind Layer Interaction
Photoshop blend modes, also known as blending modes, are fundamental to achieving sophisticated visual effects. At their core, these are mathematical equations that govern how pixels from a layer positioned above another layer (referred to as the "blend layer" or "top layer") interact and merge with the pixels in the layer beneath it (the "base layer"). By manipulating these modes, you can achieve highly specific color schemes, alter the brightness and contrast of an image instantaneously, and create a myriad of artistic effects that would be difficult or impossible to achieve through other means.
The application of blend modes can be quite versatile. They can be applied to an entire layer, affecting all pixels within that layer uniformly. Alternatively, for more targeted adjustments, you can create a layer mask. With a layer mask, you can then use the Brush tool to selectively apply the blend mode's effect to specific areas of the image, offering granular control over the final appearance.
Exploring the Blend Mode Options
The journey into blend modes begins with understanding their structure within the Photoshop interface. When working with layers, you'll find a drop-down menu, typically located near the top of the Layers panel, which displays the current blend mode. The default setting for this menu is "Normal," which essentially means no blending occurs, and the top layer simply covers the layer below. However, by clicking on this menu, you unlock a comprehensive list of blend modes, categorized into six distinct sections, each offering a unique way for pixels to interact.

Adjusting the Intensity: The Opacity Slider
Once you have selected a blend mode, its effect on the image can be fine-tuned using the Opacity slider. This slider provides a crucial level of control, allowing you to moderate the blend mode's intensity. If a chosen blend mode is producing an effect that is too subtle or overwhelmingly strong, adjusting the Opacity slider can bring it into perfect balance. Moving the slider to the left decreases the opacity, making the blend mode's effect more transparent, while moving it to the right increases the opacity, making the effect more pronounced. This interplay between blend mode selection and opacity adjustment is key to achieving professional-looking results.
Selective Blending with Layer Masks and Selections
For highly targeted blending effects, Photoshop's selection tools and layer masks are indispensable. This approach allows you to apply blend modes or other adjustments to specific parts of an image, rather than the entire layer.
Making Precise Selections
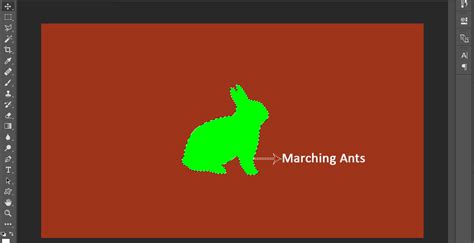
To begin tailoring your blending, open the Layers panel (Window > Layers) and select the layer you wish to work with. For instance, if you are working with a portrait and want to apply a specific effect to the subject's face and hands, you would select the "Portrait" layer in this example. Next, choose a selection tool, such as the Quick Selection tool. By scrubbing over the desired areas - in this case, the hands and face - Photoshop will automatically create a selection border, commonly referred to as "marching ants," around each identified area.
A pro tip for refining your selections: utilize the settings available in the Options bar. These settings allow you to add to an existing selection, effectively expanding it, or subtract from it, shrinking the selected area, enabling you to meticulously define the precise regions you want to modify.
Applying Patterns with Targeted Blending
Once your subject’s hands and face are selected, you can proceed to apply a pattern for a unique blending effect. Select the "Pattern" layer and ensure it is visible by clicking the small box to the left of the layer name (which usually contains an eye icon). At this point, the pattern will cover the entire portrait. Now, to control where this pattern is visible, you can interact with the blend mode options. Click the box above the layers that displays the current blend mode and mouse over the different available modes. As you hover over each mode, you will see a live preview of the effect it has on your image, allowing you to experiment and find the perfect blend.
Inverting the Mask for Precise Control
To refine the application of the pattern, specifically to remove it from the subject’s hands and face while keeping it elsewhere, a technique involving mask inversion is used. Hold down the Alt key (on Windows) or Option key (on macOS) and click the "Mask" button. This action creates an inverted layer mask. Instead of revealing the pattern where you selected, it hides the part of the Pattern layer within the selected areas, effectively revealing the pattern only on the parts of the image you didn't select. This is a powerful method for isolating effects and achieving complex compositing.
Photoshop Advanced Technique Tutorial Quick Mask Layer Masks
Sharing Your Masterpiece
Once you are satisfied with your composition and the blending effects you have achieved, you can share your creation with the world or incorporate it into other projects. To do this, navigate to File > Export > Export As. This command opens a dialog box where you can specify the desired image format (such as JPEG, PNG, or TIFF), as well as the dimensions and scale of your exported image. This ensures that your artwork is optimized for its intended use, whether it's for web display, print, or further manipulation in another application. The ability to export in various formats and sizes provides the flexibility needed for diverse creative workflows.