Photoshop's Perspective Crop Tool is a powerful yet often overlooked feature that allows you to correct perspective distortions and extract subjects from their backgrounds with remarkable precision. This tutorial will guide you through the functionalities of this tool, enabling you to transform skewed images into perfectly aligned compositions. Whether you're dealing with artwork in frames, architectural photography, or any image captured at an angle, the Perspective Crop Tool can be your solution to achieving a straight-on, distortion-free view.
Understanding Perspective Distortion
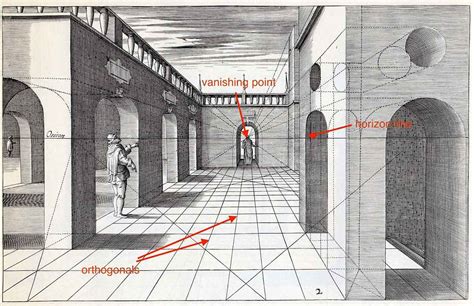
Perspective distortion, often referred to as "keystoning," occurs when an object is photographed from a non-straight angle or when wide-angle lenses are used to capture a large expanse. This results in lines that should be parallel appearing to converge, making subjects seem to lean backward or tilt inward. For instance, when photographing tall buildings from the ground up, the top of the structure often appears narrower than its base, creating a "leaning" effect. This distortion can detract from the intended impact of an image, making it appear amateurish or simply incorrect.
The Perspective Crop Tool was introduced in Photoshop CS6 and is designed specifically to address these issues by allowing you to transform the perspective of an image while simultaneously cropping it. This means you can correct the visual skew and define the final boundaries of your image in a single operation.
Accessing the Perspective Crop Tool
To begin using the Perspective Crop Tool, you first need to locate it within Photoshop's toolbar. It is nested behind the standard Crop Tool. To access it, click and hold the Crop Tool's icon. A fly-out menu will appear, revealing other tools available in that position, including the Perspective Crop Tool. Select this tool from the menu.
Working with the Perspective Crop Tool: Two Primary Methods
The Perspective Crop Tool offers two distinct methods for defining your cropping area and correcting perspective:
Method 1: Drawing a Crop Boundary
Once the Perspective Crop Tool is selected, you can begin by drawing a crop boundary directly onto your image. Click and drag within the image to establish an initial rectangular crop box. After releasing the mouse button, handles will appear around this boundary. You can then drag these corner handles to precisely position them according to the lines of your subject that should be straight. For example, if you are correcting the perspective of a building, you would drag the handles to align with the vertical edges of the structure.
How to Straighten Buildings with Grids in Photoshop
Method 2: Setting Points
Alternatively, you can click on the image to set individual points that define the corners of your crop boundary. This method can be particularly useful for complex shapes or when you want to meticulously define each corner of your desired crop area. After setting the points, you can then drag the corners to refine the shape and perspective correction.
Refining Perspective with Grid Guides
A key feature of the Perspective Crop Tool is the appearance of a grid within the crop boundary. These grid lines are invaluable for guiding your perspective adjustments. To correct a perspective problem, you'll drag the corner crop handles until the vertical grid lines align with elements in your image that should be vertically straight. For instance, when working with a photograph of a hotel, you would align the grid lines with the sides of the building.
As you drag a handle, you can press and hold the Shift key to constrain its movement or ensure a more symmetrical adjustment. It's important to note that adjusting the grid line on one side of your subject might affect the other. Therefore, you may need to toggle back and forth between handles to achieve the best alignment. You can also drag the handles on the bottom corners if necessary, though often aligning the top corners is sufficient.
Finalizing the Crop and Committing Changes
Once you have meticulously lined up the grid lines with the intended angles of your subject, you can then reshape the crop border by dragging the top, bottom, left, or right handles. This allows you to crop away any excess parts of the image and define your final composition.
When you are satisfied with the perspective correction and the crop boundaries, you can finalize the operation in a couple of ways:
- Click the checkmark located in the Options Bar.
- Double-click the bounding box of the crop marquee.
- Press the Enter key on your keyboard.
Photoshop will then instantly crop the image to the defined area and apply the perspective correction, resulting in a distortion-free view of your subject.
Addressing Potential Issues and Enhancements
While the Perspective Crop Tool is highly effective, it's not always an exact science. Occasionally, after applying the crop, the image might still appear slightly "wonky" if the grid lines weren't perfectly aligned with the subject. In such cases, the best course of action is to undo the crop (Ctrl+Z on Windows or Command+Z on Mac) and try again, paying closer attention to the alignment.

Another potential issue is that the image might appear vertically "squished" after the crop is applied. This happens because Photoshop typically prevents transformations on a "Background" layer. To overcome this, you need to convert the layer into a regular layer. In Photoshop CC, you can do this by clicking the lock icon on the layer. In earlier versions like CS6, you can press and hold the Alt (Windows) or Option (Mac) key and double-click on the Background layer. This will place the Free Transform bounding box around your image. You can then use the handles to stretch the image vertically until the subject appears to have its natural proportions. This step is often a matter of visual estimation to achieve the desired result. Once you're happy with the proportions, commit the transformation by clicking the checkmark in the Options Bar.
Advanced Applications and Considerations
The Perspective Crop Tool is incredibly versatile and can be used in numerous scenarios beyond architectural photography. It's ideal for:
- Extracting artwork from frames: If you've photographed a painting or print within its frame at an angle, the Perspective Crop Tool can "peel" the artwork out, presenting it as if viewed straight on. This is particularly useful when dealing with reflections or glare on the glass of framed pieces. By standing to the side and using the tool, you can capture a cleaner image of the artwork.
- Correcting skewed signs or posters: Similar to architectural elements, signs and posters often suffer from perspective distortion when photographed from an angle. The tool can rectify this, making text and graphics appear straight.
- Straightening skewed objects: Any object with distinct straight lines that has been photographed at an angle can benefit from the Perspective Crop Tool. This includes items like doors, windows, or even text on a wall.
When using the tool, having solid lines within your subject to follow can significantly improve accuracy. For example, the straight sides of a perspex sheet or the edges of a framed picture provide excellent reference points for aligning the grid lines.
Resolution and Size Adjustments
The Perspective Crop Tool also offers options for adjusting the resolution and dimensions of your cropped image directly within the Tools Options panel. You can provide specific values for Width (W), Height (H), and Resolution. This is beneficial when you need your final cropped image to adhere to particular size requirements, preventing distortion that might occur if you resized the image after cropping.
Optional Grid Lines and Cropping Preferences
Photoshop's design philosophy often prioritizes user control and flexibility. The grid lines, while highly recommended for accurate perspective correction, are optional. Furthermore, you can customize the appearance of the crop shieldâthe dimmed area indicating the parts of the image that will be removed. This can be done by navigating to Edit > Preferences > Display & Cursors and adjusting the Color and Opacity settings in the Crop Tool area. This allows you to tailor the visual feedback to your preference, making the editing process more comfortable.
Beyond the Basics: Related Tools and Techniques
While the Perspective Crop Tool is specialized, it's part of a broader suite of cropping and straightening tools in Photoshop. Understanding these can further enhance your editing workflow:
- The standard Crop Tool: This is your go-to for simple cropping to remove unwanted areas and focus attention on your subject. It also offers features like displaying original aspect ratios and suggesting various crop compositions.
- The Straighten Tool: Often found nested with the Crop Tool, the Straighten Tool (accessible via the 'P' shortcut for the Crop Tool, then clicking and holding to find it) is designed to automatically realign a photo to make horizons perfectly horizontal or to straighten vertical lines. You can draw a line along what should be a horizontal or vertical edge, and Photoshop will rotate the image accordingly.
- Canvas Size: The Canvas Size command allows you to expand or shrink the editable area around an existing image. This is useful for adding space for text or other elements, or for trimming away excess background.
- Cookie Cutter Tool: For creative cropping, the Cookie Cutter tool allows you to crop an image into a predefined shape.
Photoshop Elements, a more streamlined version of Photoshop, also includes enhanced cropping features, with versions from 2013 onwards automatically displaying four ready-to-use crop suggestions, simplifying the process of finding an optimal composition.
By mastering the Perspective Crop Tool and understanding its place within Photoshop's comprehensive editing capabilities, you can elevate your photography and graphic design work, transforming ordinary shots into compelling, distortion-free visuals.
tags: #photoshop #perspective #crop #tool