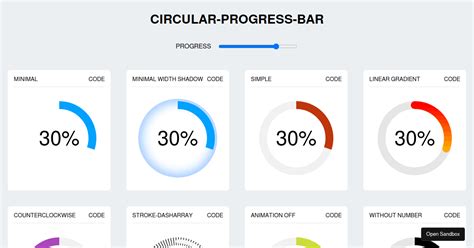
Using a progress bar in your application is a good way to interact with your users. This guide delves into the creation of visual progress indicators, exploring both manual design techniques within Adobe Photoshop and the intricacies of scripting for dynamic progress tracking. We will cover methods for designing static progress bars that enhance user experience and examine the challenges and potential workarounds associated with implementing real-time progress feedback through scripting.
Designing a Minimalist Progress Bar in Photoshop
The creation of a visually appealing and functional progress bar can be achieved through a series of straightforward steps within Photoshop, focusing on shape manipulation and layer styling.
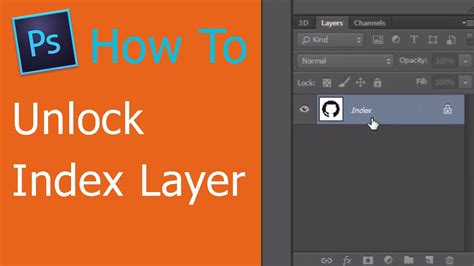
Open your Photoshop and create a new canvas, with a width of 450 pixels and a height of 300 pixels. Now, name this layer "index" and fill it with the color #565a59. This foundational layer will serve as the background for our progress indicator.
Grab your Rounded Rectangle Tool (M) and set your Radius to 50 pixels. Draw a simple shape that will represent the main body of the progress bar. Name this layer "body." This shape’s rounded corners will give the progress bar a softer, more modern aesthetic.
Next, we address the numerical percentage display. Repeat the steps on creating the "body" layer. Ensure that the height of this new shape is the same as the original "body" layer. This duplicated shape will serve as the visual representation of the progress, filling up as the task advances.
For a more dynamic appearance, you can incorporate effects to simulate a glowing end to the progress bar. This can be achieved through layer styles such as "Outer Glow" or "Inner Glow," or by using adjustment layers to add subtle color shifts and luminosity. Experiment with different blend modes and opacities to achieve the desired luminous effect.
There you have it! A minimal progress bar that you can use on your projects. You can change the colors and layouts of this one, or re-create your own. The beauty of this manual approach lies in its flexibility; you have complete control over the visual output, allowing for seamless integration into any design aesthetic.
Advanced Progress Bar Design with Effects
Beyond the basic shape, Photoshop offers powerful tools for adding depth and visual interest to progress bars. One effective method involves using masks and effects to create a dynamic fill.
To begin, create a square composition and add a black solid of the same size. This will serve as the background. Duplicate the solid (Command/Control+D) and change its color; this will become the progress bar. With that layer selected, make the Ellipse tool active. Now, double-click the tool to automatically add a circular mask to the layer, centered within the composition.
Double-click the mask path to reveal its handles. Hold Command/Control+Shift while dragging a corner handle to keep the mask centered as you scale it inward by about one-third. Duplicate this mask; this will mark the inner edge of the progress bar, defining its track. Press MM to reveal both masks’ properties.
Add the "Radial Wipe" effect to the layer and give "Wipe" a "Counterclockwise" direction. Keyframe "Transition Completion" from 100% to zero over the duration of the composition - or somewhat less so there’s time at the end to see that we’ve reached 100% completeness. This technique creates a circular progress indicator that visually depletes or fills.
Incorporating Numerical Feedback
To provide precise user feedback, integrating a numerical percentage display is crucial. This can be achieved using Photoshop's text and effects capabilities.
Add a new solid (any color) to the top of the composition and apply the "Numbers" effect to it. In the Numbers dialog box, choose a narrow font (such as DIN Condensed from Adobe Fonts) and make sure Alignment is set to Right. In the Effect Controls panel, set Decimal Places to 0 so it shows only whole numbers. Choose a Fill Color, Size, and Tracking value that suits the design, and turn Proportional Spacing off.
To finesse the numeric display, add a new text layer to the composition and type a percent symbol using the same font, color, size, and tracking value as the numbers. Position the percent and numbers layers so they look centered as a group in the composition.
Fine-tune your design by adding the "Glow" effect to an adjustment layer. You could also create some kind of “completed” reaction at the end, like a quick size bump.
Scripting Progress Bars in Photoshop: Challenges and Considerations
While designing static progress bars is straightforward, implementing dynamic, real-time progress indicators through Photoshop scripting presents significant challenges. My extensive research into making a progress bar in Photoshop scripting has led to the conclusion that it is not a straightforward or efficient endeavor.
The primary obstacle is Photoshop's scripting environment's limitations regarding user interface elements. The ideal way to display a progress bar would be through a non-modal "Palette" window, which allows scripts to run in the background while the user interface remains responsive. However, Photoshop does not natively support Palette windows for scripting purposes.
If one resorts to using a "Dialog" window, a critical issue arises: dialog windows are modal. This means that while a dialog is displayed, the script execution is paused. Consequently, it becomes impossible to track the progress of a script if the script is paused while the dialog is being shown. This creates a paradoxical situation where the very tool intended to show progress halts the process it's meant to monitor.
Adobe Photoshop Scripting Tutorial: Create a Basic Script
Workarounds for Scripted Progress Feedback
Despite the inherent limitations, there are two primary workarounds that can be employed to achieve some form of progress feedback in Photoshop scripting: app.refresh() and waitForRedraw().
The app.refresh() method forces Photoshop to redraw the screen, which can be used to update a visual element that simulates a progress bar. However, as the Photoshop scripting manual states, app.refresh() will considerably slow down your code. My experimentation confirms this; each time app.refresh() is called, the script loses approximately 1 second, irrespective of the computer's processing power.
This significant time overhead means that app.refresh() can realistically only be used a few times during the entire duration of a script. Consequently, the progress bar would only be updated a limited number of times, with each update incurring a substantial delay. In other words, there is no truly efficient or seamless way of making a progress bar in Photoshop scripting that provides continuous, real-time feedback without severely impacting script performance.
The waitForRedraw() function is an undocumented function that appears to perform a similar task to app.refresh(). While its exact behavior and performance characteristics are not officially documented, it is likely subject to similar performance penalties, making it an equally problematic solution for achieving fluid progress indication.
Conclusion on Scripting Feasibility
Based on these findings, the conclusion remains that effectively implementing a dynamic progress bar within Photoshop scripting is problematic. The modal nature of dialog windows and the performance cost associated with refresh mechanisms make it impractical for most scenarios where real-time feedback is desired. For tasks that require significant processing, the delays introduced by these workarounds can outweigh the benefits of having a progress indicator. Therefore, for many scripting tasks, it might be more pragmatic to omit a visual progress bar and instead provide feedback through alternative means, such as console messages or simply allowing the script to run to completion without interruption.
Understanding Photoshop's Timeline for Animation
While not directly related to scripting progress bars, understanding Photoshop's Timeline panel is essential for creating time-based animations, which can sometimes incorporate progress-like visual elements.
To begin, create a new document with appropriate dimensions for your animation. Open the Timeline panel by selecting Window > Timeline. This panel is the central hub for all animation work in Photoshop.
Set the timeline frame rate by selecting the Timeline panel menu and choosing "Set Timeline Frame Rate." The frame rate dictates how many frames are displayed per second, influencing the smoothness of your animation.
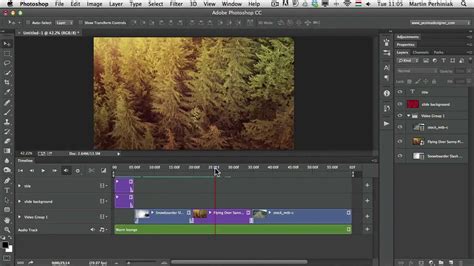
Move the current-time indicator to a different point in time, then change a Layer property. This could involve moving the layer, adjusting its opacity, or transforming its scale. These changes will automatically create keyframes, marking the start and end points of your animation for that specific property.
The Timeline panel offers various controls:A. Playhead: Indicates the current frame being displayed.B. Timeline panel menu: Provides access to various settings and options for the timeline.C. Add media to track: Allows for the import of video or audio files.D. Keyframe: Marks a point in time where a property's value changes.E. Zoom In/Out: Adjusts the zoom level of the timeline for better visibility.F. Zoom slider: Offers a visual way to control the zoom level.G. Convert to frame animation: Switches the timeline from video timeline to frame animation mode, and vice-versa.H. Enable Keyframe animation: Toggles the creation of keyframes for properties.
Learning to effectively utilize the Timeline panel, layers, and keyframes will enable you to create sophisticated animations, some of which can be adapted to visually represent progress or completion stages in a more artistic manner than traditional progress bars.