Photoshop's Ruler tool, often overshadowed by more visually dynamic features, is an indispensable asset for achieving professional-grade precision in digital design and image manipulation. This versatile tool empowers users to measure distances, angles, and straighten crooked lines with remarkable accuracy, ensuring that every element of a design is meticulously aligned and proportioned. Whether you're a seasoned graphic designer or a budding enthusiast, understanding the full capabilities of the Ruler tool can elevate your work from good to exceptional. It's the key to unlocking a level of detail that transforms amateur creations into polished, professional outputs.
Locating and Activating the Ruler Tool
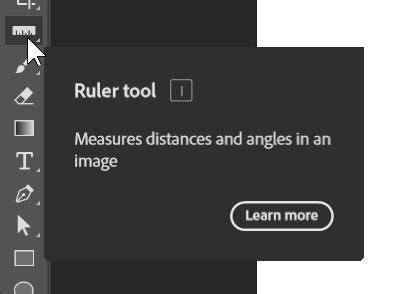
The Ruler tool is a fundamental component of Photoshop's toolkit, designed to provide objective measurements within your digital canvas. To access it, locate the left-hand toolbar, where you'll find a variety of essential editing instruments. The Ruler tool typically resides alongside other measurement and selection utilities, such as the Eyedropper tool and Color Sampler tool.
If you don't immediately see the Ruler tool, it's likely nested within another tool's flyout menu. To reveal it, simply right-click on the icon of the tool it might be hidden behind. This action will present an extended menu, from which you can select the Ruler Tool. For those who prefer keyboard shortcuts, activating the Ruler Tool is as simple as pressing Shift + I. This shortcut cycles through a group of related tools, so repeated presses of Shift + I will eventually bring the Ruler Tool to the forefront.
Understanding the Options Bar
Once the Ruler Tool is activated, a dedicated Options bar will appear at the top of your workspace, just beneath the main application menu. This bar is crucial for understanding and controlling the tool's behavior and for interpreting the measurements it provides.
The Options bar displays several key metrics:
- X and Y: These values indicate the precise coordinates of your starting point on the digital canvas. They represent the horizontal (X) and vertical (Y) position of where your measurement began.
- W (Width) and H (Height): When you draw a measurement line, W and H show the horizontal and vertical distances from the starting point to the endpoint. Specifically, W reflects the difference in the X-coordinates, and H reflects the difference in the Y-coordinates between the two points.
- Angle (A): This measurement is instrumental when using the Ruler tool to assess or define angles. It displays the angular difference between lines, functioning much like a digital protractor.
- L1 (Length 1) and L2 (Length 2): These indicate the lengths of individual lines drawn by the Ruler tool. L1 represents the distance between the start and end points of the first line segment, while L2 can be used for a second, related measurement, particularly useful in protractor mode.
These readouts provide a quantitative understanding of your design elements, enabling meticulous adjustments and ensuring perfect alignment.
Straightening Crooked Lines and Horizons
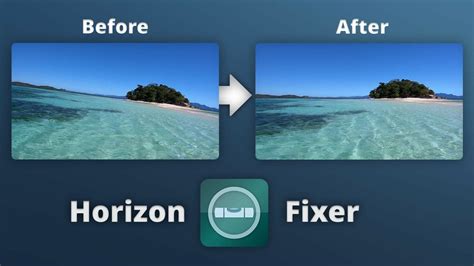
One of the most common and impactful uses of the Ruler tool is its ability to straighten misaligned lines, horizons, or any other element that appears skewed in an image. This is particularly useful for photographs where the camera was not held perfectly level, resulting in a tilted horizon line or architectural elements that appear to be leaning.
To straighten a layer:
- Activate the Ruler Tool: Select the Ruler Tool from the toolbar or use its keyboard shortcut.
- Draw Along the Crooked Line: Click and drag the Ruler tool along the current, angled line you wish to straighten. This could be a horizon, the edge of a building, or any other feature that should be perfectly horizontal or vertical.
- Initiate Straightening: With the line drawn, look to the Options bar. You will find a "Straighten Layer" button. Clicking this button instructs Photoshop to analyze the angle of the line you just drew.
- Automatic Adjustment: Photoshop will then automatically rotate the entire layer to make the line you measured perfectly horizontal or vertical, effectively correcting the tilt.
This feature is incredibly powerful for achieving a professional look, as crooked lines can detract significantly from the overall appeal and perceived quality of an image.
Alternative Straightening Method: Image Rotation
While the "Straighten Layer" button is the most direct method, Photoshop also offers a more manual approach through the Image menu. If you've drawn a line with the Ruler tool, you can also go to Image > Image Rotation > Arbitrary. This will open a dialog box where you can input the angle of rotation. Photoshop often pre-fills this with the angle calculated from your Ruler tool measurement, allowing for precise manual rotation if needed.
Measuring Angles with Protractor Mode
The Ruler tool excels at measuring angles, effectively serving as a digital protractor. This capability is invaluable for tasks requiring precise angular alignment, such as in technical illustration, architectural rendering, or when precisely rotating elements.
To measure an angle:
- Draw the First Line: With the Ruler tool active, click and drag to draw the first line segment. This establishes one side of the angle you wish to measure.
- Draw the Second Line: To define the angle, hold down the Alt key (or Option key on a Mac). Then, click on the endpoint of the first line and drag to create a second line segment. This second line, originating from the endpoint of the first, forms the angle.
- Read the Measurement: The Options bar will display the angle (A) formed between these two lines, providing an exact measurement in degrees.
This feature allows for meticulous control over the orientation of elements within your design, ensuring that angles are precisely as intended.
Measure angles and Lengths in Photoshop
Measuring Distances and Object Dimensions
Beyond angles, the Ruler tool is fundamental for measuring linear distances. This is crucial for ensuring that objects are spaced correctly, that elements fit within specific dimensions, or for precisely cropping an image to a desired size.
To measure distance:
- Activate the Ruler Tool: Select the tool from the toolbar.
- Click and Drag: Click on the starting point from which you want to measure. Then, drag the cursor to the endpoint of the object or the desired measurement location.
- Release the Mouse Button: Releasing the mouse button completes the measurement.
- Interpret the Readings: The Options bar will display the horizontal (W) and vertical (H) distances from the start to the end point, as well as the total length of the line (L1). This provides precise data on the dimensions and spacing of elements within your image.
The ability to measure width, height, and the distance between two objects ensures that your designs are not only aesthetically pleasing but also functionally accurate. This is especially important when preparing designs for print or for web layouts where exact pixel dimensions are critical.
Custom Measurement Scales and the Measurement Panel
Photoshop's measurement capabilities extend beyond simple linear and angular readings. The tool can be configured to work with custom measurement scales, allowing for more complex analysis and precise record-keeping. This is particularly useful when working with images that have a specific scale, such as architectural plans or scientific imagery.
The Measurement Panel is a key component in managing these custom measurements. When you take a measurement with the Ruler tool, you can record these readings in the Measurement panel. This panel acts as a log, storing multiple measurements taken within a document.
To utilize the Measurement Panel:
- Take a Measurement: Use the Ruler tool to measure a distance or angle.
- Record the Measurement: In the Measurement panel (which can be accessed via Window > Measurement), click the "Record measurements" button.
- Add New Measurements: You can then take new measurements with the Ruler tool and record them as well. The panel will keep a running log of each measurement.
This feature is incredibly powerful for comparing different measurements directly within the document without needing to manually remember or jot down values. Photoshop can then calculate aggregate measurements such as area, perimeter, and more, based on the recorded data.
Advanced Measurement Features
Photoshop CC (version 14.1 and later) significantly increased the limit for the number of measurements that can be recorded, from 700 to an impressive 10,000. This allows for extensive data collection and analysis within a single document.
The concept of a "Measurement Scale" is also important. If you need the Ruler Tool to report measurements in specific units (like inches or centimeters) rather than pixels, you might need to configure the "Set Measurement Scale" option under Image > Analysis. This is distinct from the general rulers displayed on the canvas. Sometimes, users find that their general rulers are set to inches, but the Ruler Tool still reports in pixels. This can be due to the "Measurement Scale" setting not being correctly configured or a misunderstanding of how it functions. Resetting the tool or Photoshop preferences can often resolve such discrepancies.
The Dedicated Note Tool: Annotating Without Clutter
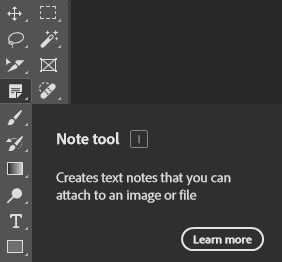
While the Ruler tool is focused on precision and measurement, Photoshop also offers a dedicated Note tool for adding annotations. This is a lesser-known but highly practical feature that allows you to embed comments directly into your image file without cluttering the Layers panel with additional type layers.
To use the Note tool:
- Select the Note Tool: Find the Note tool in the toolbar (it often shares a flyout menu with the Hand and Zoom tools).
- Click to Add a Note: Click anywhere on the image canvas, or even outside the visible canvas area. This will create a "marker" indicating the location of your note.
- Enter Your Annotation: A separate dialog box will appear, allowing you to type your comment, reminder, or question. This note is embedded within the image file itself.
This method is far more organized than creating multiple type layers solely for comments, keeping your Layers panel clean and focused on design elements.
Tool Presets for Efficiency
For users who frequently employ specific configurations of the Ruler tool or other tools, Photoshop offers the ability to create and save Tool Presets. This feature allows you to save a tool's settingsâsuch as measurement units, straightening angles, or specific measurement parametersâand recall them instantly.
To create a Tool Preset:
- Configure the Tool: Adjust the Ruler tool's settings in the Options bar to your desired configuration.
- Access Tool Presets: Open the Tool Presets panel (Window > Tool Presets).
- Create New Preset: Click the "Create new tool preset" icon.
- Name and Save: Give your preset a descriptive name and save it.
You can then quickly switch between different presets, optimizing your workflow for various tasks. To reset any tool back to its default settings, right-click on the Tool Presets button and select "Reset Tool."
Conclusion: Precision as a Design Cornerstone
Photoshop's Ruler tool, though perhaps less glamorous than its artistic counterparts, is a cornerstone of precise digital design. Its ability to measure distances, angles, and facilitate the straightening of layers ensures that every aspect of your work adheres to exact specifications. By mastering its various functions, from basic measurements to custom scales and integrated annotation tools, designers can achieve a level of accuracy and polish that is essential for professional output. The continuous evolution of Photoshop, including enhancements like increased measurement limits, underscores the enduring importance of precision in the digital creative process.