Shapes are fundamental building blocks in the world of design, acting as the primary elements that designers manipulate to construct more complex and compelling visual narratives. A shape is fundamentally defined by its perimeter, a closed contour that encloses an area. This enclosed space possesses two dimensions: height and width. In Adobe Photoshop, the ability to create and manipulate vector shapes offers a powerful advantage, allowing for scalable designs that retain their crispness and detail regardless of size. This tutorial delves into the intricacies of Photoshop's shape tools, from basic geometric forms to the creation and management of custom shape packs, offering a deep dive for users ranging from beginners to seasoned professionals.
The Power of Vector Shapes in Photoshop
At its core, Photoshop's shape tools generate vector shapes. This is a crucial distinction from rasterized elements, as vector shapes are mathematically defined, allowing them to be scaled infinitely without any loss of quality, blurriness, or pixelation. This makes them indispensable for a variety of design tasks, including logo creation, UI design, icon design, and intricate border work. While dedicated vector programs like Adobe Illustrator or Inkscape exist, Photoshop itself boasts robust vector capabilities through its Shape and Path tools. For those who primarily work within Photoshop but require vector precision, mastering these tools is a significant asset.
Understanding Photoshop's Shape Tools and Modes
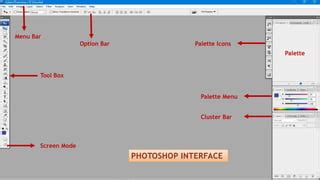
When you select a Shape Tool (often found under the Pen Tool or accessed via the 'U' shortcut), the top toolbar presents a critical dropdown menu for "Tool Mode." For creating scalable vector shapes, it is imperative to set this mode to "Shape." This ensures that whatever you draw will be created as a vector layer, complete with an editable path and fill. The alternative modes, "Path" and "Fill Pixels," create work paths (which are essentially outlines without fill or stroke) or rasterized pixel shapes, respectively. Rasterized shapes will lose quality when resized, negating the benefits of vector design.
The basic shape tools within Photoshop include:
- Rectangle Tool: Allows for the creation of squares and rectangles.
- Ellipse Tool: Used for drawing circles and ovals.
- Polygon Tool: Enables the creation of polygons with a user-defined number of sides.
- Line Tool: For drawing straight lines.
- Custom Shape Tool: This tool, which we will explore in depth, allows you to utilize pre-made or user-created vector shapes.
When using the Rectangle, Ellipse, or Polygon tools, clicking once on the canvas will bring up a dialog box where you can specify exact dimensions, radii for rounded corners, or the number of sides for polygons, ensuring precise control over your basic shapes.
Leveraging Custom Shape Packs for Efficiency and Creativity
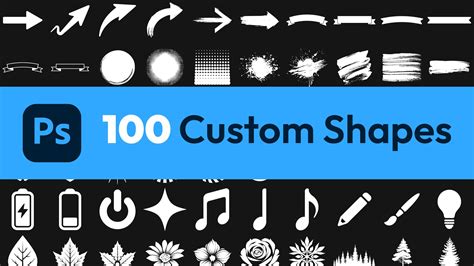
The true power of Photoshop's vector capabilities is amplified by the use of custom shapes. A "photoshop shapes pack" is a collection of pre-designed vector elements in the CSH (Custom Shape) format that can be loaded into Photoshop. These packs can significantly accelerate the design process, providing ready-made elements for a wide array of projects.
A comprehensive collection, such as the 13,000 Custom Shapes from graphicxtras.com, offers an extensive library for Adobe Photoshop, Photoshop Elements, and all standalone versions. These custom shapes are universally compatible with both PC and Mac operating systems and are provided in the standard CSH format.
Key Characteristics of High-Quality Custom Shape Packs:
- Format: CSH is the native format for Photoshop custom shapes.
- Compatibility: Works across various Photoshop versions, including Elements.
- Licensing: Crucially, custom shapes should be royalty-free and available for commercial use, allowing for their integration into projects without legal concerns. The graphicxtras.com collection, for instance, explicitly states "all for commercial use, all are royalty free."
- Vector Nature: All shapes are vector designs, meaning they can be scaled to any size without loss of quality. This is paramount for professional design work.
- Diverse Categories: A robust pack includes a wide variety of shapes, such as star shapes, polygon shapes, abstract shapes, blot shapes, embellished shapes, cross shapes, number shapes, and many more. This variety caters to numerous design needs.
- Origin: Reputable sources will clearly indicate the artwork's origin, as seen with graphicxtras.com, where all presets were created by Andrew Buckle.
Integrating Custom Shapes into Your Workflow
Using custom shapes is straightforward. Once loaded into Photoshop's Custom Shapes panel, you simply select the Custom Shape Tool, choose your desired shape from the panel, and then click and drag on your canvas to place it.
The use of these custom shapes extends far beyond simple placement. They can be employed to create:
- Logos
- Book covers and internal designs
- Advertisements
- Packaging
- Ceramics designs
- Posters
- Items for sale on platforms like Zazzle and Cafepress
- Complex artworks that can be sold
- The foundation for creating thousands of brushes and patterns.
To create brushes or patterns from your custom shapes, you can design your artwork, then use the "Edit > Define Brush Preset" or "Edit > Define Pattern" commands.
Flexibility in Application: Fill, Stroke, and Paths
When using custom shapes as shape layers, you have direct control over their appearance through the top options bar:
- Fill: This can be set to solid colors, gradients, or patterns.
- Stroke: Similarly, strokes can be solid colors, gradients, or patterns.
If you choose to work with shapes as paths (rather than shape layers), there will be no initial fill. However, you can apply a stroke via the Paths panel. Alternatively, if you add a shape as a "Fill Pixel" (which rasterizes it), you must set the color before adding the shape. Recalibrating color after rasterization can be achieved using adjustment layers.
How to Create Custom Shapes in Adobe Photoshop
Advanced Techniques: Combining and Manipulating Shapes
Photoshop offers sophisticated methods for combining and manipulating shapes, allowing for the creation of highly complex and unique designs.
Combining Multiple Custom Shapes into a Single Smart Object
A powerful technique for managing and editing groups of shapes is to convert them into a Smart Object. This process preserves the original data of each shape, allowing for non-destructive editing, filtering, and adjustments.
To combine multiple shape layers into a single Smart Object:
- Ensure each shape is on its own layer in the Layers panel.
- Select all the desired shape layers.
- Navigate to the Layer menu and choose "Smart Objects > Convert to Smart Object."
The individual shapes now exist as a single, unified entity within the Smart Object. This is distinct from "combining shapes" on a single layer, where the constituent shapes remain separate vector elements within the Smart Object. This allows for the addition of type layers to the Smart Object as well. To edit the individual shapes within the Smart Object, simply double-click its layer icon in the Layers panel. This will open the Smart Object in a new tab, where you can modify, add, or delete elements before saving and returning to your main document. Smart Objects are invaluable for grouping and applying filters or adjustments non-destructively.
Combining Shapes Using Boolean Operations
When creating new shapes or modifying existing ones, Photoshop's shape tools offer boolean operations that allow you to combine multiple shapes on the same layer in various ways:
- Create New Shape Layer: Each shape is placed on a separate layer.
- Add to Shape Area: The new shape is added to the existing shape's area.
- Subtract from Shape Area: The new shape's area is cut out from the existing shape.
- Intersect Shape Areas: Only the overlapping areas of the shapes are kept.
- Exclude Overlapping Shape Areas: The overlapping areas are removed, leaving only the non-overlapping parts.
These operations are accessed via the options bar when a shape tool is active and a shape layer is selected. By strategically using these modes, you can construct intricate forms by adding, subtracting, and intersecting basic and custom shapes.
Combining Shapes via Copy and Paste
For more complex compositions, it's often beneficial to build elements on separate layers and then combine them. This method is particularly useful for symmetrical designs or when incorporating elements from different sources.
- Sketch Your Design: Start with a rough sketch on a separate layer or canvas to guide your shape creation.
- Create Base Shapes: Draw individual shapes on their respective layers, aligning them with your sketch. For symmetrical elements, create one half, then duplicate and flip it.
- Combine Layers: Copy one shape layer (Ctrl+C) and paste it onto the target layer (Ctrl+P).
- Clean Up Overlaps: Use the Path Selection tool with the "Combine" option to merge shapes and remove unnecessary anchor points where they overlap. This ensures a clean, unified shape.
- Repeat for Complex Designs: Continue this process for all elements, combining them progressively. For instance, wings can be created, patterned, and then combined with a body shape. If you accidentally add a shape when you intended to subtract, using the "Subtract" option after pasting can correct the error.
Utilizing Grids and Guides for Precision
For pixel-perfect designs, Photoshop's Grid and Guides are indispensable tools. Enabling snapping to grids and guides ensures that your shapes align precisely, which is crucial for UI design, icon creation, and any project requiring exact measurements.
- Accessing Grids and Guides: Go to
View > Show > GridandView > Show > Guides. - Configuring Grids:
Edit > Preferences > Guides, Grid & Slicesallows you to customize gridline color and spacing. Optimal divisions are often in multiples of 4 or 5 pixels for easy scaling and alignment. - Snapping: Ensure
View > Snap To > GridsandView > Snap To > Guidesare enabled. - Toggling Visibility: Use keyboard shortcuts:
Ctrl + ;for Grid,Ctrl + 'for Guides.
When drawing or transforming shapes with snapping enabled, their edges will automatically align to the nearest gridline or guide, facilitating precise construction.
Saving and Reusing Your Custom Creations
Once you have designed a complex shape or a unique element, you can save it as a custom shape for future use.
- Select the Vector Thumbnail: In the Layers panel, ensure the vector thumbnail of your completed shape layer is selected.
- Define Custom Shape: Go to
Edit > Define Custom Shape. - Name Your Shape: A dialog box will appear, prompting you to name your new custom shape. Choose a descriptive name.
Your newly created shape will now appear in the Custom Shapes panel, ready to be accessed and used in any Photoshop document. This process is invaluable for developing personal design assets, logos, or recurring graphical elements.
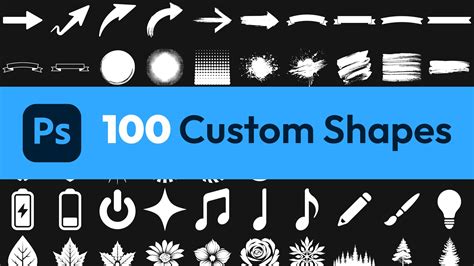
The ability to create, manipulate, and save custom shapes in Photoshop empowers designers to build intricate and scalable vector artwork efficiently. Whether you are using pre-made shape packs or crafting your own unique elements, these tools provide a versatile foundation for a wide spectrum of creative endeavors, from simple icons to complex illustrations and professional branding. The vector nature of these shapes ensures that your designs will remain sharp and professional at any size, making them a cornerstone of modern digital design.