Creating custom brushes in Adobe Photoshop can significantly enhance your digital art workflow, allowing for quicker iteration and unique artistic expressions. Among the most versatile and impactful custom brushes are those designed to represent trees. Whether you're an architect visualizing a project, a concept artist building a fantasy world, or a graphic designer adding natural elements to a layout, a well-crafted tree brush can save considerable time and imbue your work with a distinct character. This tutorial delves into the process of creating both monochromatic and multi-colored tree brushes in Photoshop, offering efficient methods and exploring various customization options.
Acquiring Your Tree Image: The Foundation of Your Brush
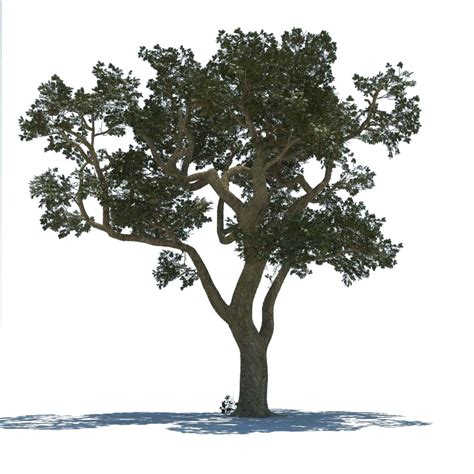
The first crucial step in creating any custom brush is obtaining a suitable source image. For a tree brush, this typically means a clear image of a tree, ideally with a transparent or easily removable background. While traditional methods involve capturing your own photographs or meticulously isolating trees from existing images, there are more streamlined approaches available.
One highly efficient method leverages the 3D library on platforms like Envato Elements. Here, you can discover a vast collection of high-quality 3D models, including a diverse range of trees. Simply browse the library, select a tree that fits your aesthetic needs, and click on it. You'll often find an option to download a specific angle of the 3D render directly. If the default angle isn't quite right, or if you require a different perspective, many platforms offer a "View 360 Render" option, allowing you to explore and download various viewpoints. This approach bypasses the need for complex background removal, providing a clean base for your brush creation.
Alternatively, if you prefer to work with a photograph, ensure it's of good quality and taken against a contrasting background, such as the sky. After opening the image in Photoshop, you may need to crop it to focus solely on the tree. For monochromatic brushes, converting the image to grayscale is often a necessary step. This can be achieved through Image > Adjustments > Desaturate. Further refinements might involve adjusting the levels to enhance contrast, pushing the lower levels up and the highest levels down to create a stark silhouette or a more detailed outline, depending on your desired brush effect. The resolution of your source image is also important; a height of around 300-400 pixels is often sufficient for creating a detailed brush.
Defining Your Brush Preset: The Core Creation Process
Once you have your chosen tree image open in Photoshop, the process of defining it as a brush preset is remarkably straightforward. Navigate to the Edit menu and select Define Brush Preset. A dialog box will appear, prompting you to name your new brush. Choose a descriptive name, such as "Pine Tree Brush" or "Oak Silhouette," to easily identify it later. Clicking "OK" will save your brush to Photoshop's brush library.
You can immediately test your newly created brush. Open a new document or canvas and select the Brush Tool (B). Your new tree brush should now be available in the brush preset picker, often located at the top of the screen or within the Brush Settings panel. For initial testing, it's recommended to keep the Opacity and Flow settings at 100% to see the brush's true form and density. This ensures you're evaluating the brush's core characteristics without any transparency or flow limitations affecting the outcome.
Enhancing Your Brush: Shape Dynamics and Scattering
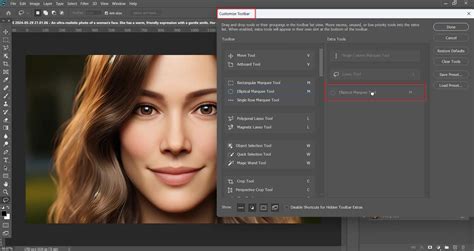
While simply defining a brush preset is the fundamental step, unlocking its full potential lies in customizing its behavior through the Brush Settings panel. To access this, select the Brush Tool and then open the Brush Settings panel (Window > Brush Settings).
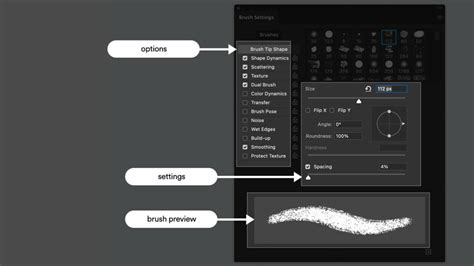
Within the Brush Settings panel, you'll find several key areas for customization:
- Brush Tip Shape: This is where you can adjust the fundamental characteristics of your brush tip.
- Spacing: Increasing the spacing between brush tip instances allows you to create more dispersed elements or to avoid the "stamping" effect, making painted lines appear more fluid. For tree brushes, adjusting spacing can control how densely trees appear when painted continuously.
- Hardness/Softness: While less relevant for pre-defined shapes like trees, this controls the edge feathering of a round brush.
- Shape Dynamics: This section is crucial for adding natural variation and preventing a repetitive look.
- Size Jitter: Controls the random variation in the size of each brush stamp.
- Angle Jitter: Introduces random rotation to each stamp, which is invaluable for making trees appear more natural and less uniform.
- Roundness Jitter: Varies the roundness of the brush tip, though its effect might be subtle on complex shapes like trees.
- Minimum Diameter: Sets a lower limit for the size jitter.
- Scattering: This setting allows you to distribute brush instances randomly around the path you paint.
- Scatter: Controls the amount of random displacement from the path.
- Count: Determines how many instances are scattered per step.
- Count Jitter: Adds random variation to the scatter count.
Experimenting with these settings is key. For instance, adjusting the Angle Jitter significantly can make a row of identical tree stamps look like a natural forest. Similarly, controlling the Spacing and Scatter can create believable undergrowth or sparse treelines. You can even delete the original brush preset if you've made significant modifications and wish to save your customized version as a new preset.
Achieving Multi-Colored Tree Brushes: A Creative Workaround
By default, Photoshop brushes are monochromatic, meaning they will render in the foreground color you select. However, there's a clever technique to achieve multi-colored tree brushes, particularly useful for creating more realistic or stylized foliage.
The core of this technique involves utilizing the brush's ability to interact with color variations in a way that isn't directly saved in the brush preset itself. One method involves painting with your tree brush over a pre-colored tree image. You would first create your monochromatic tree brush as described earlier. Then, in a new Photoshop document, you would place your original tree image (or a similar one). Resize your tree brush so it's large enough to encompass the entire tree in the image. When you "paint" with this brush over the colored tree image, Photoshop can, under certain conditions and with specific brush types, sample the color from the underlying layer.
However, it's important to note a limitation: Photoshop does not inherently save the color information of the brush content when you create a brush preset, especially for tools like the Mixer Brush where color blending is a primary function. This means that while you can paint with color, the brush itself doesn't retain multiple color channels. The workaround often involves using the brush in conjunction with layered artwork or specific layer blending modes to achieve the desired color effects.
A more direct approach to multi-colored brushes often involves creating the brush from an image that already has color variation, or by using textures within the brush settings themselves. For instance, if your source image for the brush has subtle color gradients in the leaves or bark, these might translate to a degree when the brush is applied. However, for distinct, pre-defined color areas within a single brush stamp, you might need to explore more advanced techniques or consider using multiple brushes in succession.
Applying Your Tree Brush: From Simple Stamps to Complex Scenes
The applications for custom tree brushes are vast and varied, extending beyond simple forest creation.
- Architectural Visualization: As mentioned, trees are crucial for adding context and realism to architectural renders. A well-placed tree brush can instantly provide a sense of scale and environment. You can use the brush to dot trees around a building, create dense landscaping, or even suggest a park or natural area.
- Concept Art and Illustration: For fantasy landscapes, sci-fi environments, or even realistic nature scenes, tree brushes offer a quick way to populate your artwork. They can be used to build forests, add solitary accent trees, or create atmospheric elements like mist-shrouded woods.
- Graphic Design and Layouts: In flyers, posters, or web design, a hint of natural elements can significantly enhance visual appeal. Tree brushes can add a decorative border, create a background texture, or simply break up large areas of color.
When applying your tree brush, remember the customization options available in the Brush Settings panel. Adjusting Opacity, Flow, Size, Spacing, and Jitter will allow you to tailor the brush's output to your specific needs. For example, to create a dense forest, you might increase the Count in the Scattering settings and decrease the Spacing. For a more sparse, windswept look, you might increase the Angle Jitter and Size Jitter.
One interesting application involves creating scenes. For instance, you could create a cottage house brush using the same Define Brush Preset method. By combining a house brush with your tree brush, you can quickly assemble a scene, perhaps depicting a cottage in a sunset. You might also use a normal round brush to add a sun, selecting a suitable color and adjusting its size and opacity. This layering of custom brushes allows for rapid scene construction and exploration of different artistic ideas.
🌳 HOW TO PAINT SIMPLE ENVIRONMENTS (plus free brushes!)
Beyond Tree Brushes: Expanding Your Brush Arsenal
The ability to create custom brushes is a powerful skill that can be applied to countless subjects. If you find yourself needing more specialized brushes, numerous resources offer extensive collections.
- Envato Elements: As previously mentioned, Envato Elements provides access to a massive library of creative assets, including a wide array of Photoshop brushes. Sets can include hundreds of brushes for various purposes, such as:
- Leaf brushes (e.g., a set of 56 leaf brushes)
- Stamp brushes (e.g., 15 stamp brushes based on different flowers)
- Flower brushes (e.g., sets with 60 flower brushes, 5 fauna brushes, 4 garland brushes, and 6 wreath brushes)
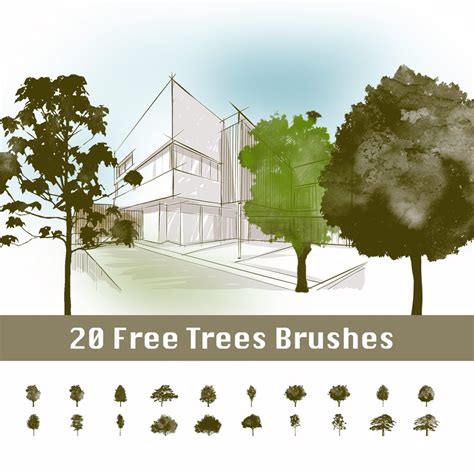
- Specialized Brush Packs: Many artists and platforms offer curated brush packs for specific effects or subjects. These can range from realistic watercolor brushes to abstract texture brushes, or specialized brushes for elements like clouds, lightning, or foliage.
Consider exploring resources that offer brushes for different software as well. For instance, if you also work in Procreate, you might wonder how to create a tree brush or stamp in that application. While the specific steps differ, the underlying principle of using a source image to define a brush shape remains consistent across many digital art programs.
By mastering the creation and application of custom tree brushes, you not only streamline your artistic process but also unlock new avenues for creative expression within Photoshop. The ability to define your own tools means your digital canvas becomes an even more personal and responsive space for bringing your visions to life.