Have you ever found yourself in a situation where you’ve chosen a photo, only to drop it into another image in Photoshop and suddenly realize the size isn’t what you expected? This common predicament, especially for those new to the software, stems from a fundamental misunderstanding of image resolution and size. Once you grasp these concepts, working with images in Photoshop becomes significantly easier. This guide will demystify the relationship between pixels and inches, crucial for both digital and print projects.
Pixels vs. Dots: Decoding DPI and PPI
You will frequently encounter two key terms: DPI (Dots Per Inch) and PPI (Pixels Per Inch). If you're outside the United States, you might hear these as DPCM (dots per Centimeter) or Pixels/cm (Pixels Per Centimeter). It's important to note that these terms are often used interchangeably, sometimes incorrectly. Older terminology from the analog age might lead some to refer to everything as DPI, a habit that hasn't always been updated for the digital realm.
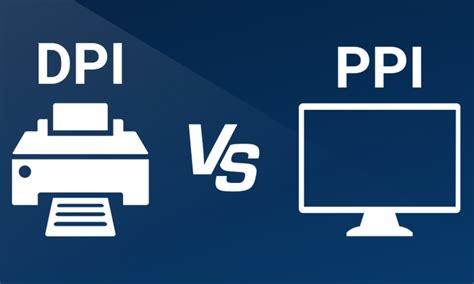
However, there's a distinct difference: DPI (dots per inch) is a measurement specifically for print. It refers to the number of individual ink dots a printer lays down within a linear inch. PPI (pixels per inch), on the other hand, refers to the actual pixels that make up a digital image. The average standard for print resolution is 300 dpi. This means that within a one-inch square area on a printed output, there are 300 dots of ink. This concentration of dots results in a high-resolution file, producing a sharp and detailed print. If you were to print at a lower resolution, such as 80dpi, the individual dots would be large enough to be visible to the naked eye, resulting in a less defined image. Therefore, the measurement of print resolution fundamentally concerns how many dots are packed into an inch. If your work is solely for on-screen viewing and you never intend to print, you can largely set aside concerns about DPI, as you will not be dealing with physical ink dots.
Screen Resolution: The Role of PPI and Pixel Dimensions
On a screen, resolution is measured in pixels per inch (or pixels per centimeter). In the recent past, most screens operated at a standard of 72ppi. However, with the advent of High Definition (HD), 4K, 5K, and Retina displays on laptops, tablets, and smartphones, screen resolutions can vary significantly, often approaching the density of print resolutions. For digital display, the only number that truly dictates the actual size of an image is its dimensions in pixels.
Consider the example of a "smaller" butterfly image. Why might this image appear larger than an 11.4-inch image when combined? The key lies in their respective resolutions. If an image has enough pixels to be displayed nicely at 11.451 inches when viewed at 82 pixels per inch (with resampling turned off), changing its resolution to 300 ppi (suitable for print) will drastically reduce its physical display size. In this scenario, the image would only be printable at approximately 3.13 inches.
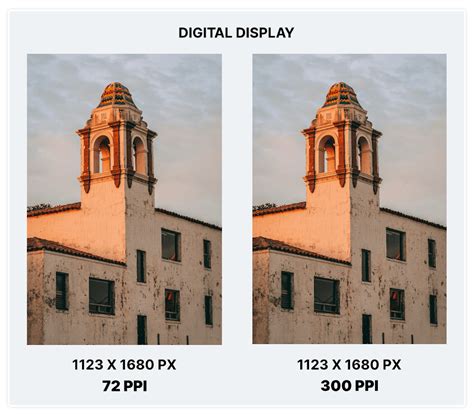
This highlights a crucial point: on a digital file, the only factor influencing its actual physical size is its dimensions in pixels.
Calculating Image Size for Print: The Pixels x Resolution Formula
When preparing a file for print, you always need two pieces of information: the final desired physical size (in inches or centimeters) and the resolution. Let's say you need to create a poster that is 10 inches by 7.5 inches, and it needs to be printed at 300 DPI. To determine the required pixel dimensions, you would perform the following calculation:
- Width: 10 inches * 300 DPI = 3000 pixels
- Height: 7.5 inches * 300 DPI = 2250 pixels
Therefore, your poster would need to be created with dimensions of 3000 pixels by 2250 pixels to meet the print requirements.
Working with Units in Photoshop: Pixels, Inches, and Beyond
For those new to Photoshop, understanding how measurements work can be a source of confusion, particularly when transitioning between web and print projects. Photoshop offers flexibility, allowing you to view and input sizes in pixels, inches, millimeters, and other units. However, it's important to recognize that not all unit fields or dropdown menus update automatically when you change your preferred unit.
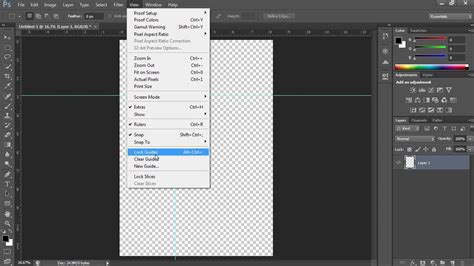
Changing Units and Rulers
To effectively manage your measurement units within Photoshop, follow these steps:
- Access Preferences: Navigate to
Edit > Preferences > Units & Rulers(orPhotoshop > Preferences > Units & Rulerson macOS). - Set Ruler Units: In the "Units" section, you can choose your preferred units for Rulers, such as Pixels, Inches, Centimeters, Millimeters, Points, Picas, or Percent. Click "OK" to apply your choice.
- Observe Ruler Changes: Once your ruler units are set, opening or viewing the rulers (by pressing
Ctrl/Cmd + R) will reflect your selected measurement system. Now, one inch on the ruler will accurately represent one inch on your screen. - Consistency Across Tools: Changing the Units and Rulers preference generally stays saved between Photoshop sessions. This means that when you make a change in the Options Toolbar and then create a new document, that unit change remains consistent.
Unit Consistency in Different Panels
While changing the global ruler units is a primary step, you might notice that some panels or tools may still display different units.
- Shape Properties: When you have a shape selected, open the Properties panel. The width and height displayed here will typically adhere to the units you've chosen in your preferences.
- Top Toolbar Discrepancies: You may observe that the top toolbar still shows different units. To adjust these, you can often click on the unit field directly and a menu will appear where you can switch to pixels, inches, millimeters, or other desired units. For example, you can directly type
50pxfor pixels,3infor inches, or75mmfor millimeters into these fields.
Image Resolution: The True Measure of Detail
A common misconception is that the pixels per inch (PPI) or dots per inch (DPI) of an image directly dictates its quality. In reality, resolution and pixels per inch are often confused. In terms of image quality, PPI does not equate to overall resolution or quality.
The true resolution of an image is determined by the total number of pixels it is composed of. For instance, an image with 3,000 horizontal pixels multiplied by 2,400 vertical pixels equals 7,200,000 pixels, which is equivalent to 7 megapixels. This total pixel count is the fundamental determinant of the image's detail.
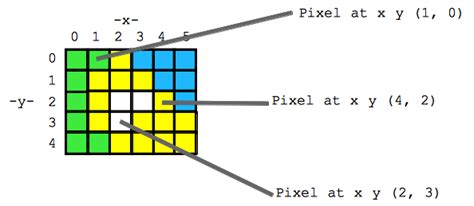
So, why the confusion with pixels per inch? The term "pixels per inch" is also more suitably used when describing the resolution of screens. For example, a 27-inch iMac with a Retina Display has approximately 218 pixels per inch, while an iPhone 6 has an even higher density at 326 pixels per inch. These figures relate to how sharp text and images appear on the display itself, not the inherent detail within an image file.
Adjusting Image Size in Photoshop: Resampling and Resolution
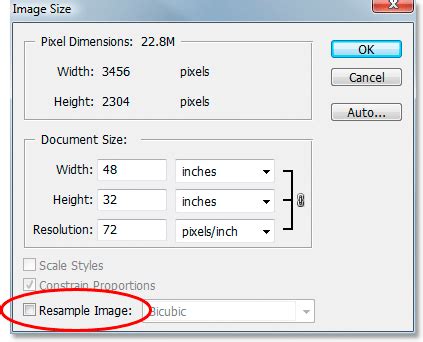
When you need to change the physical dimensions or resolution of an image in Photoshop, you'll typically use the "Image Size" dialog box.
The Image Size Dialog Box
To access this:
- Go to
Image > Image Size.
Within this dialog box, you'll find several key options:
- Dimensions: These fields display the image's width and height in pixels, inches, or other chosen units.
- Resolution: This field shows the image's resolution, usually in pixels per inch (PPI).
- Resample: This checkbox is critical.
- When Resample is checked: Photoshop will alter the total number of pixels in the image. If you increase the resolution (e.g., from 72 PPI to 300 PPI) while keeping the physical dimensions the same, Photoshop will add more pixels, potentially interpolating data. Conversely, if you decrease the resolution, Photoshop will remove pixels. This is often done to prepare an image for print at a specific size and resolution.
- When Resample is unchecked: Changing the resolution value will only affect the physical dimensions of the image without adding or removing pixels. For example, if you have an image that is 1000 pixels wide and set to 100 PPI, it will be displayed as 10 inches wide. If you then change the resolution to 200 PPI without resampling, the image will remain 1000 pixels wide, but its displayed physical size will now be 5 inches. This is useful for understanding how an image would print at different resolutions without altering the pixel data itself.
Practical Application: Preparing for Print
Let's revisit the example of preparing an image for a typical desktop inkjet printer, which often requires a resolution of 300 PPI for optimal quality.
- Open Image: Open your image in Photoshop.
- Access Image Size: Go to
Image > Image Size. - Deselect Resample: Ensure the "Resample" option is unchecked.
- Set Resolution: In the "Resolution" field, enter
300. - Observe Dimensions: Notice how the "Width" and "Height" fields (in inches or centimeters) automatically adjust to show you the physical size the image can be printed at with 300 PPI, based on its current pixel dimensions.
- Check Pixel Dimensions: If you intend to print at a larger size than what 300 PPI allows, you would then check "Resample" and adjust the pixel dimensions accordingly, keeping in mind that quality might be affected if you significantly enlarge an image.
Preserving Proportions and Canvas Adjustments
When resizing or adjusting images in Photoshop, maintaining the original aspect ratio is often crucial.
- Link Icon: In the "Image Size" dialog box, you’ll see a link icon between the Width and Height fields. Ensure this icon is highlighted. This "enforces" the link, meaning that if you change the width, the height will automatically adjust proportionally, and vice versa. This is essential to prevent image distortion.
Adding Canvas Space
Sometimes, you might need to add more space around your existing image without altering the image content itself. This is achieved by adding to the canvas.
- Select Crop Tool: Choose the Crop Tool from the Tools panel.
- Add Canvas: In the Options bar at the top, you can specify the amount of width and height to add.
- Anchor Point: Select "Relative" if you want to add dimensions relative to the current canvas size. Then, click on an anchor point in the canvas diagram to determine where the new space will be added (e.g., adding to the right side, top, or all around).
Understanding Image Size in Photoshop - About Pixels, Resampling, and Resizing a Photoshop Image
Grids and Guides: Enhancing Precision in Design
For intricate designs, layouts, or print graphics, using grids and guides in Photoshop can be invaluable. A well-structured grid system removes much of the guesswork involved in aligning elements precisely. Photoshop offers several ways to set up these alignment aids:
- Turning on the Grid: You can enable a default grid via
View > Show > Grid. - Dragging Guides: You can drag guides from the rulers (if they are visible -
Ctrl/Cmd + R). - New Guide Layout: For more complex arrangements, the "New Guide Layout" feature (
View > New Guide Layout) allows you to create custom column and row grids in seconds, defining the number of columns, rows, gutters, and margins.
These tools, combined with a solid understanding of pixels, inches, and resolution, empower you to manage your image assets with confidence, whether for on-screen viewing or professional printing.