Affinity Designer, a powerful vector-based application, might not be the first tool that comes to mind when thinking about background removal. However, it offers robust capabilities for this common graphic design task. This tutorial will guide you through two primary techniques to effectively erase backgrounds, whether you're dealing with a simple white backdrop or a complex, busy image. By following these steps, you'll learn how to achieve clean, transparent backgrounds for your projects.
Preparing Your Image for Background Removal
The initial step in any background removal process is to open your image within Affinity Designer. Navigate to File > Open and select the image file from your computer. Once the image is imported, it's crucial to unlock the background layer. In the Layers panel, which is typically located in the top right corner of the application, click on the lock icon next to your background image layer. This action will allow you to make modifications to the layer.

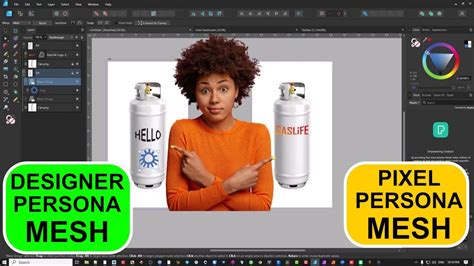
Since many images, especially JPEGs, are rasterized photos composed of pixels rather than pure vector graphics, it's often best to utilize Affinity Designer's Pixel Persona for background removal. To switch to this mode, locate the Persona icons in the top left corner of the application window and click on the Pixel Persona icon, which is represented by small colored boxes. This persona provides access to raster-based editing tools essential for manipulating pixel data.
Technique 1: Removing Solid or Simple Backgrounds with Select Sampled Color
A common scenario for background removal involves images with a solid color, such as a white background, where the goal is to achieve a transparent backdrop. For these situations, Affinity Designer offers an efficient method using the "Select Sampled Color" feature.
Begin by zooming in on your image. This will allow for a more precise selection. Affinity Designer, in the Pixel Persona, will attempt to automatically detect the dominant color in your image. For a white background, it will typically select the white areas.
Once a selection is made, you may need to adjust the "Tolerance" level using the provided slider. The Tolerance setting determines the range of similar colors that will be included in the selection. If you notice that the selection is not picking up subtle gradients or hints of color (haze) around the edges of your subject, increasing the Tolerance value can help. Experimenting with values upwards from 15% might yield a selection that more closely adheres to the edges of your subject, but the optimal setting will vary from image to image.
To remove the selected background, you can either press the Delete key on your keyboard or navigate to Edit > Delete.
After deleting the background, it's essential to check the results. Switch back to the Designer Persona by clicking its icon in the upper left corner. Then, select the Rectangle Tool (shortcut M). Click and drag to draw a shape that covers your artboard, roughly the size of your image. Place this shape beneath your subject layer and fill it with a contrasting color, such as black, to make any remaining background elements visible. Zoom in and inspect the edges of your subject. If you see any residual white haze or unwanted pixels, it indicates that the initial selection wasn't perfect.
Don't be discouraged by imperfections; this is a common occurrence. You can refine the selection by repeating the process. While still in the Pixel Persona, go to Select > Select Sampled Color. Now, click directly on the haze you observed around the edges of your subject. This action samples that specific hue. For a more precise selection, consider increasing the Tolerance level significantly, perhaps to 30% or higher, and then click Apply. After returning to the Designer Persona and checking your work against the contrasting background, your background removal should be significantly more precise, if not perfect.
Technique 2: Tackling Busy or Textured Backgrounds with the Selection Brush Tool
For images with more complex backgrounds, such as those with busy textures or less distinct edges, the Selection Brush Tool offers a more nuanced approach. This tool allows for manual painting of selections, giving you greater control.
To begin, select the Selection Brush Tool (shortcut W) from the left-hand toolbar. In the tool's settings bar at the top of the application, ensure that "Snap to edges" and "Soft edges" are checked. "Snap to edges" helps the brush intelligently detect and follow the contours of your subject, while "Soft edges" creates a smoother transition.
Your cursor will transform into a circular brush. You can adjust the size of this brush using the "Width" setting in the tool's options or by using the [ and ] keys. Start painting around your subject. As you paint, Affinity Designer will display a dotted line, visually representing the selection boundary. Continue this process until the entire background is encompassed by the dotted line.
Secret Feature in the Affinity Photo Selection Brush
Once you have a preliminary selection, it's time to refine any imperfections. Zoom in closely on the edges of your subject. If the brush has selected too much of the subject or not enough of the background, you can correct this. To "push back" the dotted line (i.e., remove areas from the selection), hold down the Alt (or Option on Mac) key and click or paint over the erroneous areas. To add areas back to the selection, simply paint without holding Alt. For intricate details like pointed tips or delicate stems, use a very small brush size, around 2-3 pixels, to achieve maximum precision.
After you've made manual adjustments, click the "Refine" button, typically located in the top options bar. This opens the Refine Selection window, which overlays your selection with a red mask. This red mask serves as a visual guide to assess the accuracy of your trace. Zoom in and meticulously examine the edges. While the default settings in the Refine Selection window often work well, you can experiment with various sliders to further fine-tune the mask for an even more accurate result.
With your refined selection in place, the final step to erase the background is straightforward: press the Delete key. The selected background will vanish, leaving you with a transparent canvas.
To confirm the success of your background removal, switch back to the Designer Persona. Use the Rectangle Tool (M) to draw a shape that covers your artboard. Place this shape behind your subject layer and fill it with a dark color, like black, or any other color that provides good contrast. Zoom in and scrutinize the edges of your subject. If the background has been completely removed, you should see a clean separation between your subject and the contrasting background layer.
Saving Your Transparent Image
Once you are satisfied with the background removal, you'll want to save your work in a format that preserves transparency. Go to File > Export. This will open the Export Settings window, presenting you with various file format options. To maintain the transparency, select the .png file format. Ensure that no specific cropping or resizing options are selected unless you intend to alter the original dimensions. Click Export to save your image with a transparent background. This PNG file can then be seamlessly imported into other projects, including back into Affinity Designer, without the original background.
Exploring Alternative and Advanced Methods
While Affinity Designer offers powerful tools for manual background removal, it's worth noting that the landscape of image editing is continually evolving. For those seeking even faster or automated solutions, AI-powered tools are becoming increasingly prevalent. Platforms like Envato offer AI tools, such as ImageEdit, that can potentially remove backgrounds with just a few clicks, requiring no extensive software knowledge or complicated prompts. Similarly, tools like Placeit can also function as background removers.
Furthermore, for users familiar with Adobe Photoshop, the concept of layer masks in Affinity Photo can be employed for background removal. After making a selection using tools like the Selection Brush Tool, instead of deleting the background, you can click the "Mask" icon in the Layers panel. This hides the background without deleting it, offering a non-destructive editing workflow. You can then use the regular Brush tool to refine the edges of the mask for precise control.
The process of learning to remove backgrounds in Affinity Designer, or indeed any design software, is often best approached with practice. Starting with images that have well-defined subjects and clear contrast between the subject and background will build your confidence and understanding. As you become more proficient, you can gradually tackle more challenging images with complex edges like fur or wispy hair. The level of precision required will often depend on the intended use of the image. For casual social media posts, a less exact removal might suffice, whereas for professional print work, meticulous attention to detail is paramount.
Affinity Photo: A Complementary Tool for Background Removal
It's important to distinguish between Affinity Designer and Affinity Photo, especially when discussing background removal. While Designer is primarily a vector graphics editor, Affinity Photo is a raster graphics editor, making it more akin to Photoshop and often more suited for complex photo manipulation tasks, including intricate background removals.
In Affinity Photo, the workflow can be very similar. You would typically unlock the background layer, then utilize tools like the Selection Brush Tool (W) to select either the subject or the background. If you select the subject, you would then invert the selection (Select > Invert Pixel Selection) to target the background. Pressing Delete will then remove the background, leaving a transparent canvas. For more advanced scenarios, Affinity Photo also offers a dedicated Background Erase Brush Tool, which is specifically designed to intelligently remove background colors while preserving foreground detail.
When saving from Affinity Photo with a transparent background, the .png format is again the preferred choice. You can also place your extracted subject onto a new background by creating a new layer, filling it with your desired color or image, and positioning it below your subject layer in the Layers panel.
tags: #remove #background #affinity #designer