Copying and pasting are fundamental operations in the digital realm, allowing for the efficient duplication and manipulation of content. In the context of Procreate, a powerful digital art application, mastering these functions can significantly streamline your creative process and unlock new possibilities for design and workflow. Whether you're creating intricate illustrations, custom stickers, or seamless patterns, understanding how to effectively copy and paste elements within Procreate is an invaluable skill. This comprehensive guide will delve into various methods for copying and pasting in Procreate, from simple layer duplication to transferring designs across canvases, empowering you to enhance your artistic endeavors.
Understanding the Basics: What is Copying and Pasting?
Copy and paste are shortcuts commonly used in computing that allow you to capture and duplicate content. In Procreate, these actions enable you to replicate layers, selections, or even entire designs, which can then be repositioned, resized, or integrated into new artworks. This ability to duplicate elements without having to redraw them saves considerable time and effort, allowing artists to focus on the creative aspects of their work. The core concept is straightforward: "copy" takes a snapshot of the selected content and stores it in a temporary digital buffer known as the clipboard, while "paste" inserts the content from the clipboard into your current canvas.
Accessing the Copy & Paste Menu: Gestures and QuickMenu
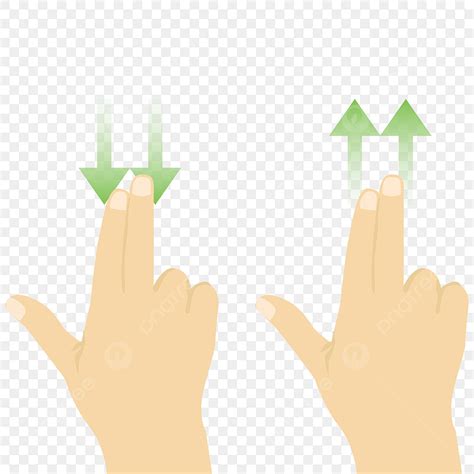
Procreate offers intuitive ways to access its copy and paste functionalities, often through gestures that can become second nature with practice. By default, the Copy & Paste menu can be summoned by swiping three fingers down the canvas at the same time. This gesture brings up a context-sensitive menu where you can select your desired option, such as "Copy" or "Paste."
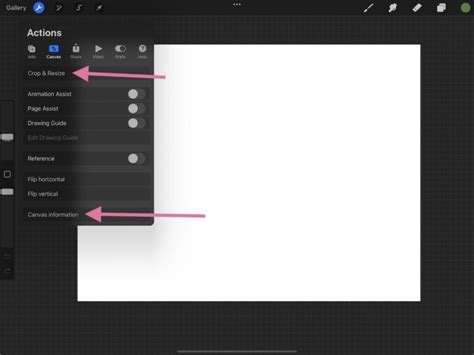
For those who prefer a more customizable approach, Procreate's QuickMenu can be configured to include copy and paste actions. To enable QuickMenu, head to Actions (wrench icon) → Prefs → Gesture Controls → QuickMenu, then toggle on the way you want to invoke it. This allows you to trigger a personalized menu of frequently used tools and actions with a specific gesture, potentially including copy and paste operations for even faster access.
Method 1: Copying and Pasting via the Layers Panel
One of the most straightforward methods for copying and pasting in Procreate involves utilizing the Layers panel. This technique is particularly useful when you want to duplicate a specific layer or a group of layers.
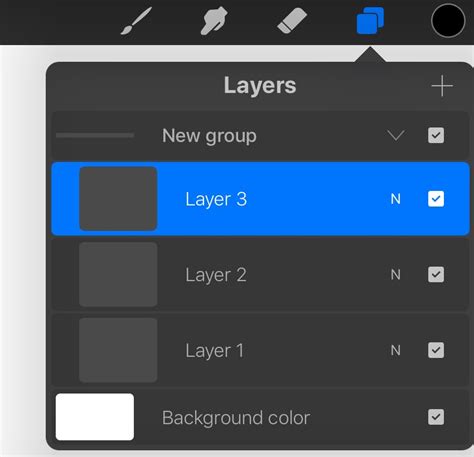
To begin, open your existing file or add an image by going to the Actions panel (wrench icon) and tapping on "Insert a file." Once your artwork is open, navigate to the Layers panel, typically located on the top right corner of the screen. To copy a layer, double-tap on the layer with your design to bring up the side menu. From this menu, tap on "Copy."
Once the layer is copied, you'll need to paste it. Tap on the Actions panel again, and then tap on "Paste." At first glance, it might appear as though nothing has happened, but the copied layer has been placed directly above the original layer in the Layers panel. To see the duplicated element, simply use the Move Tool (arrow icon) to reposition the new layer to the side of the original. This method is excellent for creating variations of an element or for building up complex designs by duplicating and modifying components.
Method 2: Leveraging Procreate Gestures for Swift Copying and Pasting
Procreate gestures are designed to accelerate your workflow by allowing you to perform actions with simple finger movements. Once you become familiar with these gestures, they can significantly speed up your creative process.
To use gestures for copying and pasting, first ensure the layer you wish to copy is selected in the Layers panel. With your three middle fingers, swipe down on the screen. This action will bring up the Copy & Paste options. Tap on "Copy" to place the layer's content onto the clipboard. To paste it, swipe down again with three fingers and tap on "Paste."
A quick and alternative option for duplicating a layer directly within the Layers panel is to swipe left on the desired layer. This action reveals several options, including "Duplicate." Tapping "Duplicate" will create an exact copy of the layer, placing it directly above the original. This is a highly efficient way to create identical elements that you might want to modify slightly later. For a deeper dive into layer duplication, a tutorial on how to duplicate 3 ways in Procreate can offer further insights.
Method 3: Copying and Pasting to a New Canvas
The ability to copy and paste elements, or even entire designs, to a new canvas is crucial for organizing your work, creating assets for other projects, or collaborating with others.
To copy a single layer to a new canvas, follow the steps outlined in Method 1: double-tap the layer in the Layers panel and select "Copy." Then, navigate back to the Gallery by tapping on "Gallery" at the top left corner of your screen. In the Gallery view, tap on the "+" icon in the top right-hand corner to open the canvas menu. Here, you'll find an option for "Clipboard size" near the top. Tapping this will automatically create a new canvas with your selected layer pasted onto it.
Procreate : Copy canvas to clipboard -Step 49
If you wish to copy multiple layers to a new canvas, Procreate offers a helpful guide on how to copy over multiple layers in Procreate, which details specific techniques for this scenario.
However, what if you want to copy the entire design to a new canvas, perhaps to make it available as a single image or to incorporate it into another project where individual layer editing is no longer necessary? In such cases, it's often best to flatten the design into a single layer. You don't need to select your layers first. Instead, go to the Actions panel and tap on "Copy Canvas." This action copies the entire visible content of your current canvas to the clipboard.
Next, tap on "Gallery" at the top left corner and follow the same process as before: tap on the "+" icon, and then select "Clipboard size." Your entire flattened design will be pasted onto a new canvas. It's important to note that after using "Copy Canvas" and pasting, your design will appear as a single, flattened layer under the Layers panel. This is ideal for exporting finished pieces or for use in contexts where layer integrity isn't required.
Method 4: Utilizing the Selection Tool for Precise Copying and Pasting
The Selection tool is a powerful asset in Procreate, especially when dealing with flattened images or when you need to isolate and copy specific portions of your artwork. This method is great for designs that have already been flattened, allowing you to extract elements that might otherwise be difficult to work with.
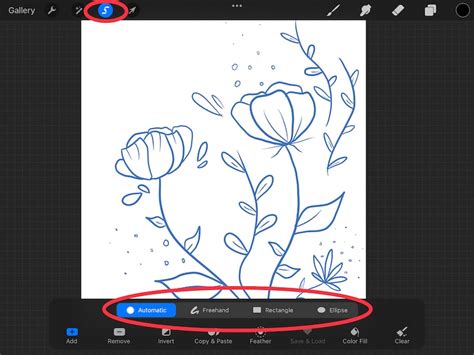
To use the Selection tool for copying, tap on the Selection tool icon (wavy "S" shape) in the top menu bar. At the bottom of the screen, you'll find various selection modes. For freeform selection, tap on the "Freehand" option. If you need to copy a specific shape, you can also explore other options like "Rectangle" or "Ellipse."
Once you have your desired selection mode active, you can draw a selection line around the area you want to copy. Use your finger or Apple Pencil to trace the outline of the element. After making your selection, tap on the "Copy & Paste" option that appears in the contextual menu. Similar to other copy actions, the copied selection will be placed directly over the original area on a new layer. If you check under the Layers panel, you will see that the copied portion now exists on its own layer.
This new layer can then be easily repositioned and resized using the Move Tool. This technique is incredibly useful for extracting specific elements from a finished piece, creating custom brushes, or even salvaging parts of an accidentally flattened design. By using these methods, you can easily make seamless patterns or planner stickers in Procreate. Accidentally saved your design as a flattened image? Don’t worry, you can use the selection tool to save yourself tons of frustration.
Enhancing Your Workflow with Copy and Paste
Mastering the various copy and paste techniques in Procreate is more than just a convenience; it's a fundamental aspect of efficient digital art creation. Whether you're duplicating elements to build complex compositions, transferring designs between canvases, or extracting specific parts of your artwork, these tools offer unparalleled flexibility.
The ability to copy and paste seamlessly allows for rapid iteration and experimentation. You can quickly test different arrangements of elements, create variations of a design, or build intricate patterns by repeating and transforming copied sections. For instance, when creating digital stickers, copying and pasting individual elements and then arranging them on a sheet is a common and effective workflow. Similarly, for artists working with seamless patterns, the ability to copy and paste sections and then precisely align them is paramount.
Procreate : Copy canvas to clipboard -Step 49
Ultimately, once you understand how to effectively copy and paste in Procreate, your design process will become significantly faster and more fluid. There is nothing stopping your creative design when you have these powerful tools at your fingertips, allowing you to bring your artistic visions to life with greater ease and efficiency. The Procreate app itself, with its intuitive interface and robust feature set, provides a fertile ground for exploring these techniques, and with practice, these operations will become an integral part of your digital art toolkit.