Creating artwork that incorporates transparent backgrounds is an essential skill for digital artists and designers, particularly when the aim is to produce assets for a variety of applications. Whether you're crafting custom stickers, intricate patterns, vibrant sublimation designs, or simply need to integrate your creations seamlessly into existing mockups, understanding how to achieve and maintain transparency is paramount. Procreate, a powerful and intuitive drawing application for iPad, offers a straightforward method for achieving this, ensuring your designs are versatile and ready for diverse projects. This guide will walk you through the process of creating a transparent background in Procreate and exporting your work in a format that preserves this crucial element, specifically the Portable Network Graphic (PNG) file type.
Understanding the Role of Layers in Procreate
At the heart of Procreate's design capabilities lies its robust layer system. Every Procreate document is initiated with a default background layer, which typically appears as a solid color, most commonly white. This layer, while serving as a foundational canvas, is not an inherent part of your artwork if you intend to utilize transparency. To effectively create a design with a transparent background, the primary step involves manipulating this background layer.
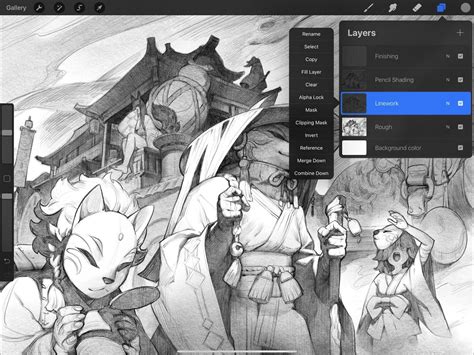
The Layers Panel is your gateway to managing these visual elements. To access it, simply tap on the icon located in the top-right corner of your Procreate interface. Within this panel, you will find a list of all the layers present in your artwork. The background layer is usually found at the very bottom of this list.
The Key to Transparency: Disabling the Background Layer
Once you have located the background color layer within the Layers Panel, the next critical step is to make it invisible. This is achieved by interacting with the checkbox situated to the right of the layer's name. By default, this checkbox is ticked, indicating that the layer is visible. To render the background transparent, you must uncheck this box.
Upon unchecking the background layer, you will notice a significant change in your canvas. The solid background will disappear, replaced by the distinctive Procreate grid. This grid is Procreate's visual cue for transparency, signifying that any area not occupied by your drawn elements is open and will remain so when exported. It's important to understand that this action does not delete the background layer; it merely hides it temporarily within the Procreate application. This means that the areas you have intentionally left empty on your other layers, as well as the areas now revealed by hiding the background layer, are precisely what will be preserved as transparent.
Exporting Your Transparent Design: The PNG Advantage
With your design ready and the background rendered transparent within Procreate, the final crucial step is to export your artwork in a file format that supports and maintains this transparency. While Procreate offers various export options, not all of them are suitable for preserving transparent backgrounds.
The secret to saving your Procreate work with a transparent background lies in exporting it as a PNG file. PNG, which stands for Portable Network Graphic, is a widely used rasterized file format that specifically supports transparency. Unlike other formats that might flatten the image and fill transparent areas with a solid color (often white), PNG files retain the alpha channel information, thereby preserving any transparent areas. Files saved in PNG format will have a file extension that ends in “.png“.
To export your design as a transparent PNG, navigate to the Actions menu, which is represented by a wrench icon. This menu is typically found in the top-left corner of your Procreate screen. Within the Actions menu, select the "Share" option. Here, you will be presented with a variety of export formats. Choose "PNG" from the "Share Image" section or "PNG Files" under "Share Layers" if you wish to export each layer individually with transparency.
Once you select PNG as your export format, Procreate will prompt you to name your file and choose a destination for saving it on your device. After confirming these details, tap the "Save" button, usually located in the top-right corner. Your artwork, now with its transparent background intact, will be ready for use in other applications, for printing, or for integration into various design projects.
How to Export Transparent Background in Procreate (Transparent PNG Tutorial)
Practical Applications of Transparent Backgrounds
The ability to create and export designs with transparent backgrounds in Procreate unlocks a multitude of creative possibilities. This technique is invaluable when you are:
- Creating Stickers: Transparent backgrounds ensure that only your design elements appear on the sticker paper, without any unwanted white borders.
- Designing Patterns: Seamless patterns that can be tiled without visible edges are often achieved by ensuring the pattern elements have transparent backgrounds.
- Sublimation Printing: For transferring designs onto various products like mugs, t-shirts, or coasters, transparent PNGs are often required to ensure the design appears cleanly on the material without a background color interference.
- Integrating with Mockups: Placing your artwork onto product mockups (e.g., a t-shirt mockup, a mug mockup) is significantly easier and more professional when your design has a transparent background, allowing it to blend naturally with the mockup image.
- Building Graphics for Websites and Social Media: Transparent PNGs can be layered over other images or backgrounds without introducing an opaque box.
- Developing Character Clipart: As exemplified by character clipart products available on platforms like Design Bundles, such as the "best friend clipart by Ohana Papers," transparent backgrounds are crucial for usability.
Furthermore, this skill is applicable to a wide range of artistic endeavors within Procreate, including drawing a butterfly, creating flat characters, or assembling a floral wreath. The core principle remains the same: preserve the areas of transparency by correctly disabling the background layer and exporting as a PNG.

Beyond the Basics: Considerations for Advanced Users
While the process of creating a transparent background in Procreate is relatively straightforward, a deeper understanding can enhance your workflow. It's important to remember that the background layer, when hidden, creates transparency within the Procreate document. The PNG export is what preserves this transparency in the final file. If you were to export as a JPG, for instance, Procreate would automatically fill any transparent areas with white.
For those who frequently work with transparency, exploring the "Share Layers" option can be particularly beneficial. This allows you to export each layer of your artwork as a separate PNG file, each maintaining its own transparency. This is incredibly useful for complex designs where individual elements might need to be manipulated or rearranged in other software.
It should also be noted that this tutorial assumes you have already established areas of transparency within your artwork on layers other than the background. This could be achieved by using the eraser tool, creating selections and deleting them, or by using brushes that inherently have opacity variations. The process described here focuses on ensuring that these pre-existing transparent areas, along with the absence of a solid background, are correctly captured in your exported file.
Gaining a complete understanding of your favorite design apps, like Procreate, involves mastering these fundamental yet powerful features. By knowing how to save with a transparent background, you significantly broaden the utility and professional applicability of your digital creations. This foundational knowledge is a stepping stone to more complex design workflows and opens up a world of possibilities for your artistic projects.
tags: #procreate #logo #transparent #background